
by John Pfanstiehl
The smaller radiator shrouds and smaller radiators on some C3s and C2s are much easier to remove and install. This tech article goes steps further to show the more involved installation of the larger radiators. Most of the steps are the same for the smaller radiators and shrouds, just easier.
If a new radiator is to be installed there are a number of options. The only copper radiator currently available for this C3 is made offshore 73-76E 350 & 454 Replacement Radiator. However there are a number of choices for the USA made aluminum radiators and they promise increased cooling capacity.
Zip has made available an aluminum replacement radiator 73-76 350 & 454 Aluminum Radiator that actually costs less than the copper replacement. It is dimensionally identical to the original radiator and so will fit in with no modifications. The main differences are that its top panel is flat while the original radiator had a channel and the tank welds are a little wider. It comes in one model that has the fittings for the automatic transmission cooling lines but it can be used with 4-speed transmissions. Installation of this particular aluminum radiator is shown below.
Going up the food chain, the Direct Fit aluminum radiators look more like the factory installed radiators having the same top channel. These also have two rows of 1-inch wide cooling tubes. The Direct Fit radiators can be ordered with or without the automatic transmission line connections. Additionally they can be ordered with a black epoxy finish to better match the original appearance. That coating doesn’t affect cooling performance.
The Direct Fit high performance (HP) radiators go one step further having two rows of 1.25-inch wide cooling tubes. These are for Corvettes with modified engines when additional cooling is required or for air conditioned cars that have need for more cooling.
Zip Corvette also offers the Direct Fit radiators as a package complete with dual electric SPAL fans. The dual fan assembly eliminates the factory Corvette fan shroud and engine driven fan. All necessary relays, fuses and wiring is included with the combo. The fan temperature sensor switch is pre-installed in these Direct Fit radiator assemblies so installation of the fan sensor into the engine is not needed. Installation and wiring of the dual fan assembly is shown in tech article 1968-1982 Corvette Electric Fan Installation.

01: Zip Corvette offers a high quality aluminum USA-made replacement radiator 73-76 350 & 454 Aluminum Radiator for less than the cost of a copper radiator from offshore. The radiator was very well packaged and arrived without a scratch or dent.

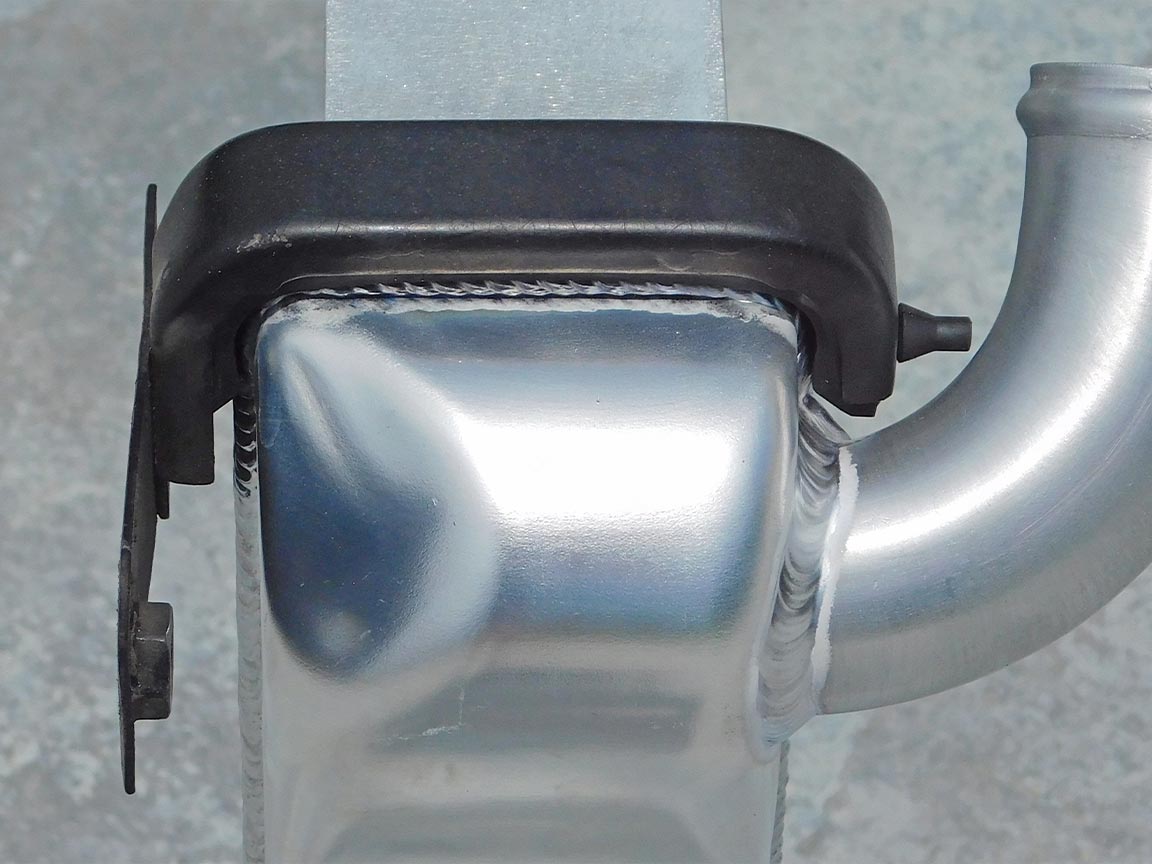
02: The quality of the welds is impressive. Note the top of the radiator is flat and the aluminum welds make for a little wider seam at the edge of tank. This model comes with fittings for automatic transmission cooling lines but can be used for 4-speeds too.

03: Compared to the original copper radiator, it has the same dimensions but is lighter at 18.8 lbs. Note the channel at the top of the original radiator.

04: This is a good time to replace the rubber cushions that cradle the radiator. Shown is the original style 66-68 427 & 69-76E Radiator Bracket Cushion Set.
05: The original style cushions worked with the aluminum radiator. Zip Corvette also offers deeper cushions 66-82 Dewitt’s Direct Fit Radiator Cushion designed specifically for the wider welds on aluminum radiators.
06: The aluminum radiator has a lot of bling when it’s new but the aluminum isn’t anodized so the surface eventually will dull or stain. To prevent this, and to make it look more like stock, semi-gloss black was applied. Prepare the surfaces brushing on a degreaser and then thoroughly rinse. This is what the finish looked like after cleaning.

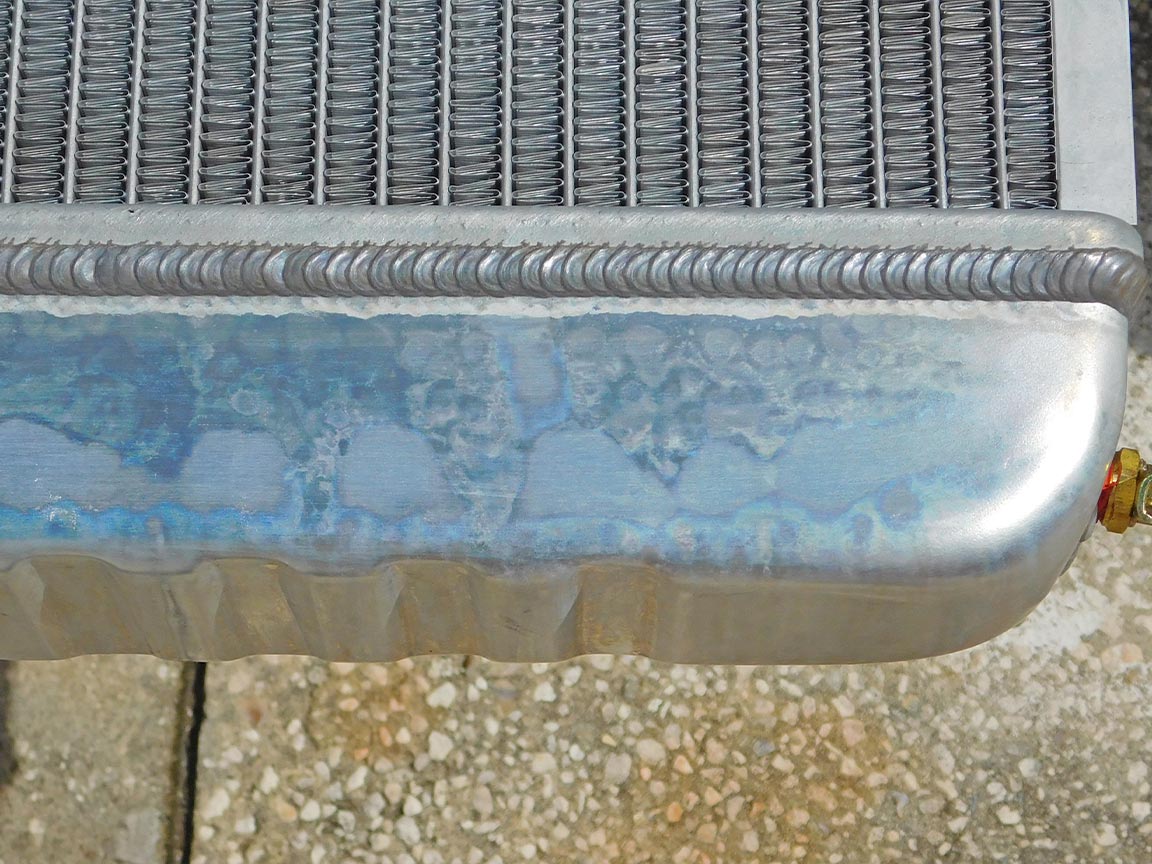
07: The next step was wiping just the tank with a metal prep and thoroughly rinsing it after several minutes. Tip: A leaf blower or hair drier helps to dry the radiator quickly after each rinse. This step was followed by a light scrub with a ScotchBrite pad, then application of primer and top coat. Zip Corvette offers self-etching Green Zinc Primer Paint.
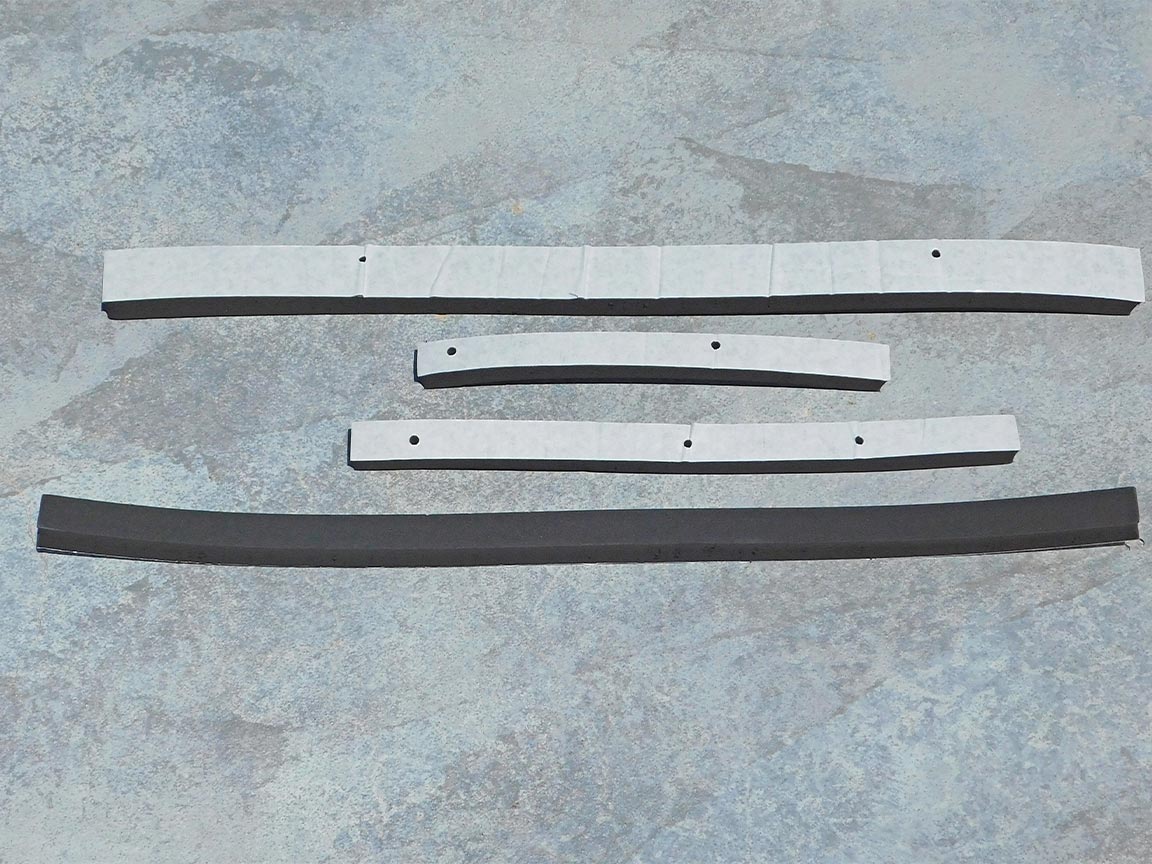
08: The four different radiator support seals are available as a complete set, 73 Radiator Support Seals. These are USA-made, all the seals are self-adhesive and three of them include positioning holes for clips.
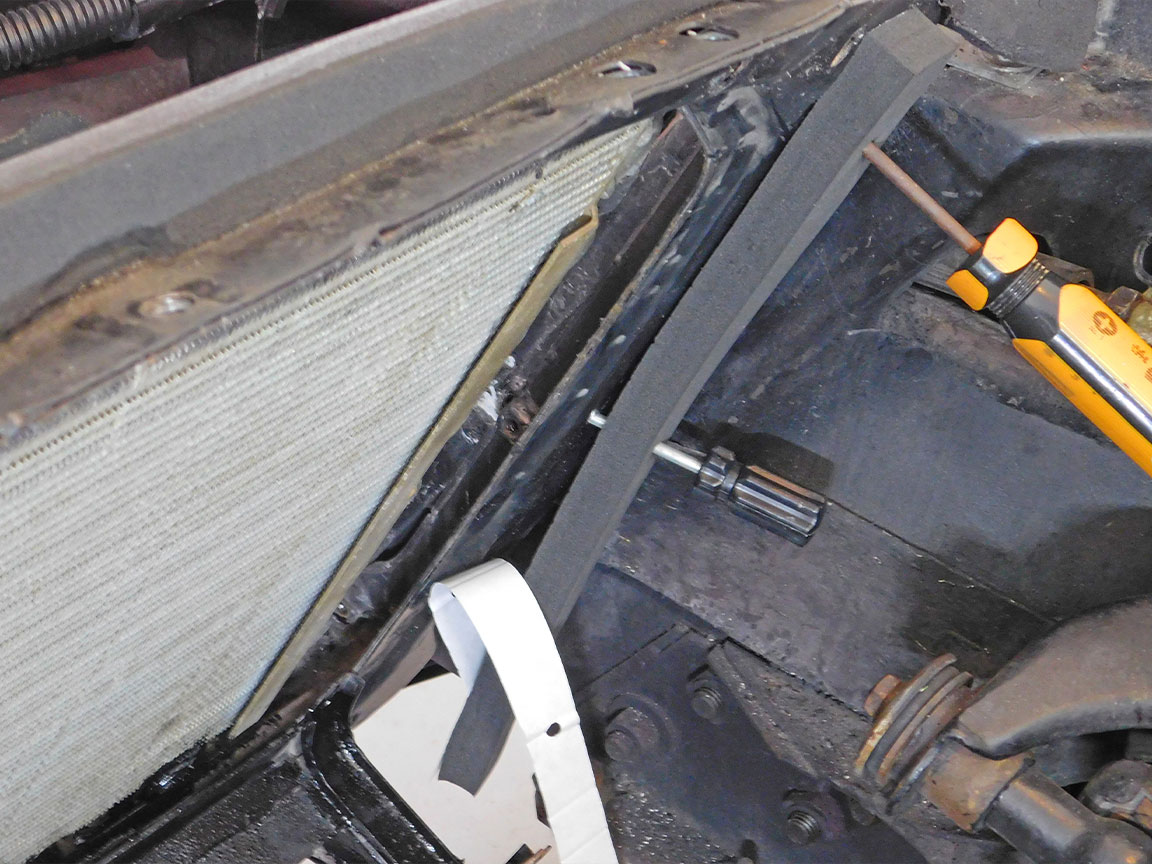
09: Originally, seven clips were used to align and hold the seals. Tips: use a screw driver to align one end and then peel the tear-off while moving to the other end. These seals use pressure-sensitive adhesive so press down hard on each inch of seal. The original style clips are 69-78 Radiator Seal Fastener.

10: Install the new radiator support seals along with the rubber cushions at the bottom of the support. The radiator support is tilted forward and it is now ready to install the radiator. Tip: if the old cushions are reused, pull them up to check underneath for rust.

11: Before installing the radiator, check to see if the lower end of the radiator support moved rearward. It may need to be moved back to allow enough clearance for installation of the radiator shroud and radiator.
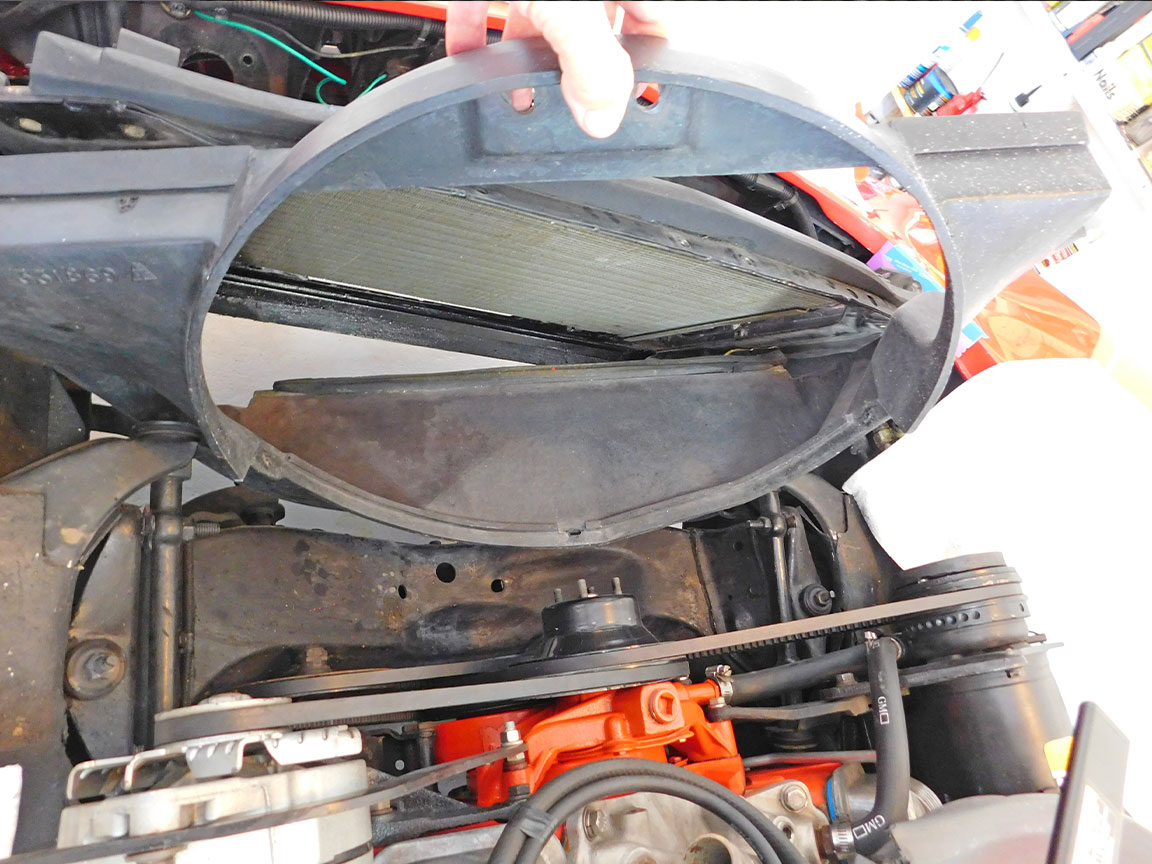
12: Installation of the large radiator shroud is fairly easy when the radiator support is moved forward. There are three methods of installation: shroud first, radiator first or both together. This takes patience to see which method works best.
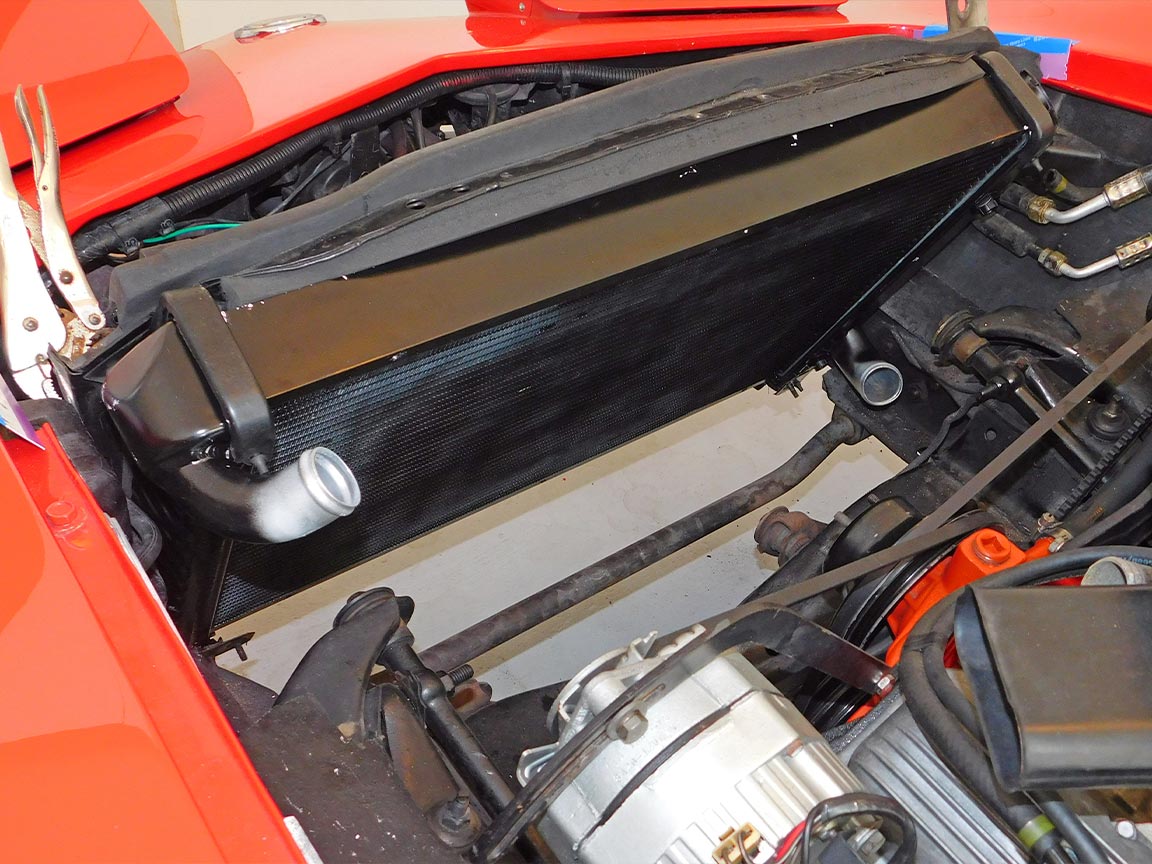
13: The new aluminum radiator went in easy without the shroud. An electric fan assembly is being installed, so the factory shroud was not need. Installation of the top brackets required some effort due to new rubber cushions fitting onto the wider aluminum radiator flange. Tip: silicone spray helps the radiator slide into the cushions.

14: Reinstall the support rod before installing the radiator support bolts.
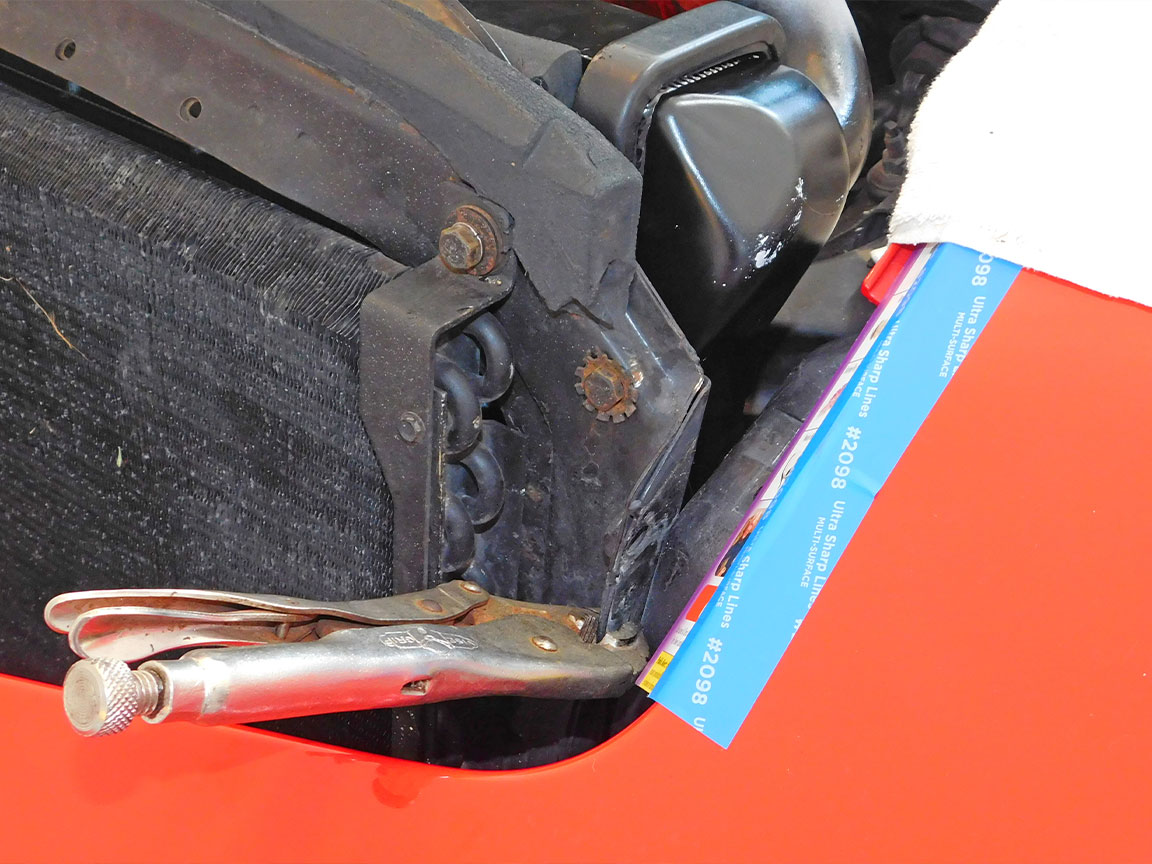
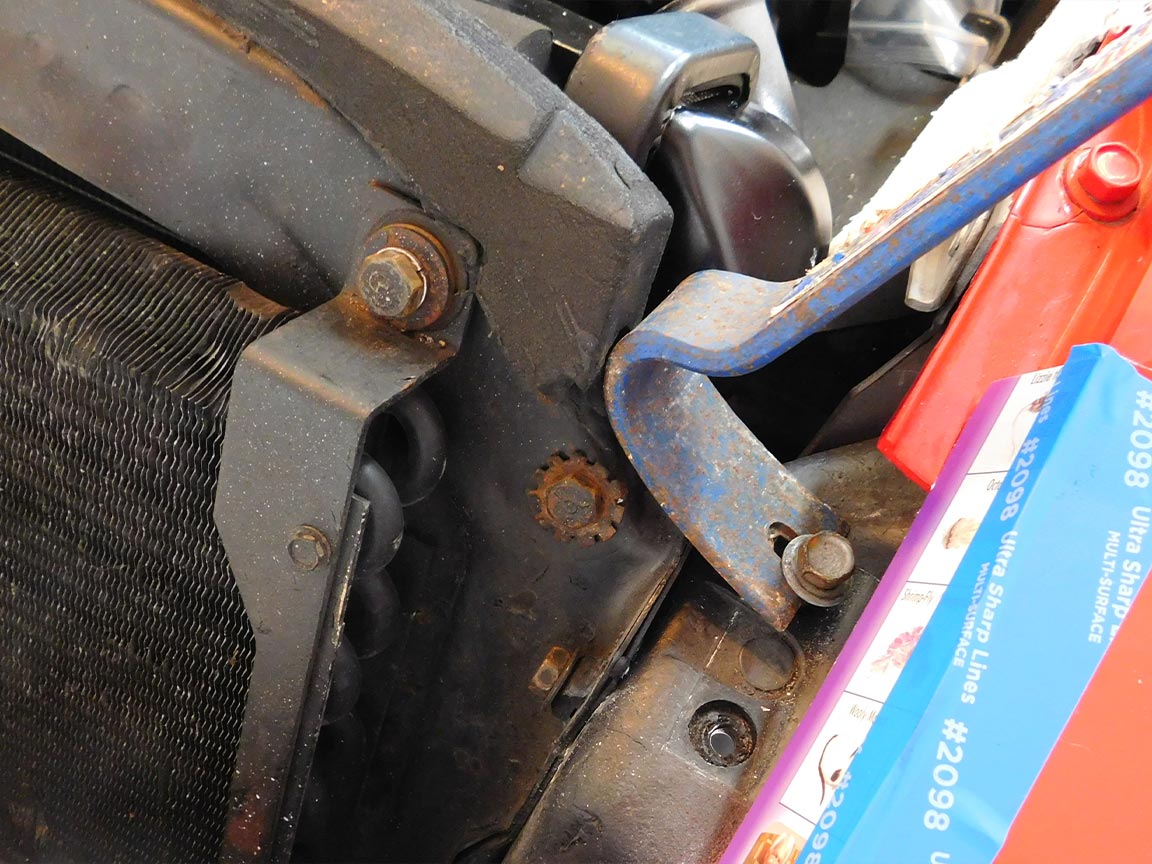
15: Next, reinstall the radiator support bolts. Tip: if an assistant is not available, pull the support forward and hold it in place with locking pliers.

16: The inner fenders may need to be raised to install the support bolts. Tip: if the fender is nearly in alignment, installing the conical tip bolts from the outside can pull the body panels into position.
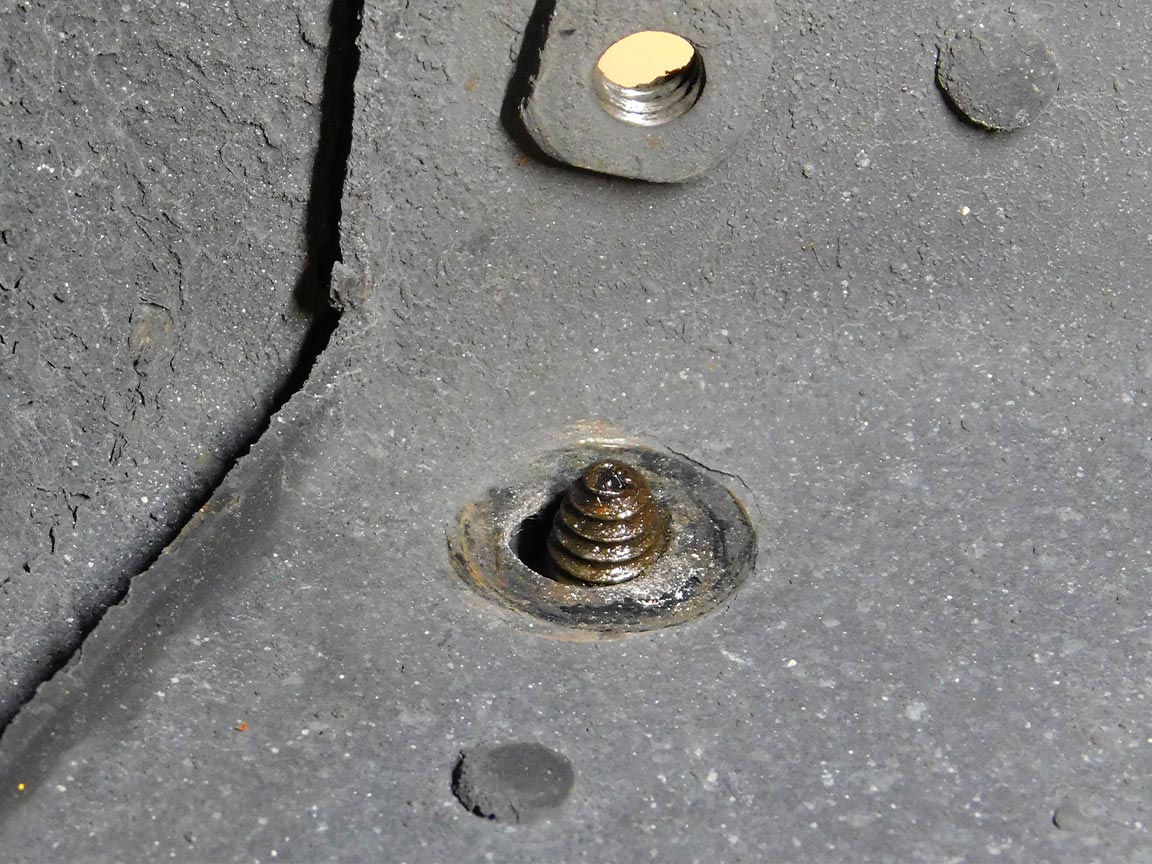
17: This view from inside the wheel well shows how the conical bolt tip can draw the inner fender into alignment with the radiator support. After the holes are aligned, install the remaining two bolts on that side.
18: Tip: if the inner fender needs to be raised more, pry on the radiator support using one of the hood hinge bolts.
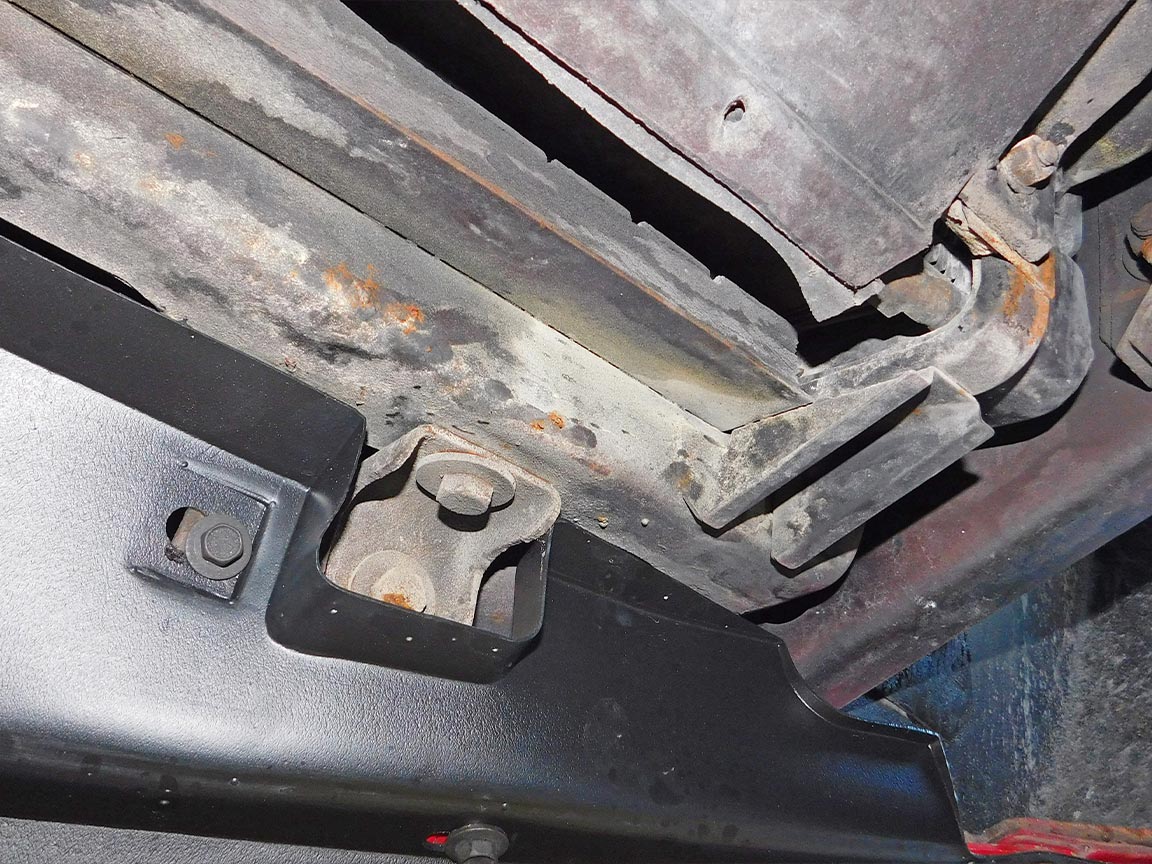
19: Install the lower radiator support bolts from underneath the car. The spoiler easily bends away to make room for a short 5/8-inch socket. Also, install the nut on the lower end of the support rod. Then, from above, install the bolt through the upper end of the support rod. When all the support bolts are installed, go back and tighten them.

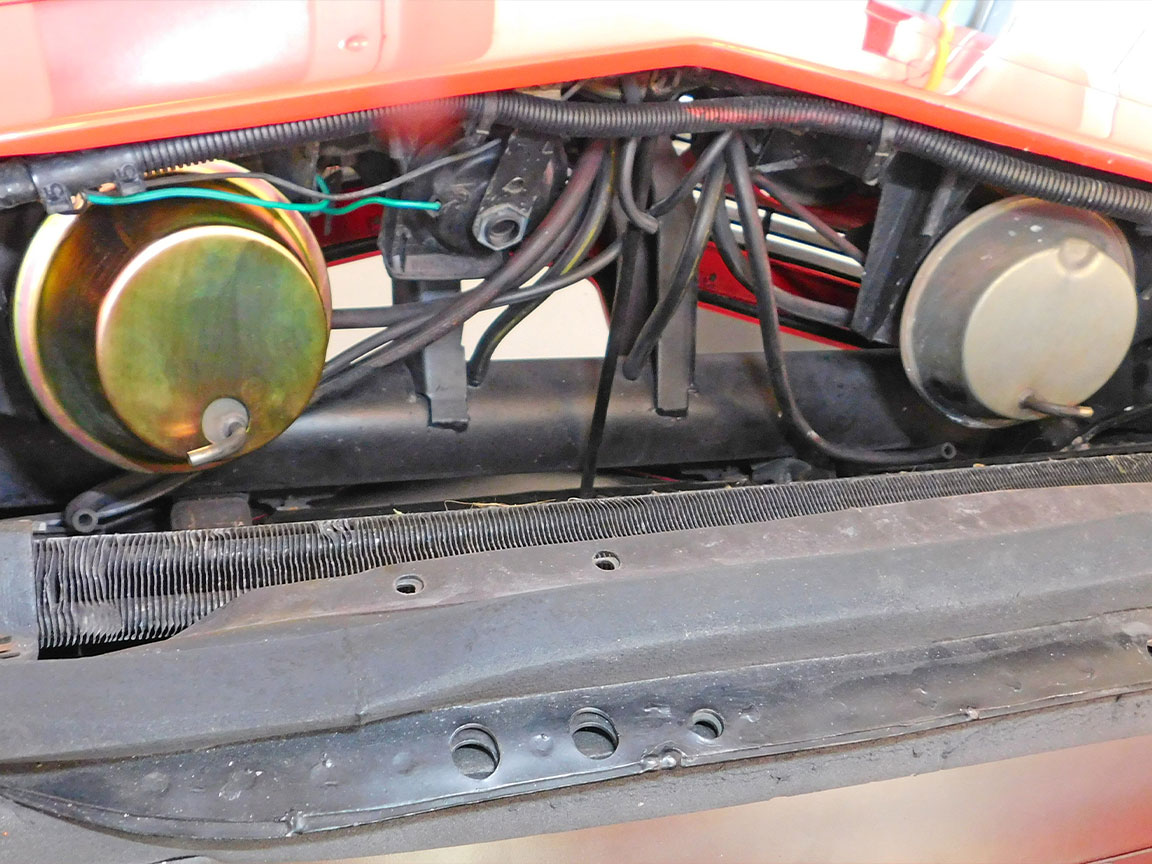
20: Reinstall the actuators and reconnect their vacuum lines, if removed. Or, reinstall the A/C condenser if it was removed. Actuator installation is shown in Zip Corvette’s tech article 1968-1982 Corvette Headlight Actuator Removal & Seal Replacement. Further information on the vacuum system is provided in 1968-1982 Corvette Vacuum Headlight Diagnosis and Repair.
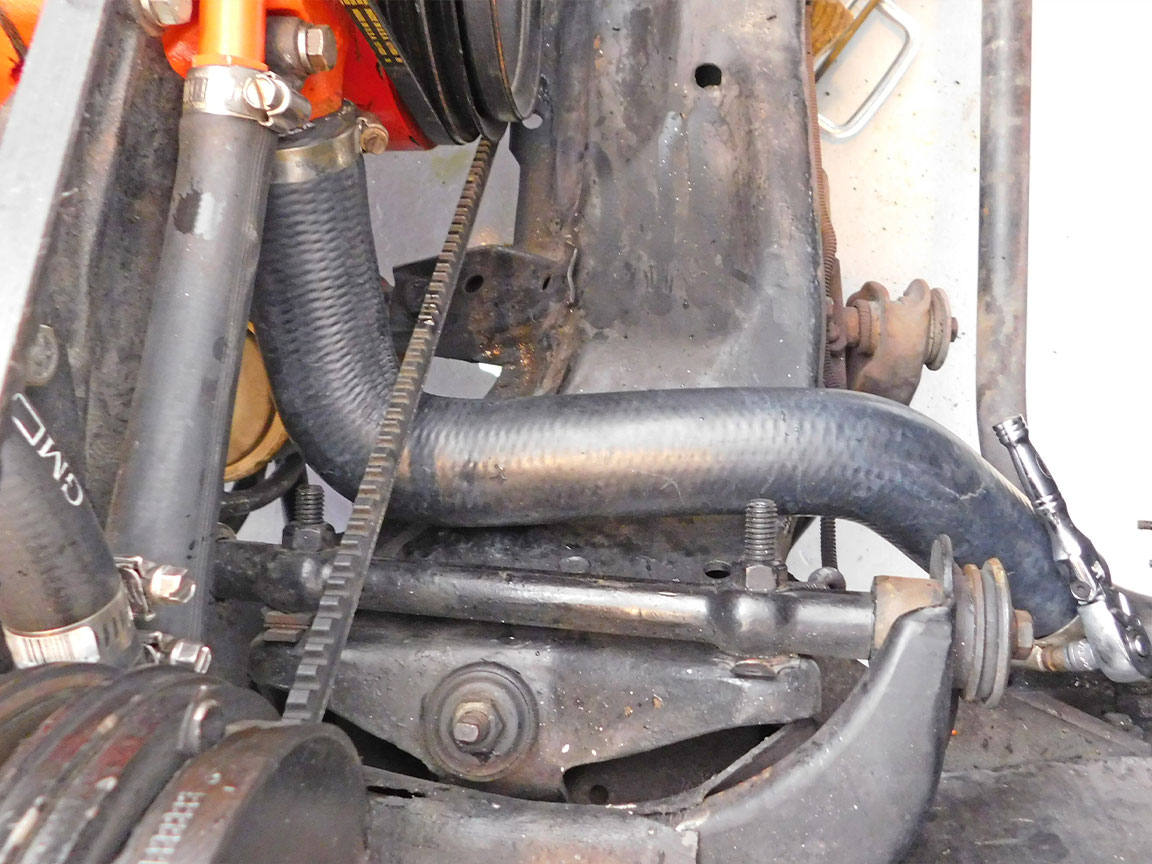
21: Install the lower radiator hose. It should have a stainless steel coil inside to keep it from collapsing under suction. Tip: apply silicone to make installation easier. Remember to position the clamps so that their screws are accessible after all the other parts are installed. Important: make sure all hoses are at least ¾-inch from any fan belt. The belts swing about when the motor is running and can cut through a hose.
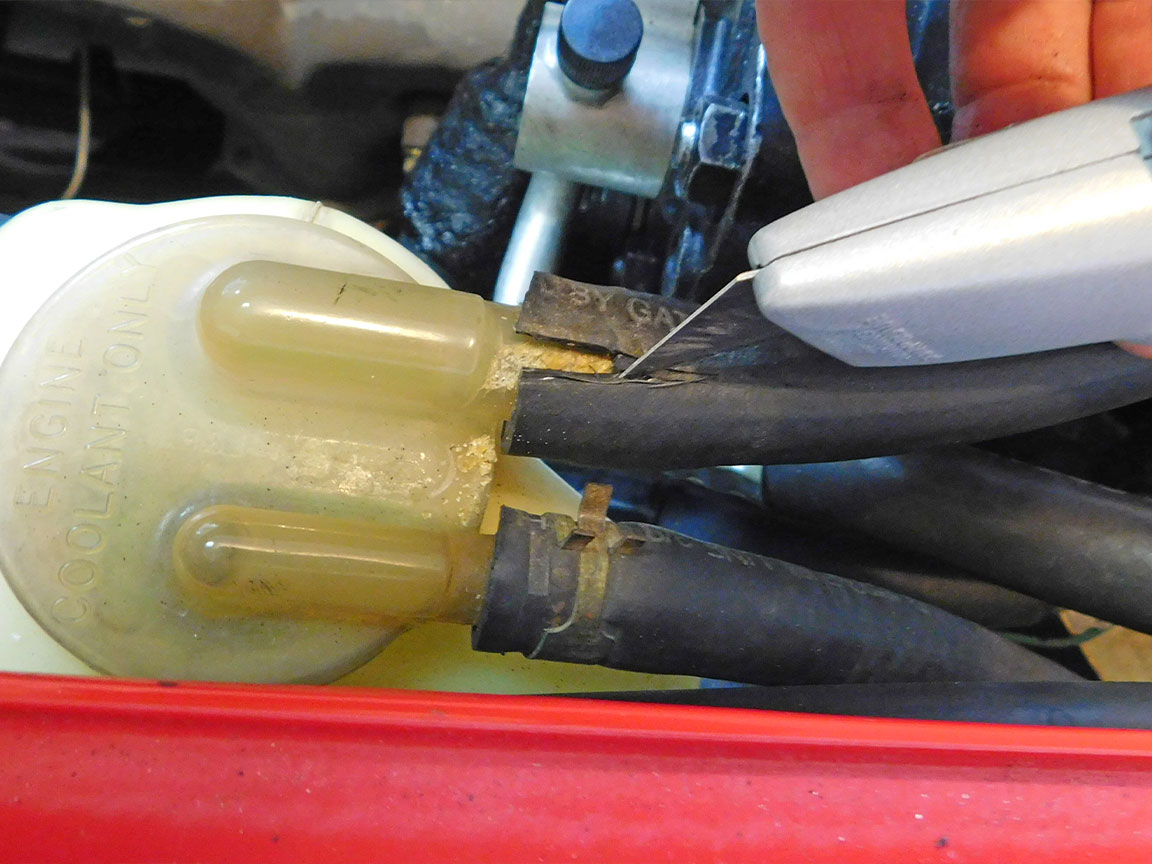
22: Replace the hoses on the recovery tank if they are cracked or brittle. It is essential that the hose from the radiator to the tank does not leak. If air is not bled out of the cooling system, corrosion is accelerated. Tip: if these or any other hoses are stuck, carefully slit the end lengthwise to facilitate its removal without damaging the connector.

23: Add coolant. The radiator manufacturer said any color coolant is OK but they make their own premix brand and it is available through Zip Corvette: Dewitts Radiator Coolant. Relatively new original style green coolant was in the motor so it was topped off with new concentrate mixed 50/50 with distilled water. Use only distilled water whenever water needs to be added to a cooling system.
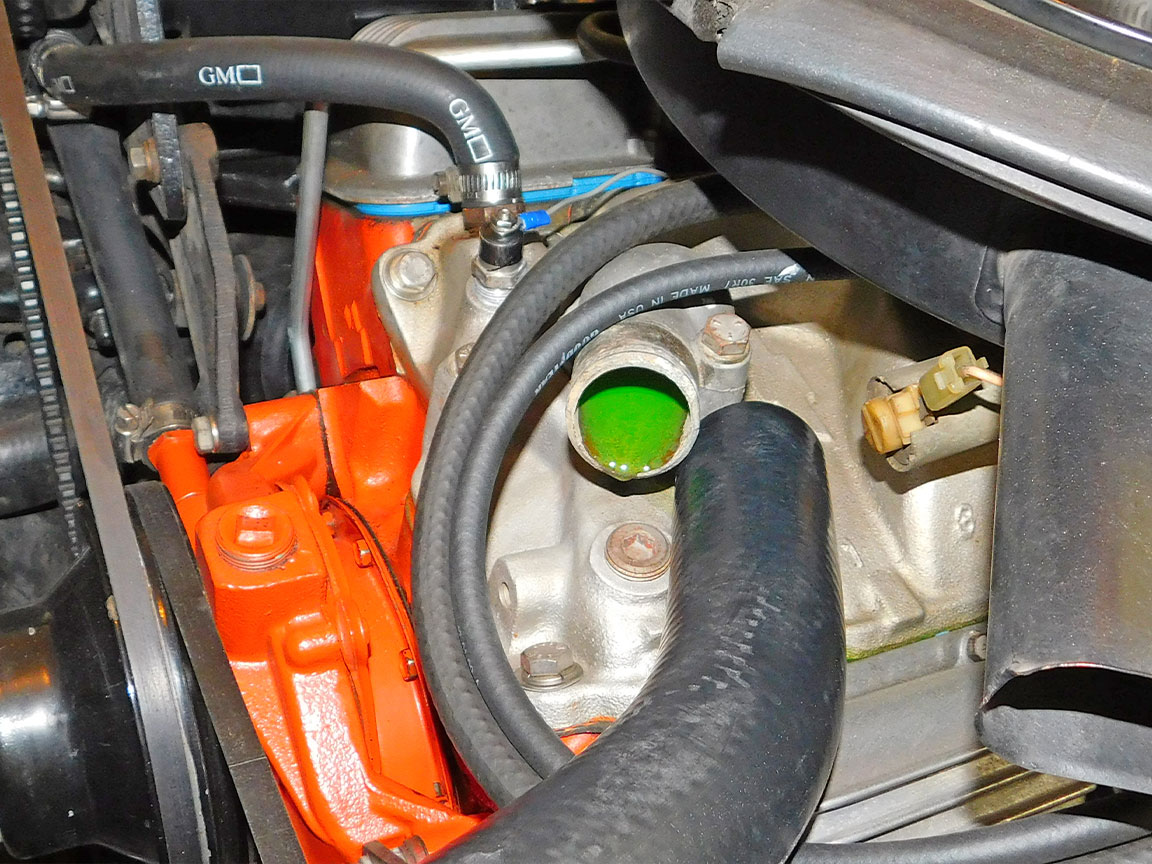
24: Install the upper radiator hose at the radiator but not at the manifold to allow air to escape while the coolant is added. This helps to get as much coolant into the system and thereby remove as much air as possible.
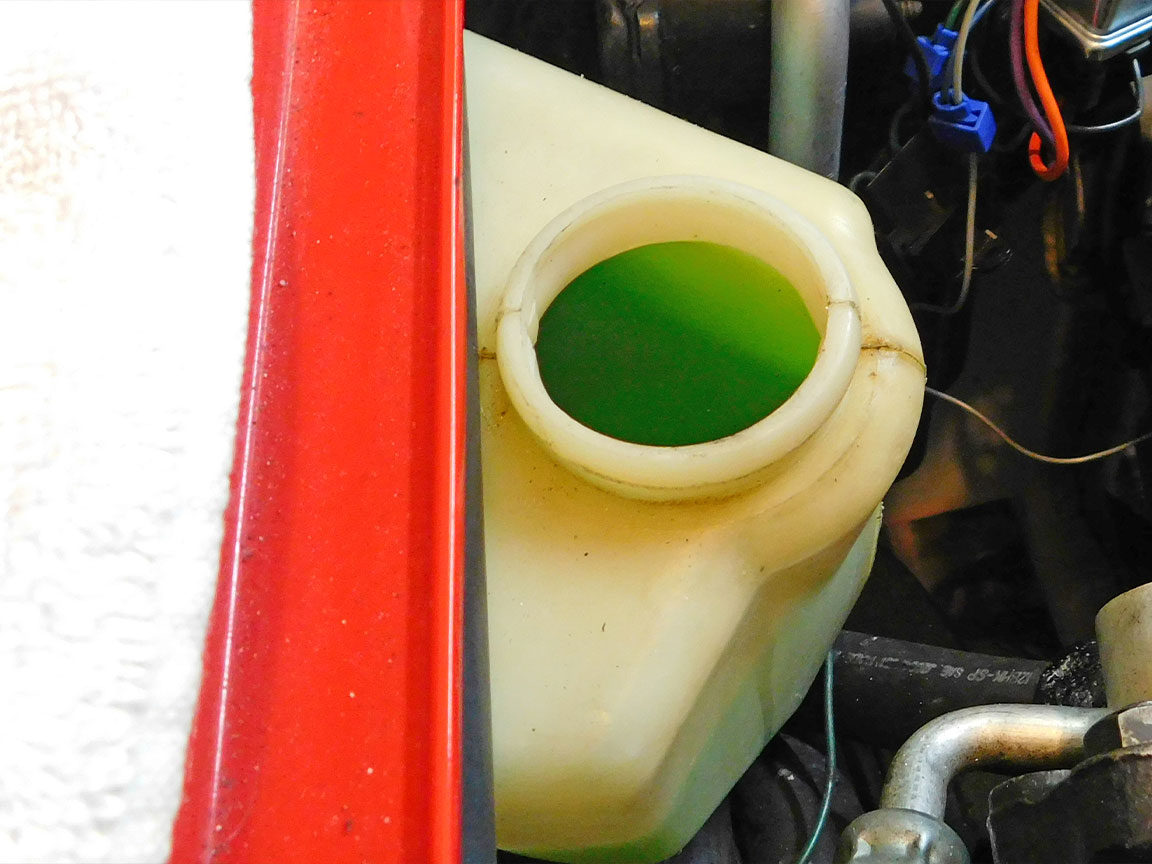
25: Add coolant to the recovery tank until it is almost full. Every time the motor is heated up, trapped air will be expelled into the tank. Later, coolant will be drawn from the tank when the motor cools down. Keep checking and refilling the recovery tank until its level stabilizes.

26: Pressure test the system to find any leaks while convenient and while the motor is still cool. Two hose clamps required further tightening. Tip: many auto parts store chains loan out pressure testers.
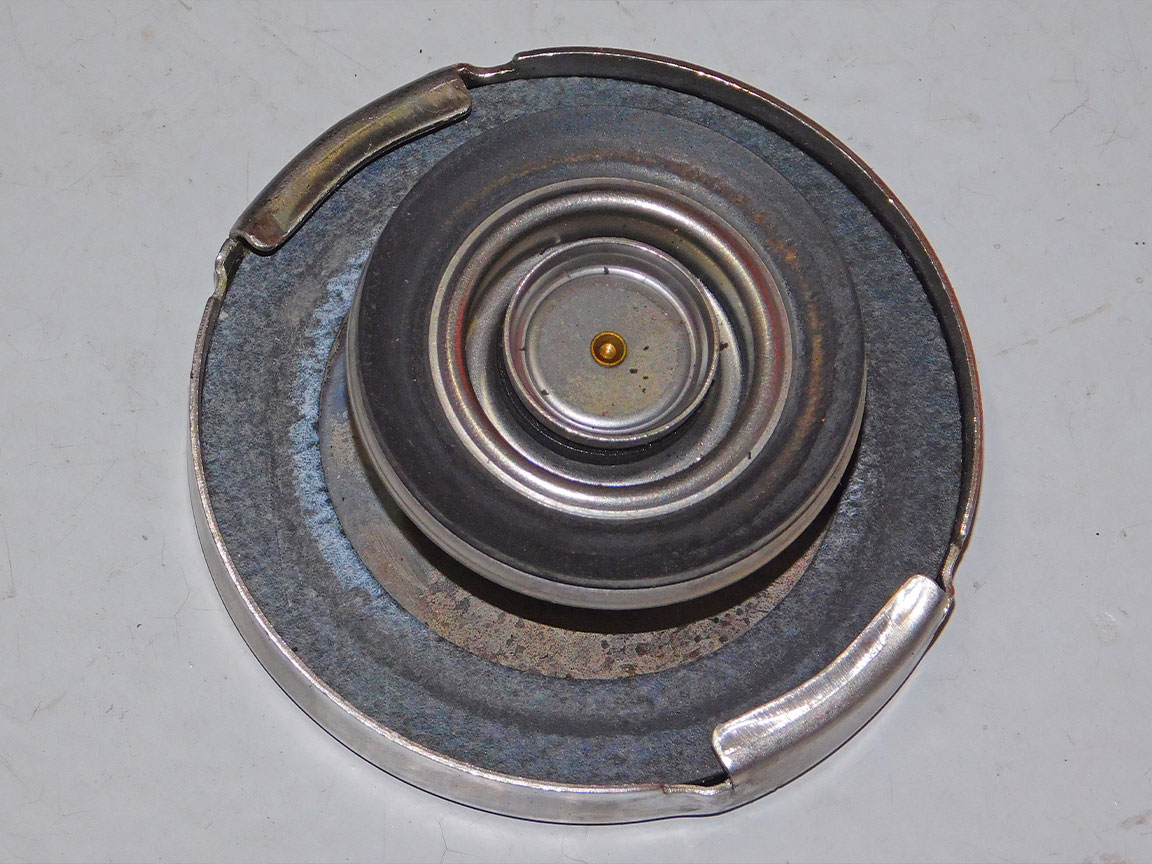
27: Inspect the insides of the radiator cap. It is important that neither gasket is cracked or deteriorated. If they are damaged, a cooling system will not be a closed system and this risks corrosion or overheating. Tip: applying silicone lubricant to the gaskets makes cap installation and removal easier.
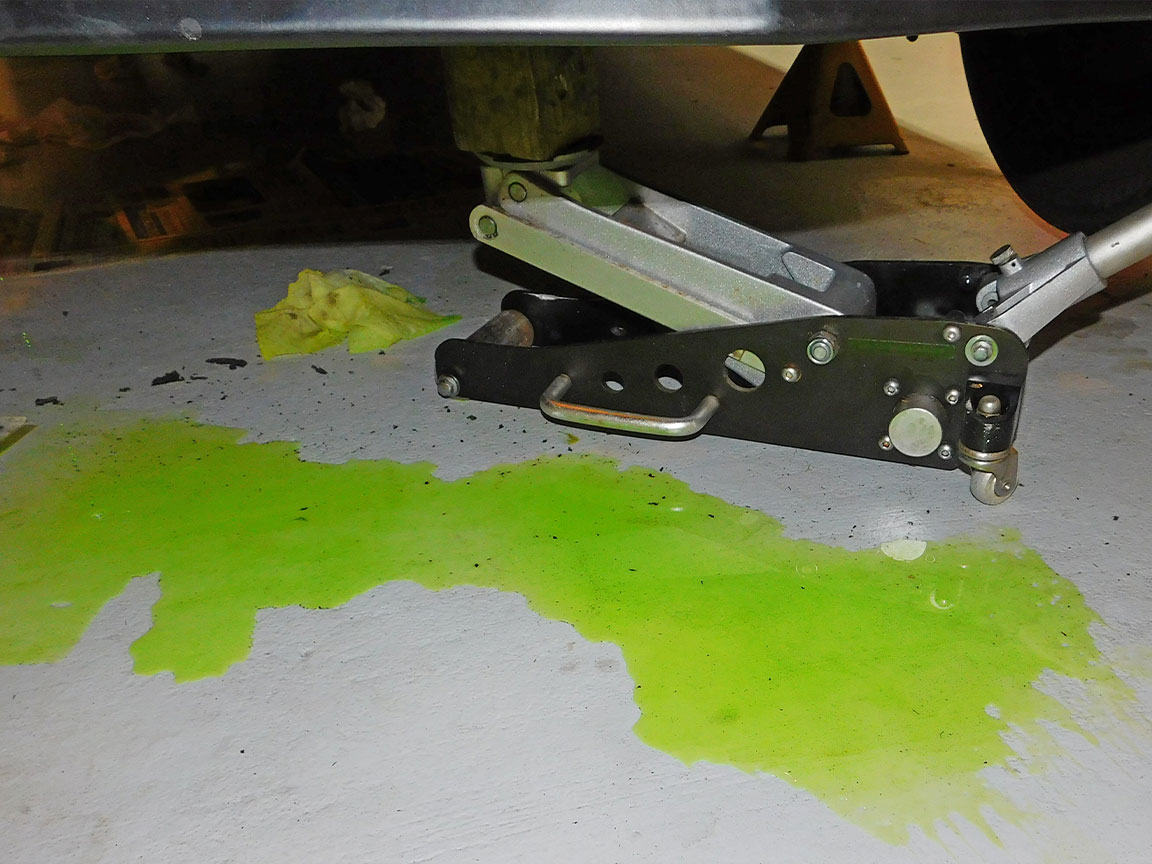
28: If pets are nearby, clean up any spilled coolant immediately. Some dogs and cats are said to like the taste of antifreeze — but it will poison them.

29: The 73 Radiator Support to Hood Air Dam is an important seal to make sure cooling air goes through the radiator instead of around it. Replace this upper seal if it’s hardened or broken. Like the other seals Zip Corvette offers, this is USA-made.

30: Install the hood and lower it to make sure its gaps are the same as before. Do not latch the hood closed yet. Adjust the hood at the hinges as necessary to duplicate the original gaps. This left front gap was larger than before the hood was removed. The hood may not open if the gaps are different and that becomes a difficult problem to solve.

31: Loosen the lower half of the hinge if more adjustment is needed than can be achieved with the hood hinge bolts. Move the left side of the hood forward to reduce the left front gap, decrease left rear gap and increase the right rear gap. Tip: loosely tighten only one bolt at each hinge until the original alignment is achieved.
32: While tidying up the engine compartment, consider adding a little bling in front of the radiator. Zip Corvette offers chrome covers that slip over the old actuators with their 68-82 Headlight Actuator Covers (Chrome).
1968-1982 Corvette Radiator Installation
Source: Zip Corvette Parts
8067 Fast Lane | Mechanicsville, VA 23111 | (800) 962-9632
Corvette Parts List Related to Article:
- 73-76 350 & 454 Aluminum Radiator
- 73-76E 350 & 454 Replacement Radiator
- 66-68 427 & 69-76E Radiator Bracket Cushion Set
- 66-82 Dewitt’s Direct Fit Radiator Cushion
- Green Zinc Primer Paint
- 73 Radiator Support Seals
- 73 Radiator Shroud Seals
- 73 350 & 454 Radiator Support & Shroud Seal Kit
- 69-78 Radiator Seal Fastener
- 73 Radiator Support to Hood Air Dam
- Dewitts Radiator Coolant
- 68-82 Headlight Actuator Covers (Chrome)
- Shop/Service Manuals
Related Articles: