
by John Pfanstiehl
The vacuum operated headlights and windshield wiper doors that debuted on the 1968 Corvette presented a new type of system to most mechanics and car owners. Fortunately, the system is pretty robust and is surprisingly easy to diagnose if problems occur. The vacuum operated windshield wiper doors were only employed from 1968 to 1972 while the vacuum operated headlights remained through 1982. The latter is the system being examined here, but the troubleshooting procedures are identical for the wiper doors.
For ease of diagnosis, the system can be divided into the power circuit and the control circuit. The power circuit is simply the actuators and the larger vacuum hoses. When vacuum is applied to one side of the actuator, the headlights go down. When vacuum is applied to the other side of the actuator, the headlights go up. A vacuum relay determines which side gets the vacuum.
The control circuit is comprised of a vacuum valve on the headlight switch, a manual vacuum over-ride valve and the vacuum relay located near the headlights. Small rubber hoses connect these in series.
Let’s start at the actuators because the power circuit is so simple.
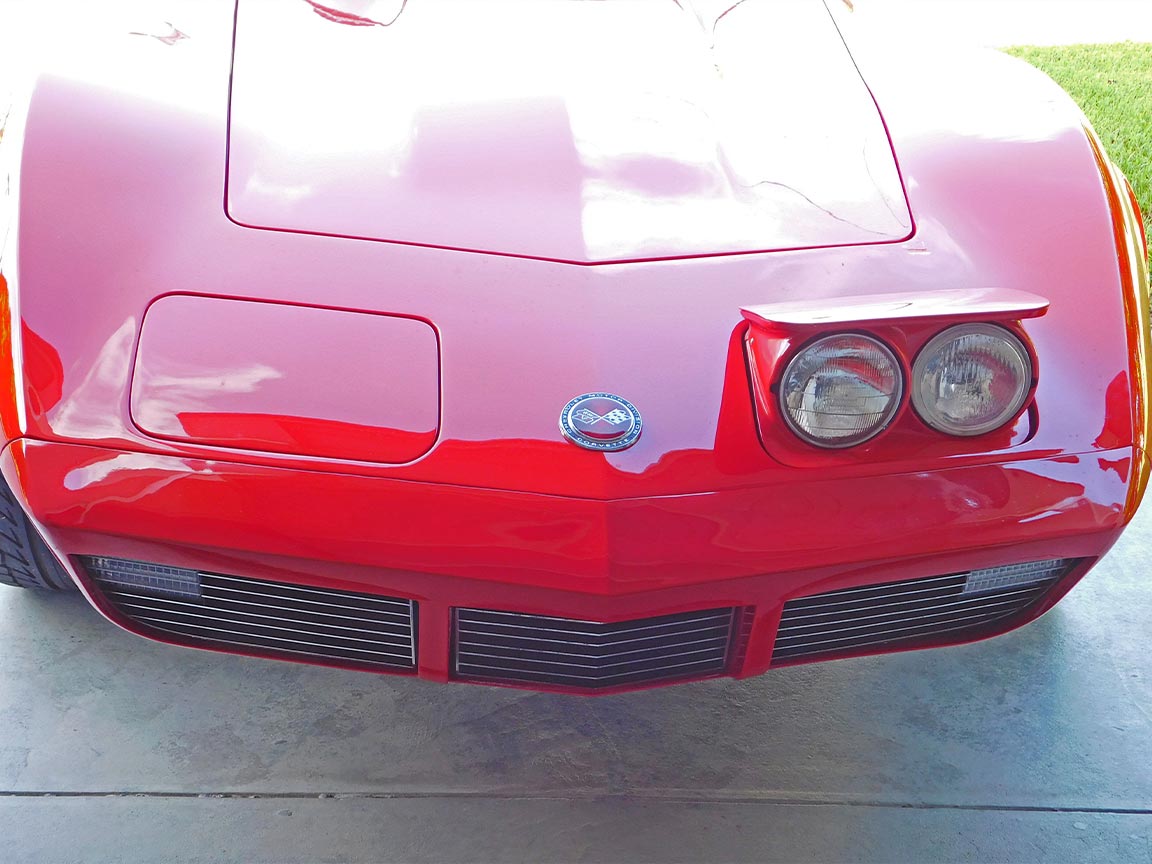
01: When a C3 is winking at people, or refusing to open its eyes or to close them, it’s time to find the problem and fix it.
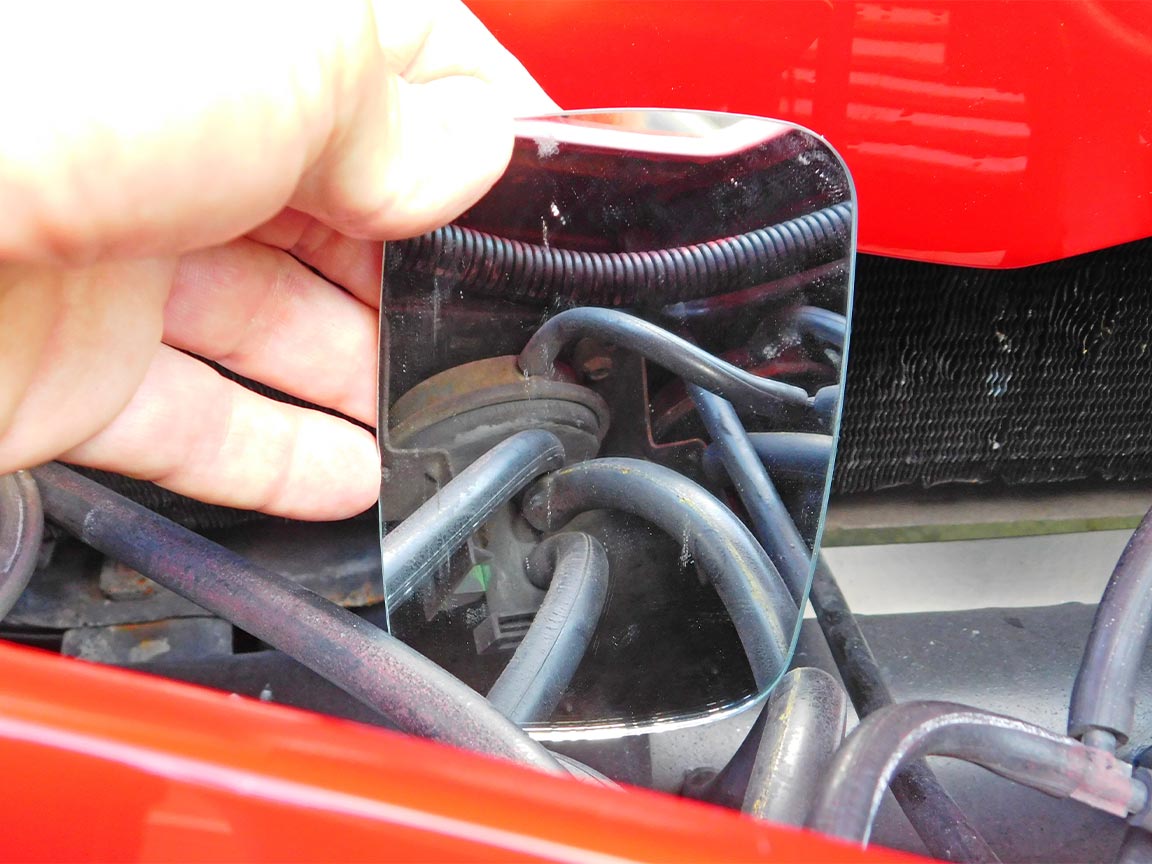
02: Check for vacuum at the vacuum relay. Open the hood, and look under the upper surround panel to see the relay and its hoses. A mirror helps see the three large hoses and the small control hose plugged into the relay.

03: The vacuum relay can also be seen, accessed or replaced from below. A replacement relay, 1968-1982 Headlight / 1969-1972 Wiper Door Actuator Vacuum Relay, and the mounting hardware, 1968-1982 Headlight Actuator Vacuum Relay Screws, are available from Zip Corvette.
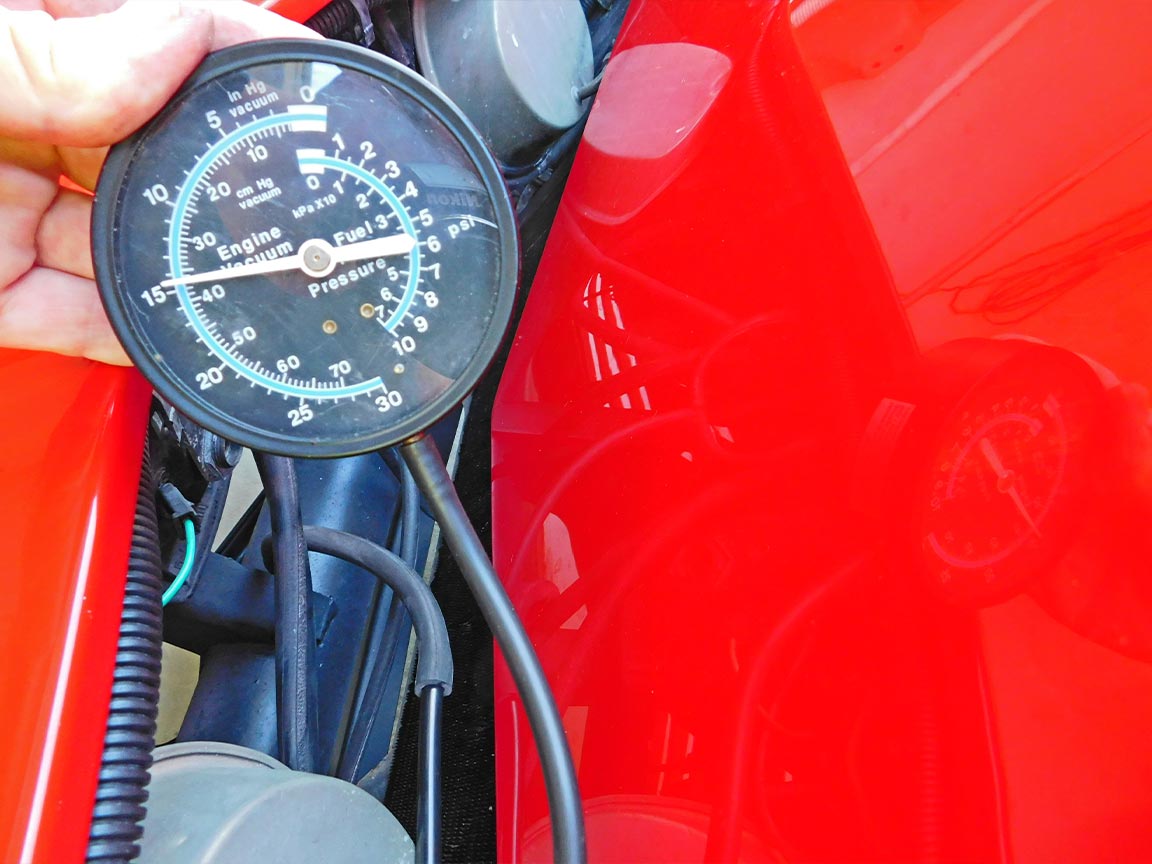
04: Remove the middle large hose from the relay to feel if there is vacuum when the engine is running and the headlights are down. A vacuum gauge is not essential, if a fingertip is held firmly to the hose end by vacuum, the system is good to that point.
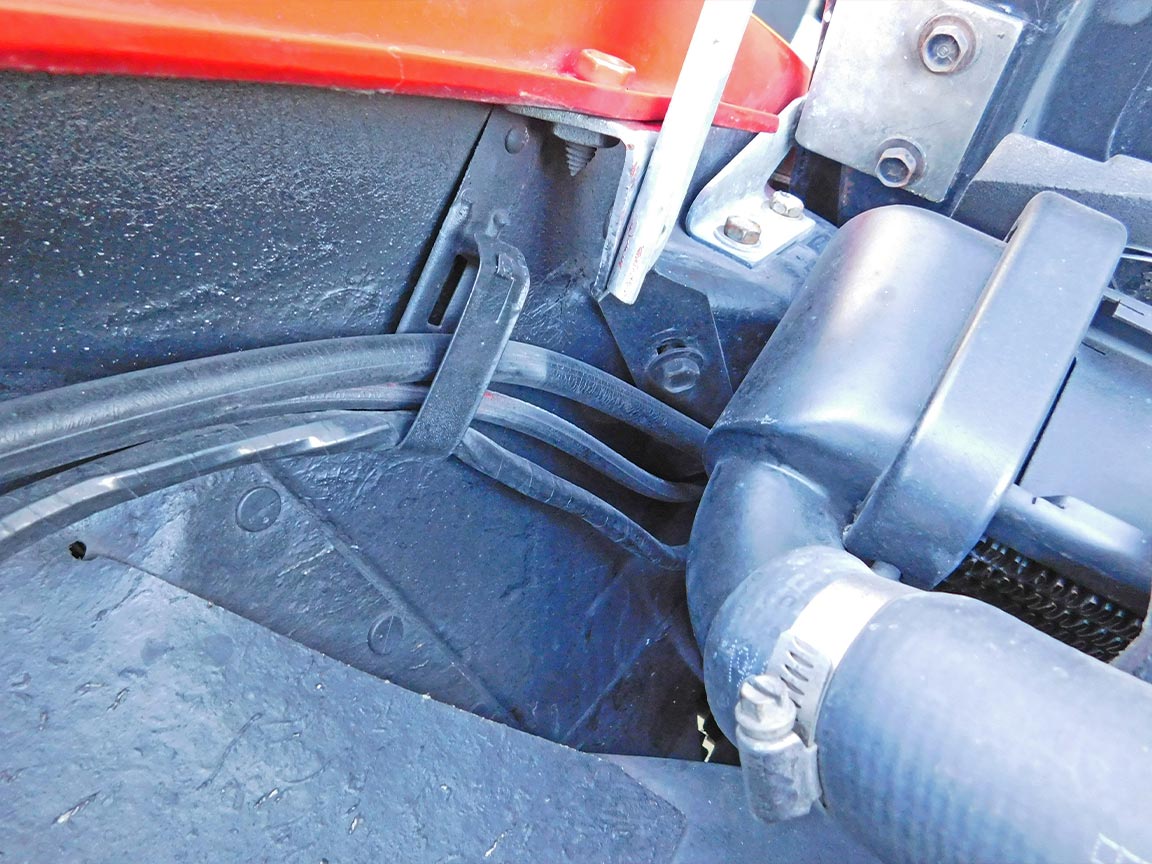
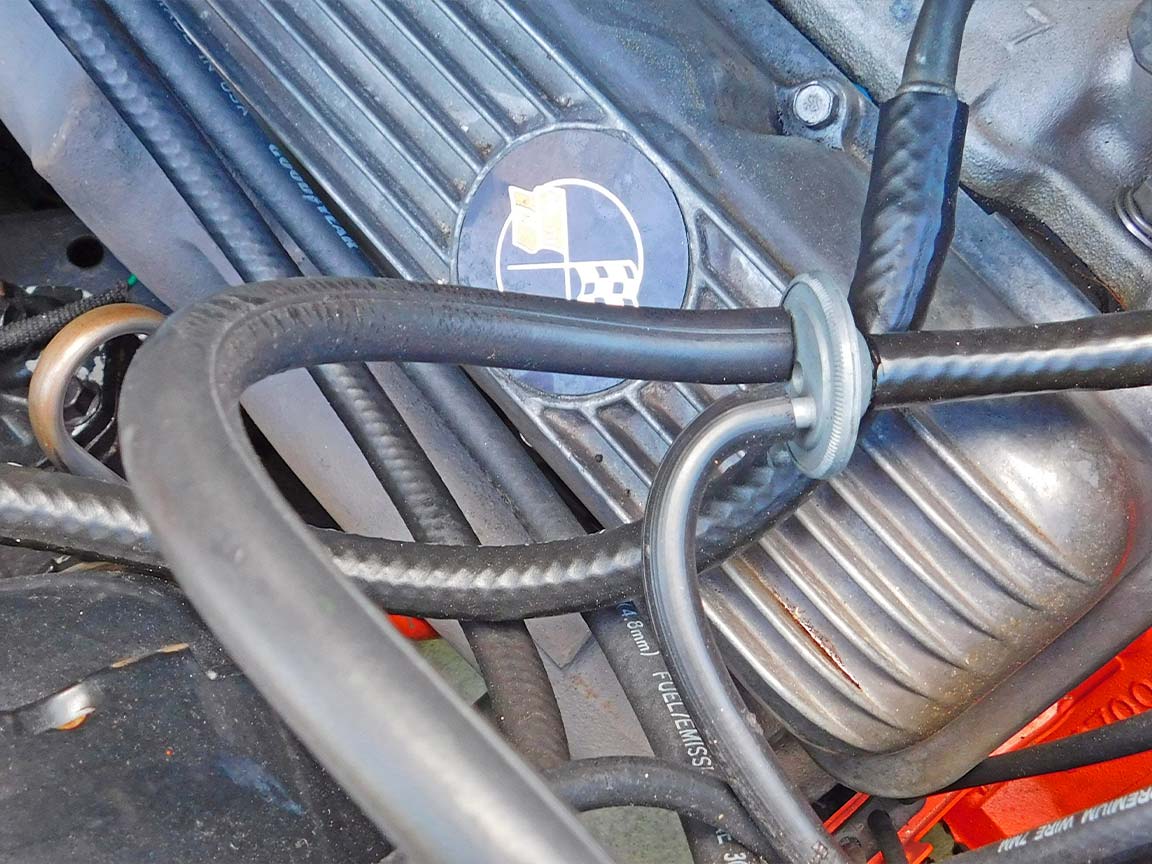
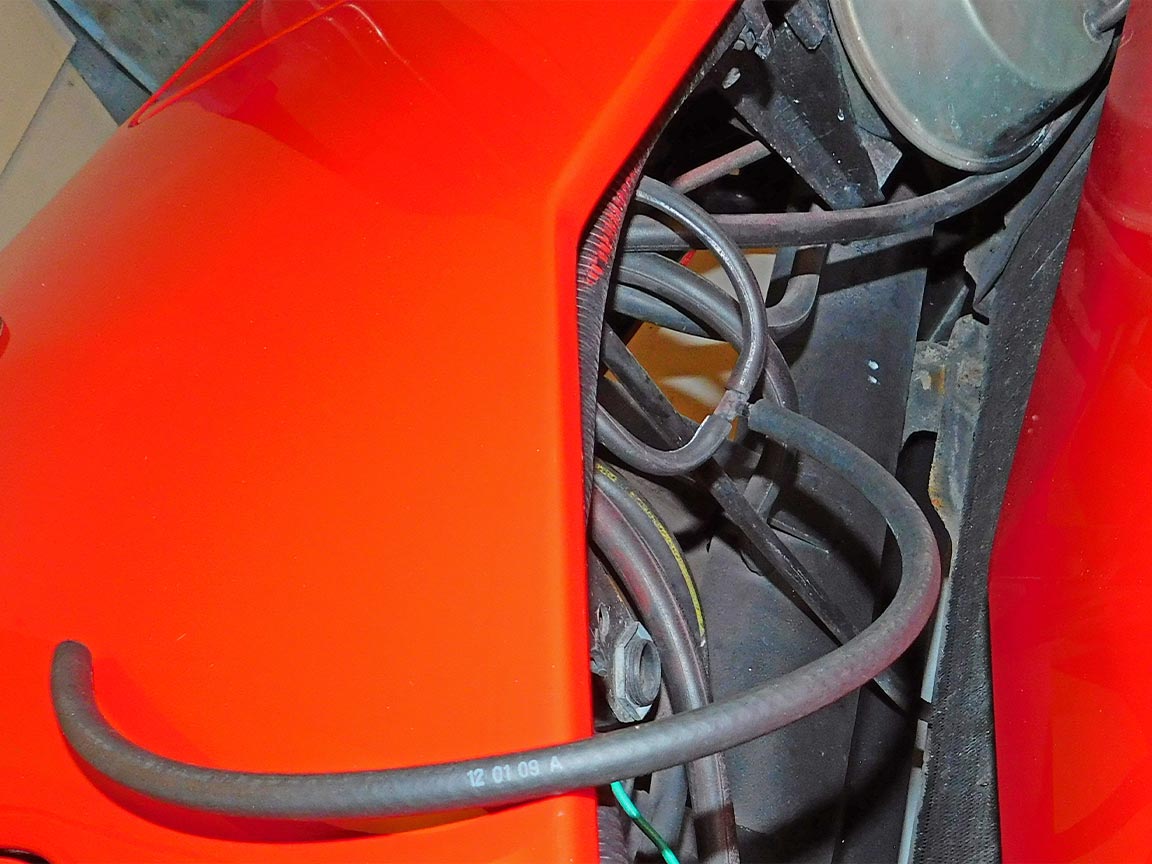
05: If the vacuum to the relay(s) is weak, trace the large hose back into the engine compartment to look for a disconnected hose, cracked hose end or leaking vacuum reservoir tank. It’s easy to follow. The large hose is on the top and the smaller control hose and wiring harness are below.
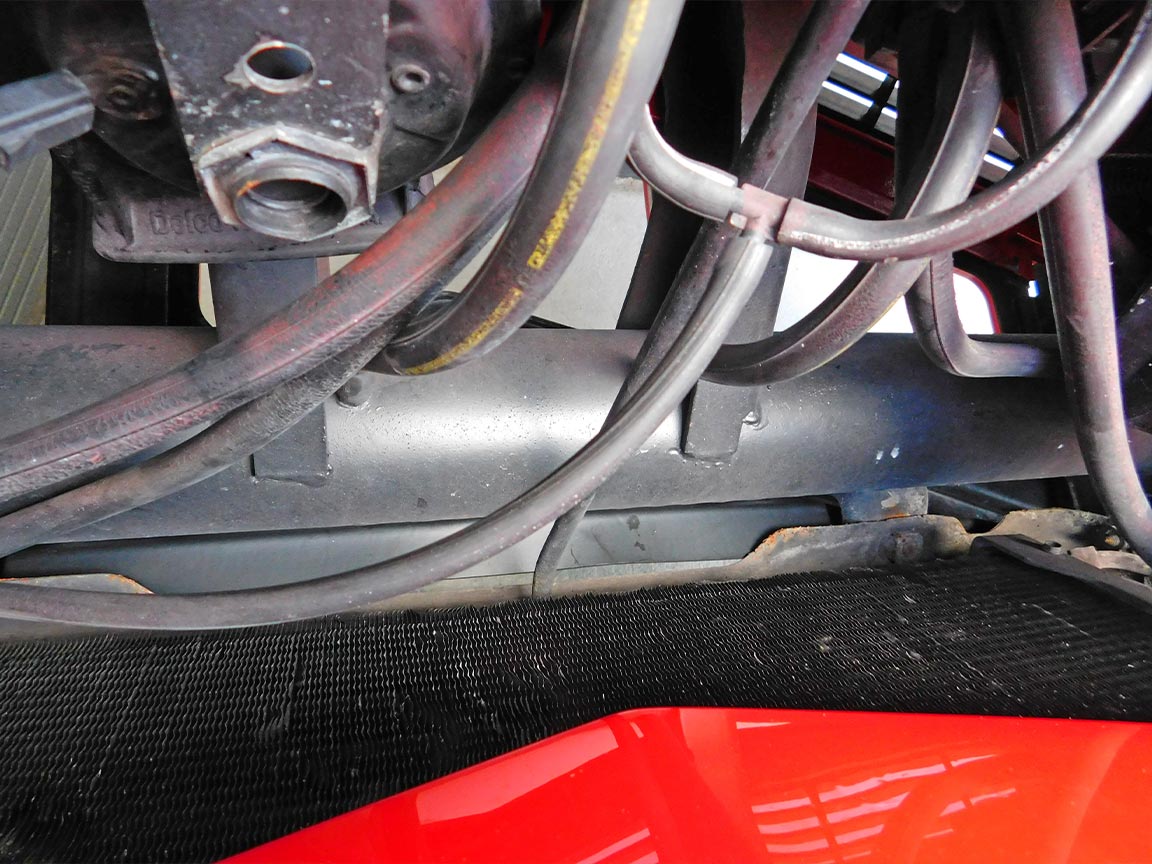
06: On this 1973, the vacuum reservoir is the cylindrical part of the bumper assembly. It has three nipples (tubes) for hose connections: one for the vacuum source from the intake manifold and two for connection to the two vacuum relays.

07: If there are two relays, test each one separately while the other is connected. If low vacuum or no vacuum is felt with one side connected, that side has a leaking actuator or hose.
08: Disconnect a hose and use it to blow into the each side of each actuator. If air flows freely into the rear actuator connection, the internal diaphragm is ruptured. If it flows freely into the forward hose connection, the external seal is ruptured.
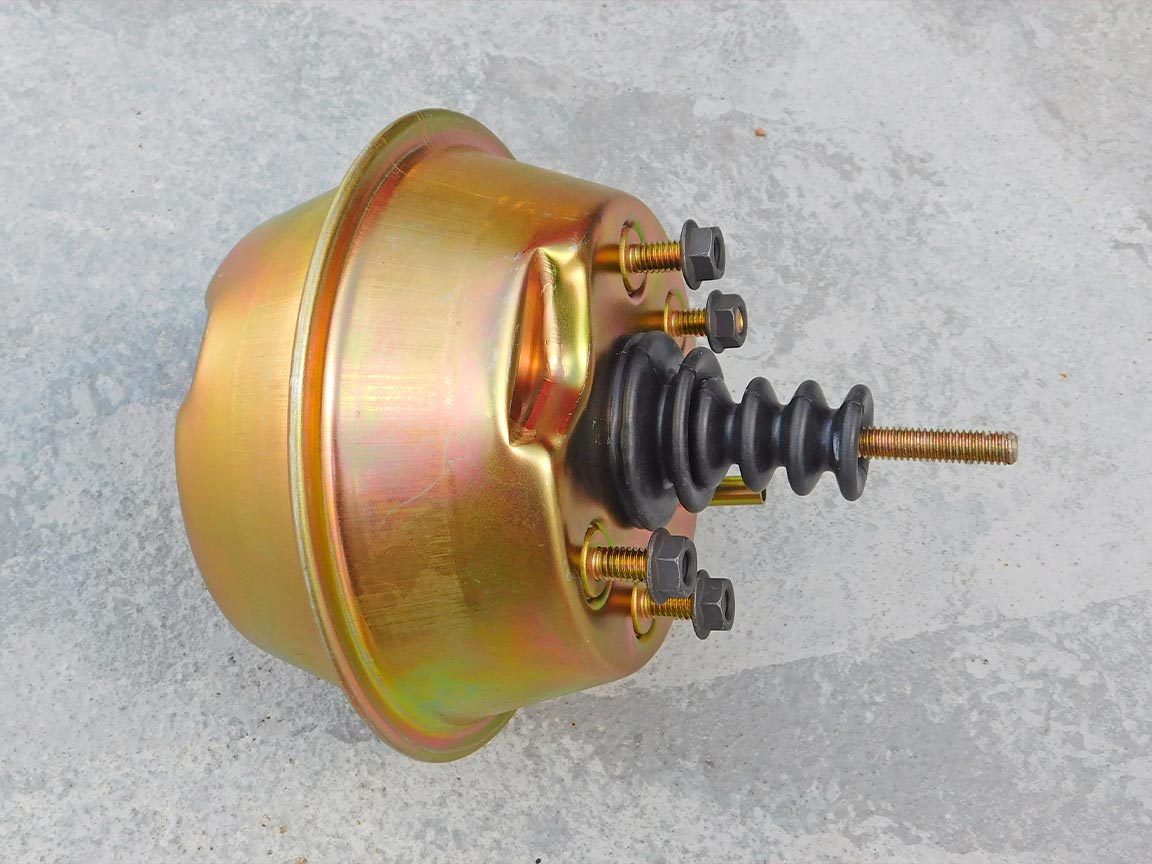
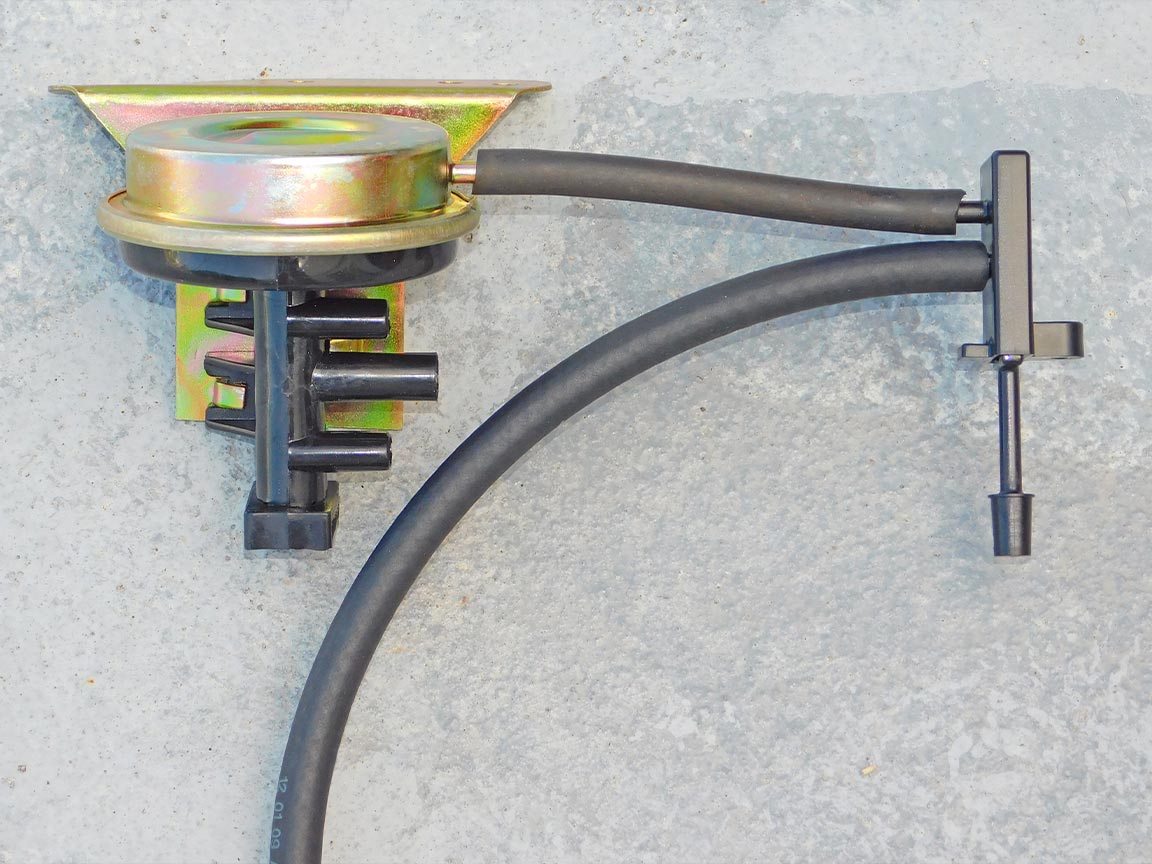
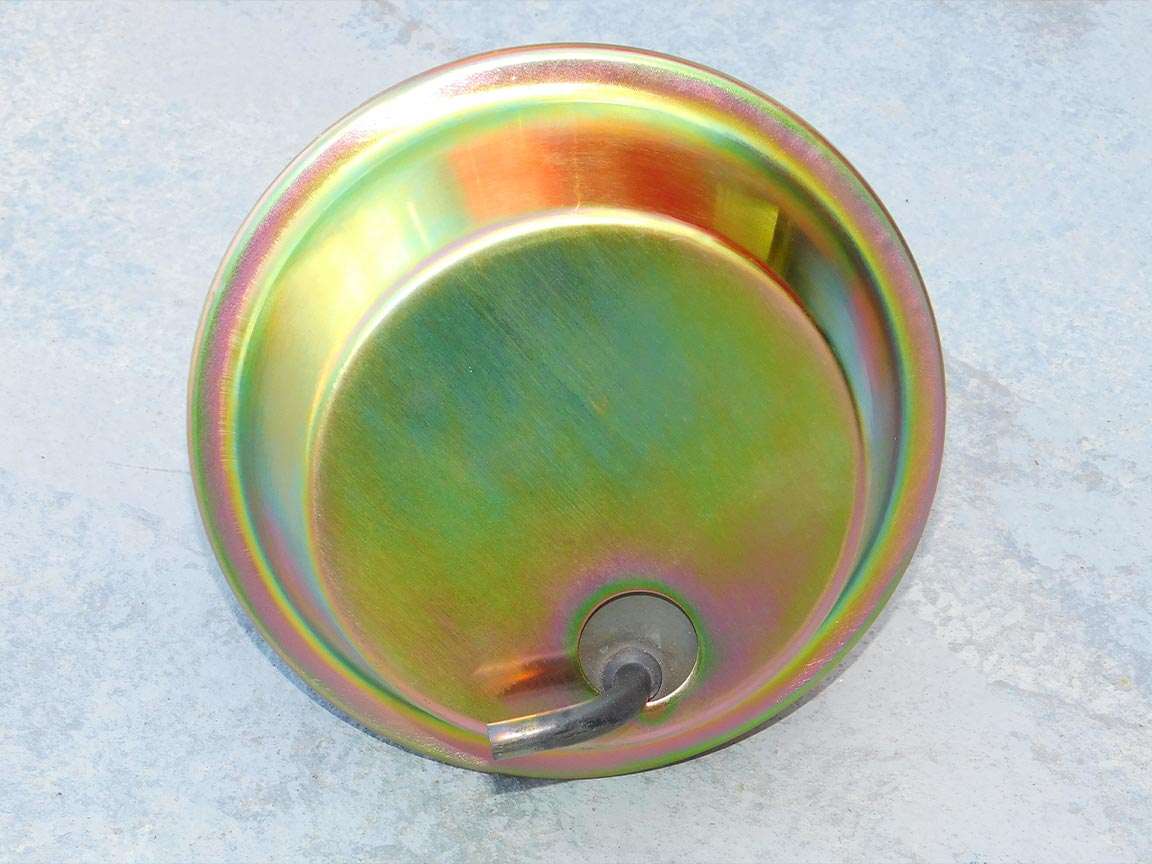
09: A replacement actuator is needed if the internal diaphragm is ruptured. Zip Corvette offers replacement actuators, 1968-1982 Headlight Actuator, that have a yellow zinc dichromate finish like the originals. Specify left or right and note that these have the nipple pointing outward. Separately Zip Corvette also offers a car set of eight nuts to attach the actuator, 1968-1982 Headlight Actuator Mount Nuts. The nuts are made in the USA.

10: The exterior seal is more likely to fail than the internal diaphragm. That was the case on this car. Actuator removal or replacement is shown in Zip’s technical article: 1968-1982 Corvette Headlight Actuator Removal & Seal Replacement.
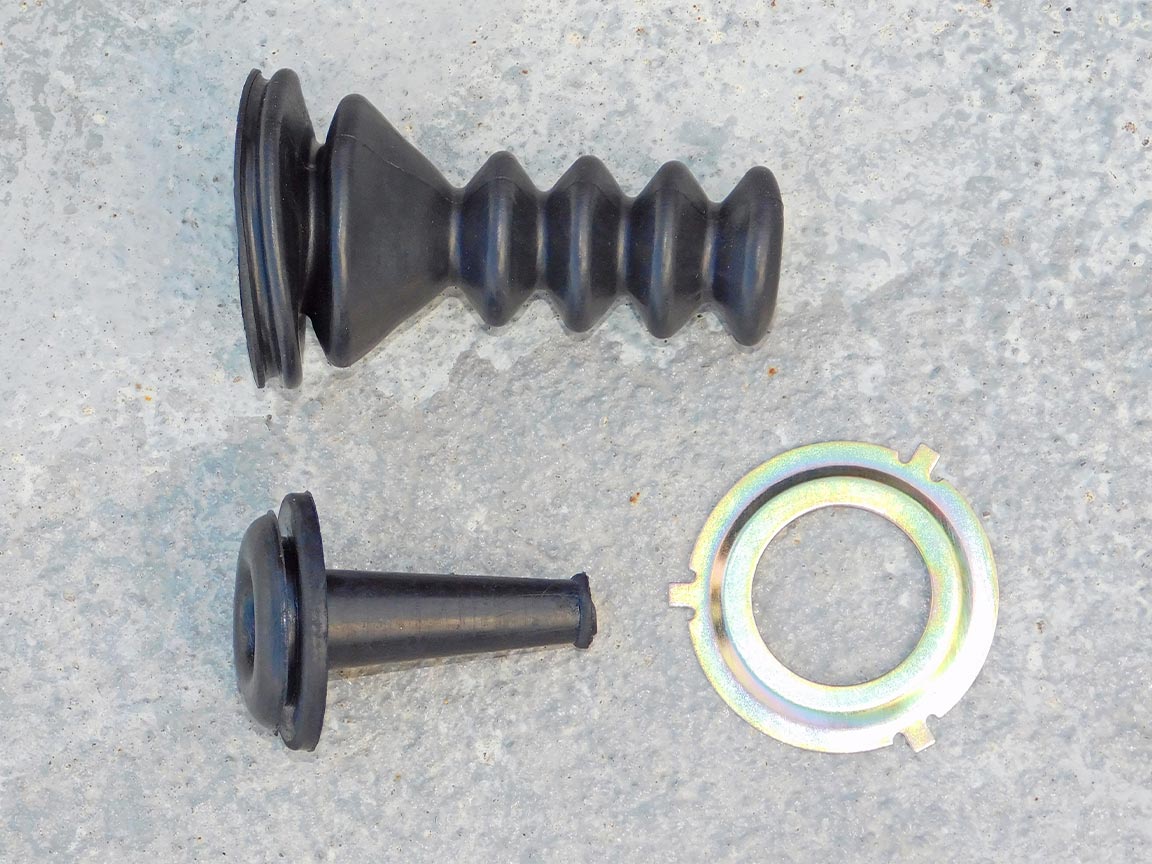
11: An actuator seal kit is available from Zip Corvette, 1968-1982 Headlight Actuator Repair Kit. It is an inexpensive solution. Removal of the actuator is required for seal replacement but it’s an easy procedure.
12: When the vacuum is strong at the relay and the actuators have no leaks, test for vacuum at the small hose at the relay. This hose should have vacuum when the headlight switch is pushed in (lights off) and the over-ride valve (located under the steering column) is in its up position.
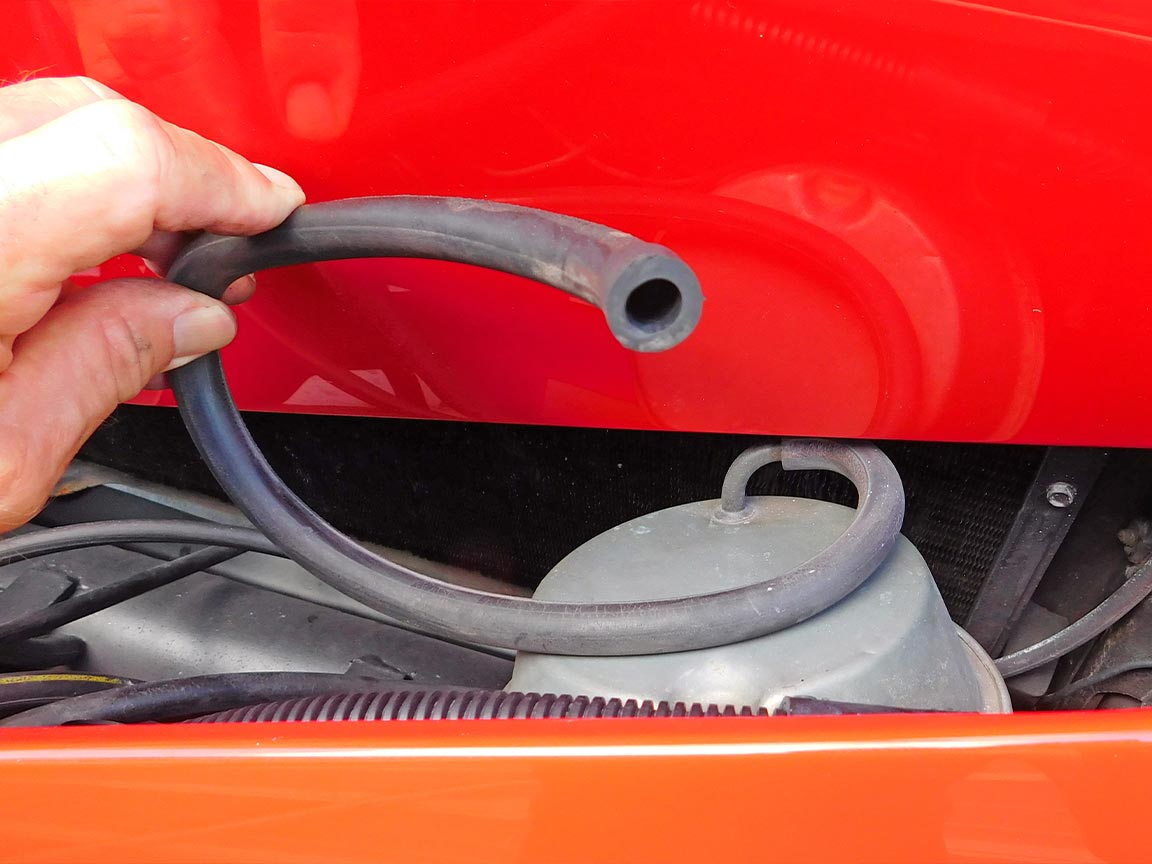
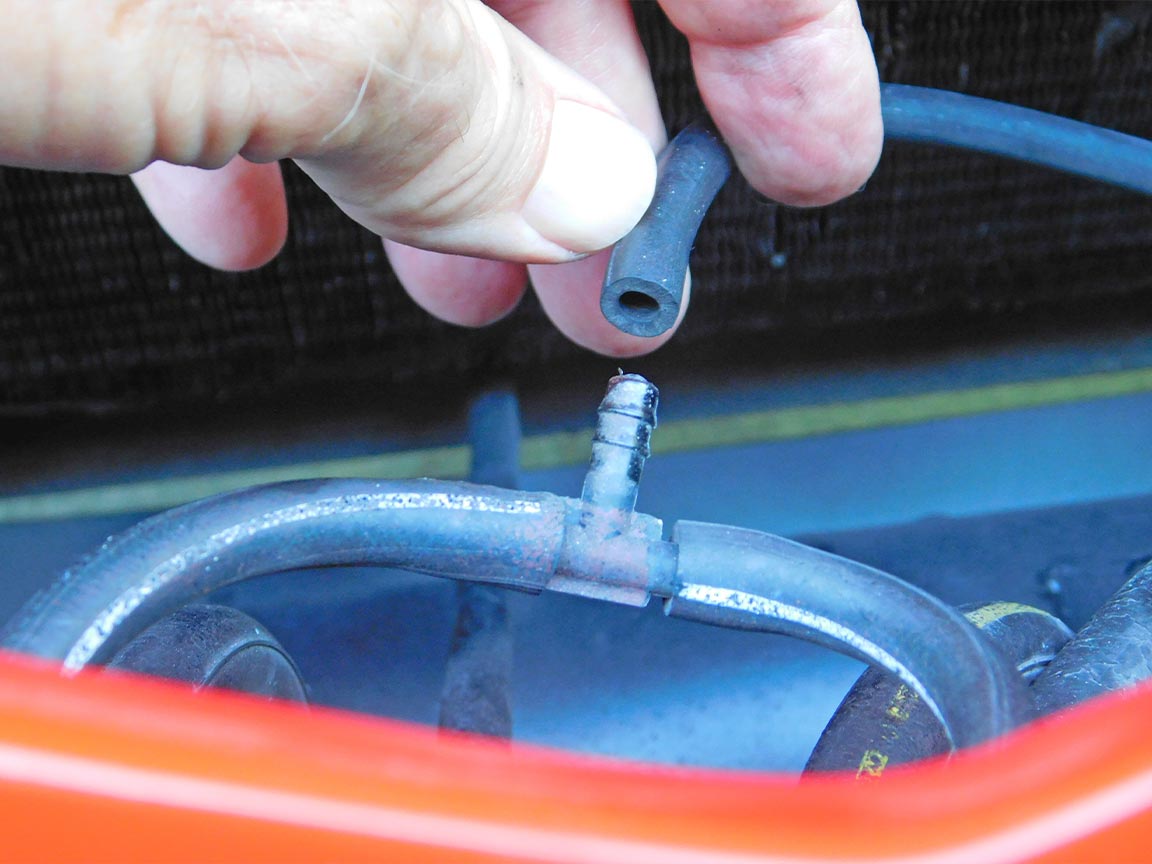
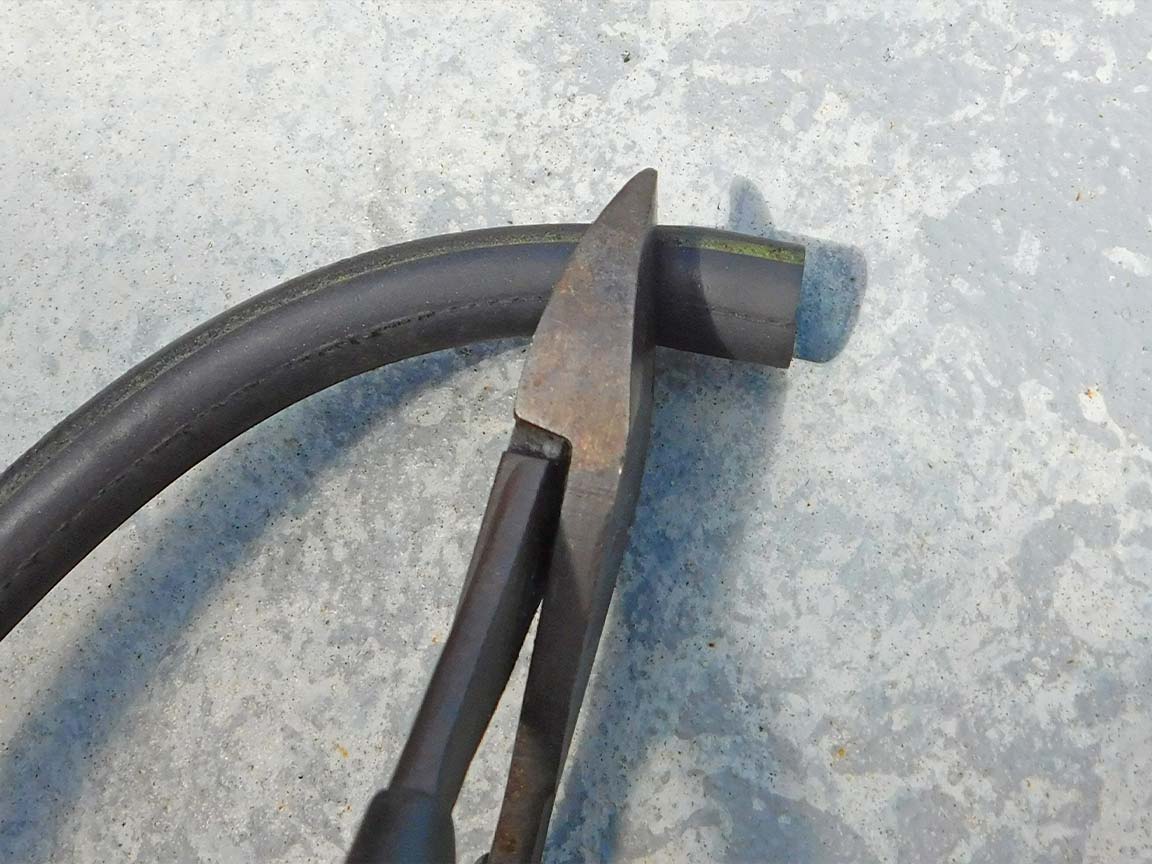
13: The large vacuum hose and the control hose both plug onto a small metal valve that is connected to the intake manifold. There may also be a white disc shaped plastic piece in-line with the valve. This part is often missing and although it had a filter screen inside, it’s not essential.
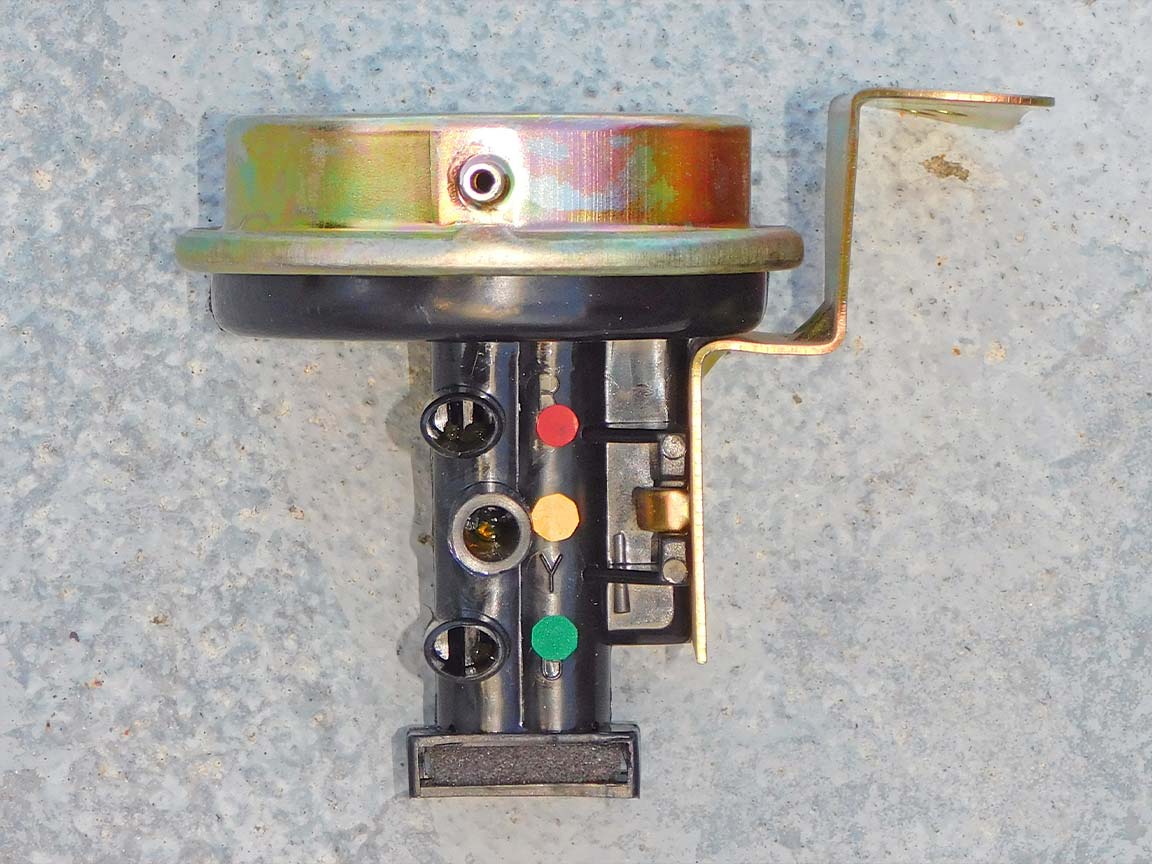
14: The control circuit consists of the vacuum relay, the over-ride valve and the headlight switch. (The wiper door uses a solenoid instead of the headlight switch.)
15: Apply vacuum to the relay’s small hose to test it. If the headlights go down when it has vacuum and the headlights go up when the there is no vacuum, the relay(s) work properly.
16: The original hoses were color coded. The top hose (closest to the control diaphragm) goes to the rear of the actuator. The lower hose goes to the front. Tip: remove the center hose first and install it last; it pushes against the other two hoses.
17: Inspect the hose ends. If they are split or stretched, snip off the end so they fit snuggly and don’t leak. The larger hose is 5/16 inch; the smaller hose is 3/16. Zip offers a complete headlight door vacuum hose kit that includes correct pre-cut vacuum and color striped hoses, 1973-1979 Headlight Vacuum Hose & T Kit that is made in the USA.
Note: You can also download all the Zip vacuum hose diagrams from their website here. Click on product documents under the kit that fits your year Corvette for installation instructions.
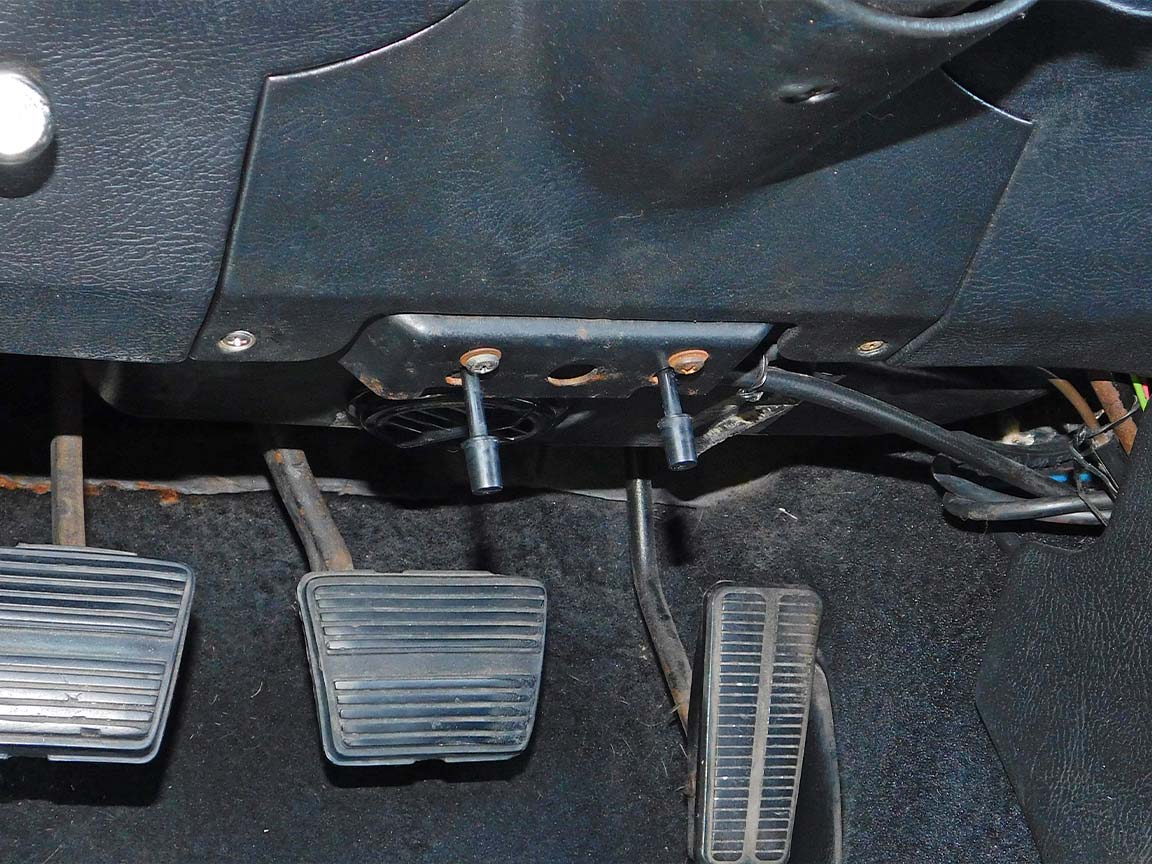
18: The black plastic vacuum over-ride valve is located under the steering column. It can get broken, leak, hiss or become chalky and discolored with age. These are available from Zip Corvette, 1968-1982 Headlight & Wiper Door Vacuum Over-Ride Valve, and are made in the USA.
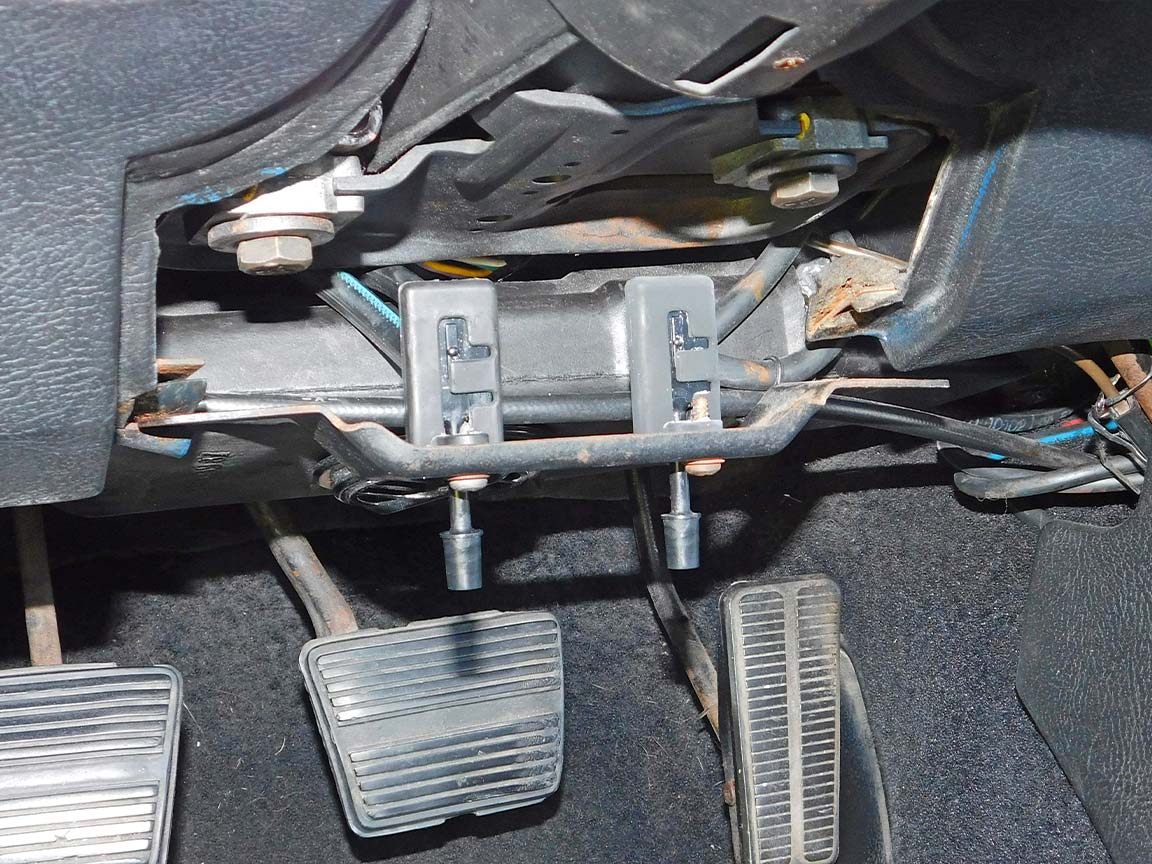
19: Remove the three screws and lower trim piece for access to the valves. Tip: transfer the hoses one at a time from the old valve to the new one. In case they get mixed up, the upper hose goes to the vacuum relay and the lower hose goes to the headlight switch.
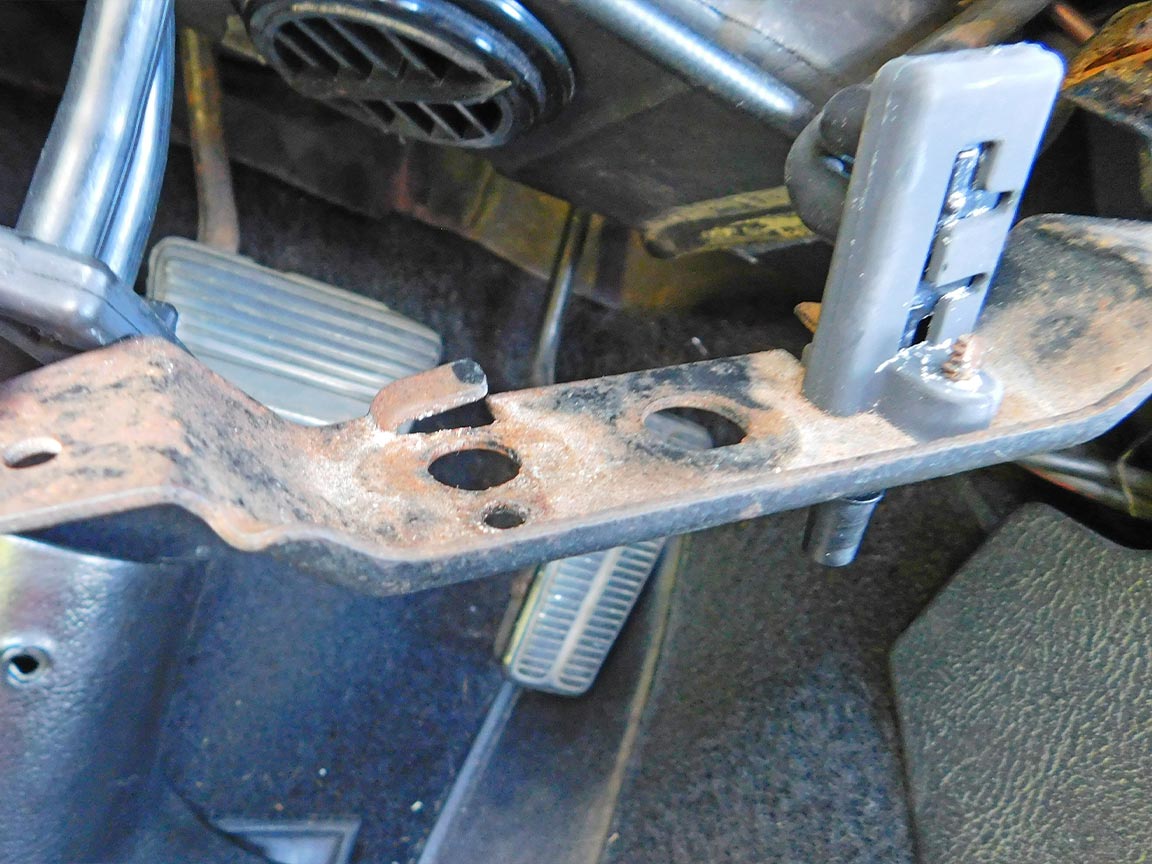
20: A tab is located behind the switch and may not be visible at first. After removing the one valve attachment screw, twist the valve out from under the tab to remove it.
21: Zip Corvette offers covers that slip over the old actuators to brighten up the under hood appearance. Choices include the original zinc dichromate finish shown here, 1968-1982 Headlight Actuator Covers. Hydrocarbon covers, 1968-1982 Headlight Actuator Covers (HydroCarbon), which have a carbon fiber appearance, and chrome covers, 1968-1982 Headlight Actuator Covers (Chrome), are also available.
1968-1982 Corvette Vacuum Headlight Diagnosis and Repair
Source: Zip Corvette Parts
8067 Fast Lane | Mechanicsville, VA 23111 | (800) 962-9632
Corvette Parts List Related to Article:
- 1968-1982 Headlight / 1969-1972 Wiper Door Actuator Vacuum Relay
- 1968-1982 Headlight Actuator Vacuum Relay Screws
- 1968-1982 Headlight Actuator
- 1968-1982 Headlight Actuator Mount Nuts
- 1968-1982 Headlight Actuator Repair Kit
- 1968-1982 Headlight & Wiper Door Vacuum Over-Ride Valve
- 1968-1982 Vacuum System Overhaul Kits
- 1968-1982 Headlight & Windshield Wiper Door Vacuum Hose & T Kits
- 1968-1982 Headlight Actuator Covers
- 1968-1982 Headlight Actuator Covers (HydroCarbon)
- 1968-1982 Headlight Actuator Covers (Chrome)
- Shop & Service Manuals
Related Corvette Technical Articles:
thanks a lot for this explanation
it is the best all over the internet
step by step with photos and a short description
you saved me a lot of time and money
appreciated it
Alex
Thanks a million for the troubleshooting on head lights
Very easy to follow the photos were great