
by John Pfanstiehl
Sooner or later, some parts are likely to have to be removed or replaced. Corvette radiators certainly fall in that category. C3’s are cramped under the hood and this sometimes makes radiator removal a little more involved than on other vehicles of this vintage. This Zip Corvette tech article on C3 radiator removal shows removal steps and tips on the most cramped model: an air conditioned car with the largest radiator. There are fewer steps for radiator removal on other C3s but the majority of steps are the same.
If radiator replacement is necessary, Zip Corvette’s tech article 1968-1982 Corvette Radiator Installation (coming soon) describes and compares the many options. And for those considering switching to electric fans, Zip Corvette has tech article on that, too: 1968-1982 Corvette Electric Fan Installation.
Radiator removal is likely to take only a morning, even if removal of both headlight actuators is needed. The work will take even less time for Corvettes without air conditioning or ones with smaller radiators or smaller fan shrouds.

01: Photograph or otherwise note the hood gaps at the front and rear and corners. Do not skip this step. If you do you run the risk of reinstalling your hood in a different position and fixing it can be difficult. Tip: use a paint stick or Phillips screw driver to measure or show the width of the gaps.

02: Mark the hinge location on hood with tape or scribing. Tip: remove the lower bolt on each side first because it’s easier to remove the top bolt while holding the hood. Remove one of the support bolts, too, for the same reason.

03: Tape a piece of cardboard to the upper surround panel to protect the paint when the hood is removed and reinstalled later.

04: Use an assistant. Have each person hold a front hood corner with one hand and hold the hood up with a shoulder while removing the support bolt. Remove the remaining hood bolt on each side and carry the hood away. Find a safe spot to store the hood and rest it on pieces of rubber or cardboard to prevent chipping the paint.

05: Unbolt and remove the fan shroud upper bracket. Two bolts attach it to the radiator support, and another two bolts go through the fan shroud. The bolts are the same size but note if the washers are different.

06: Unbolt and remove the fan and then unbolt the fan shroud extension. There are three small machine screws on the outside, two on the inside and one on the bottom which is accessed from below. Store the fan clutch vertically after removal.

07: From underneath, remove the nuts that attach the lower corner of the fan shroud to the radiator support. There’s one on each side. Use penetrant and oil if necessary to prevent breaking the stud.

08: Don’t forget to remove the small machine screw that attaches the extension to the fan shroud.

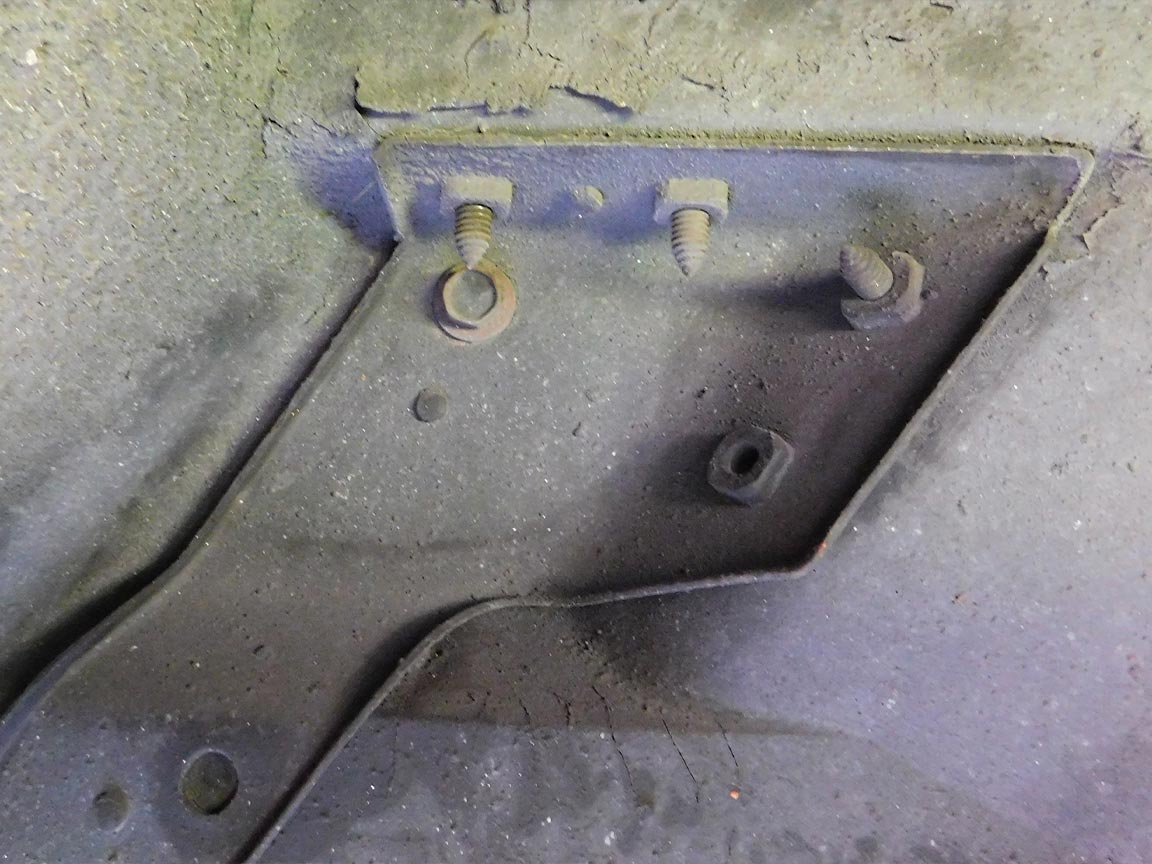
09: Remove the two bolts that attach the bottom of the radiator support. The spoiler easily bends out of the way to use a short 5/8-inch socket and extension. On some cars, these bolts only need to be loosened to enable moving the radiator support sufficiently to remove the radiator.

10: Loosen the support rod nut. Sometimes that is enough to enable moving the radiator support sufficiently to remove the radiator.

11: On this car, it was necessary to unbolt the upper end of the support rod and remove the rod to enable enough radiator support movement for radiator removal.
12: Now that much of the underneath work is done, it’s time to drain the radiator. Remove the drain plug or open the petcock if it has one. Tip: when installing a drain plug or petcock, coat the threads with Teflon tape or anti-seize compound to prevent damaging the radiator tank in a future removal.

13: Tip: to minimize splashing of the coolant, raise the drain pan. If the radiator cap is left on, the coolant will drain more slowly. Some splashing is likely to occur so it’s a good idea to place a lot of newspapers under the front of the car.

14: Cover drain pans that contain coolant if any pets are nearby. The coolant’s main ingredient, ethylene glycol, can poison them. For the same reason, wipe up any spilled coolant as soon as possible.

15: Turn the wheels to access the three side radiator support bolts in the wheel well. Remove the upper and middle bolts which are easily visible here.

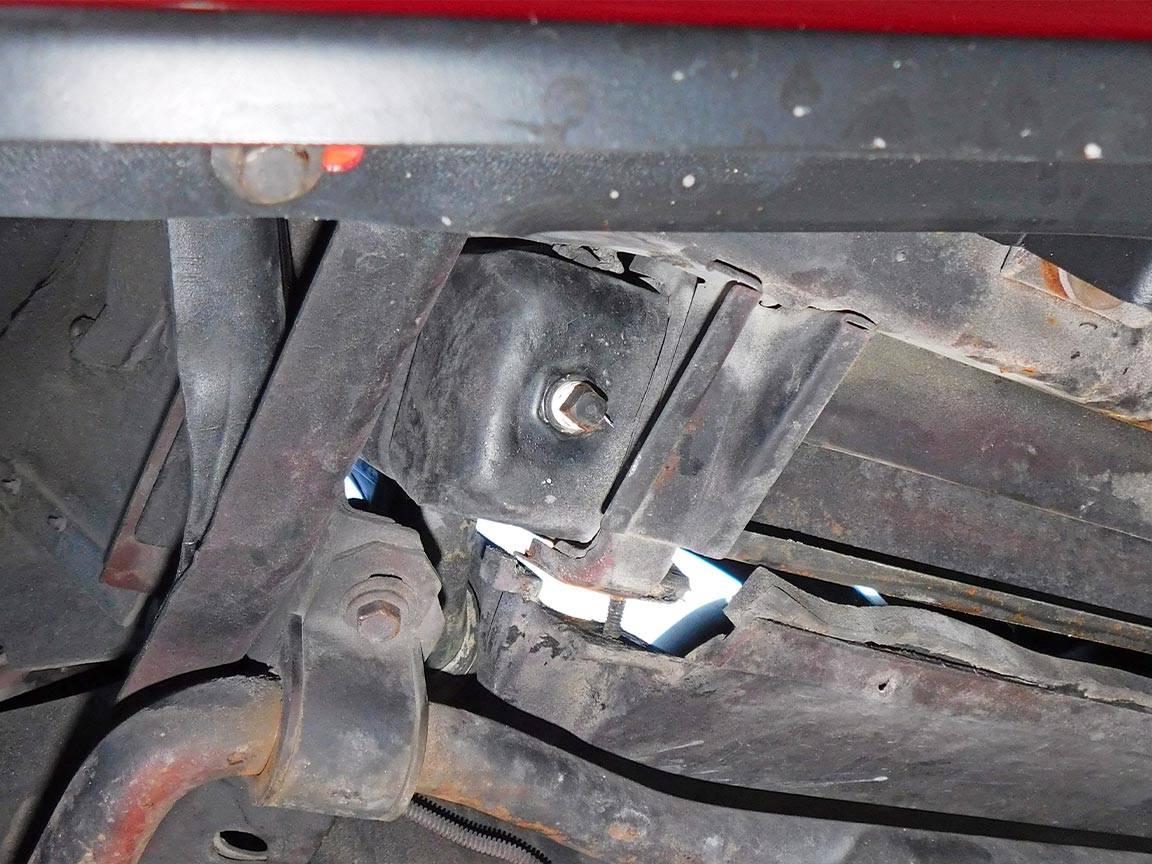
16: The frame extension assembly has a large hole to access the lower bolt. Loosen or remove this bolt. Again, sometimes the radiator support can be moved sufficiently without removing this bolt.
17: The front hinge bolt sometimes has to be backed out a little to get a socket onto the upper radiator support bolt.

18: It is a good time to go back up top and remove the upper radiator hose and the fan shroud extension while the radiator is draining.

19: Remove the two bolts on each side that attach the upper radiator brackets.

20: Pull the fan and shroud away from the radiator support and then remove any old seals that might get in the way when removing the radiator.

21: Don’t forget to remove the small hose that goes to the coolant recovery tank.

22: Now that the radiator is drained, go back below to reinstall the drain plug and to remove the hose clamp from the lower hose. Tip: it is generally easier to use a socket rather than a screwdriver to tighten or untighten hose clamps. Remove the lower hose when back up top.

23: Move the lower corners of the fan shroud rearward and off their studs on the radiator support. It may be necessary to break the shroud loose if it sticks to the old radiator support seal. Zip offers a seal kit for the support and a separate kit for the shroud, or for both together: 73 350 & 454 Radiator Support & Shroud Seal Kit.

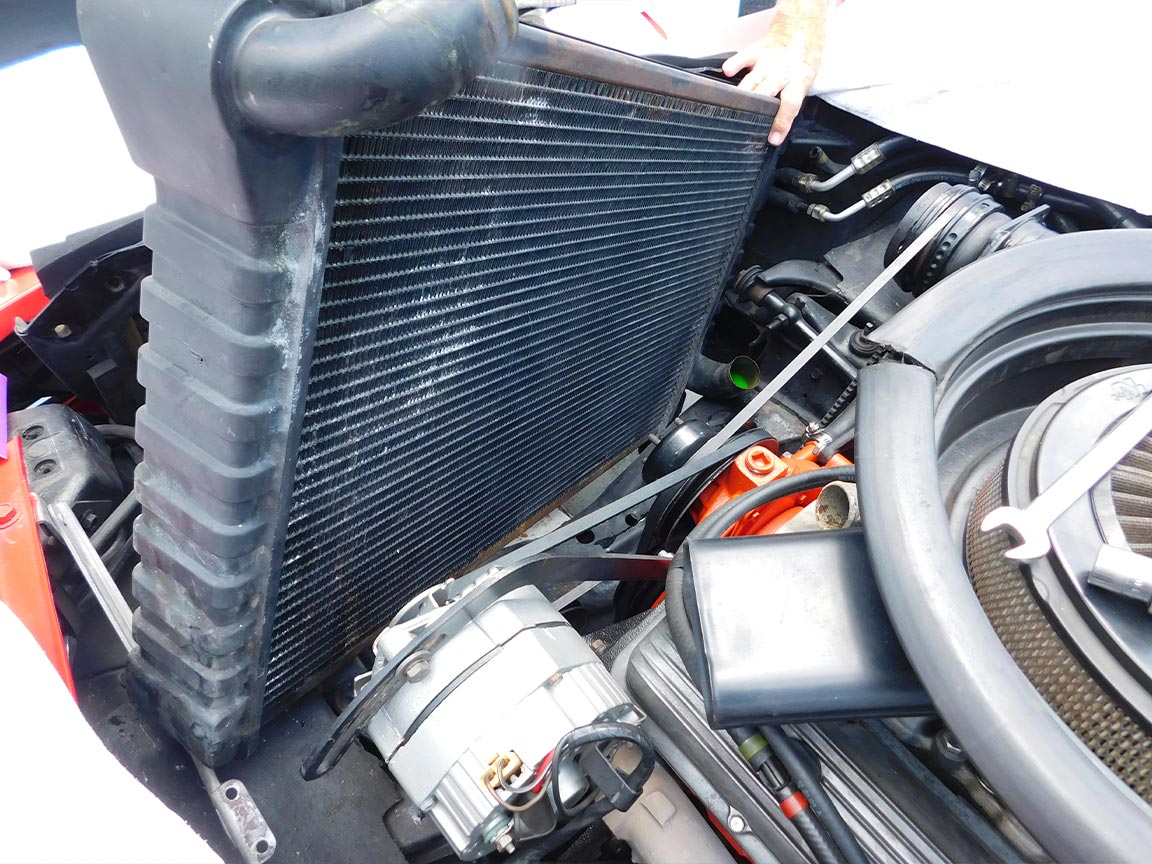
24: Pull the top of the radiator support forward as far as it will go. The condenser limits this movement on cars with air conditioning. Indentations in the condenser fins show where it pressed up against the headlight actuator. Be careful not to puncture the condenser tubes.

25: This shows why the radiator support needs to be moved forward. The fan shroud on this car is still blocked by the upper A-frame bushings. If there is no A/C condenser, the radiator support can be moved further forward and this is often enough to permit removal of the shroud and radiator.

26: If the radiator support needs to be moved further forward, there are two options: disconnect and remove the condenser or remove the headlight actuators. To avoid the need for recharging this R-12 A/C system, the headlight actuators were removed. Actuator removal or replacement is shown in Zip’s tech article 1968-1982 Corvette Headlight Actuator Removal & Seal Replacement.
27: The fan shroud and then the radiator were able to be removed when the radiator support was moved farther forward. On this car, the left side of the radiator was lifted up first so that the lower hose outlet could clear the A-frame.

28: With the radiator removed, debris and rust was evident on the radiator support. Although normally hidden from view, severe rust damage is all too common on this part. New supports are available from Zip Corvette and replacement is easy at this point. On this car the part is 73-76E 350 & 454 Radiator Core Support.

29: Remove the rubber radiator mount cushions 66-68 427 & 69-76E Radiator Bracket Cushion Set to see if there is rust underneath. Fortunately, a little cleaning, scraping and application of a rust preventive coating like POR 15 was all that was needed on this radiator support.

30: Apply a rust preventive coating where needed. Tip: be aware that POR 15 coatings get thinner after application and will drip, hence the cardboard underneath the car. Also, immediately use acetone to wipe off any POR 15 that gets on skin or it will stay there for days.
1968-1982 Corvette Radiator Removal
Source: Zip Corvette Parts
8067 Fast Lane | Mechanicsville, VA 23111 | (800) 962-9632
Corvette Parts List Related to Article:
- 73-76 350 & 454 Aluminum Radiator
- 73-76E 350 & 454 Replacement Radiator
- 73-76E 350 & 454 Radiator Core Support
- 66-68 427 & 69-76E Radiator Bracket Cushion Set
- 66-82 Dewitt’s Direct Fit Radiator Cushion
- 12oz Green Zinc Primer Paint
- 73 Radiator Support Seals
- 73 Radiator Shroud Seals
- 73 350 & 454 Radiator Support & Shroud Seal Kit
- 69-78 Radiator Seal Fastener
- 73 Radiator Support to Hood Air Dam
- Dewitts Radiator Coolant
- Shop/Service Manuals