
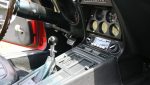
One of the most annoying things that can happen to a 68-82 Corvette owner is to start to roll up your window and find it is going up at a severe angle and will not close. You may also start to roll it up only to have it drop down into the door with a resounding thud or worse, to the sound of breaking glass. These problems can all be attributed to broken window and regulator roller assemblies. There are five nylon rollers that attach to the glass and window regulator and roll in the door and glass run channels. They are what allows the window to roll up and down freely. When they break, the glass has a tendency to roll up at angles or not at all, depending on how many rollers are broken. The repair is not very hard and all of the parts are readily available from Zip Corvette Parts, 8067 Fast Lane, Mechanicsville, VA 23111, (800) 962-9632. Our project 73’s passenger door glass decided to drop down into the door so a call to Zip Products for the needed parts and a few hours was all that we needed to repair the problem. Follow along as we get our door glass back on the right track.
Lead Shot: Is this how you get your door glass into place? The hands on pull up.

01: These are the parts that are needed to repair the roller assemblies. The front and rear glass run rollers, regulator rollers, glass bushings and washers and two anti-rattlers. You will also need some hand tools, a helper and a shop manual for your year Corvette. Zip can also supply one of these if you do not have one.

02: Start by lowering the door glass and removing the door panel. You will need a door handle spring clip removal tool similar to this one to remove the door lock knob. These are available from Zip or some of your local parts houses.

03: Remove the door glass anti-rattlers. There is one in the front and the rear of the door.

04: Now remove the outer weatherstrip seal and moulding. The weatherstrip is held in by small screws at either end and is clipped to the door in the middle. The moulding is held in place by small screws at both ends.

05: The front and rear glass run channel stops are removed now. There are access holes in the door so that they can be removed.

06: The window regulator access cover should now be removed. This will allow you to remove the lower glass channel and regulator.

07: Position the window all the way up to line up the horizontal lower glass channel retaining screws and the access holes in the door. Have your helper hold the glass while you reach up inside of the door and hold the nuts on the back of the horizontal lower glass channel.

08: Adjust the front and rear glass run channel outboard as far as possible. This will allow more room for the glass to be removed. Carefully pull the window upward and out making certain to clear the roller assemblies through the glass opening in the door.

09: Slide the horizontal lower glass channel off of the regulator arm rollers and up and out the rear glass run channel. You may have to move the regulator arms to remove this channel but this is done by moving the regulator up or down whichever is needed. When moving the window regulator be very careful not to have your hands inside of the door anywhere near the regulator arms. If the regulator arms accidently close on your fingers, you will make a very fast and painful trip to the hospital.

10: Now mark the position (Here we drew a circle around each one.) of the regulator channel retaining bolts, then remove them.

11: Position the regulator arms down so that you can remove the regulator out of the access hole. If you have power windows, disconnect the regulator wiring. Remove the regulator retaining bolts and remove the regulator.

12: The glass mounting pads can be removed or installed by using a spanner socket. We used a Snap-On #S-8703. If you cannot obtain one, a pair of needle nose pliers or a pair of large retaining ring pliers will also work.

13. When removing or installing the front glass run channel roller assembly, use a screwdriver to hold the shaft into place while tightening the retaining nut.

14: The regulator roller assemblies are removed by drilling out the peened over area on each roller with a 3/16 drill bit.

15: Have your helper hold the regulator in place. Clamp a 1/4” drift into a vise and place the indented center stud of the roller directly onto the drift shaft. Place the regulator arm over the shouldered shaft of the roller and into the regulator arm hole. Use a punch and hammer to expand the hollow end of the roller stud. NOTE: If the hole in the regulator arm has wallowed out, we suggest using a #10 flat washer over the roller shaft then expanding the roller stud. If you look closely, you can see we had to do that with this regulator.

16: Use a small ball peen hammer and tap the roller stud to fully expand it on the regulator arm.

17: Thoroughly clean the lower glass horizontal channel and the regulator channel. Then coat each one with white lithium grease.

18: Remove the rear glass run channel roller assembly on the lower glass horizontal channel and install the new roller assembly.

19: Here is the way the regulator and roller channel will look when they are assembled.

20: Start the reassembly by installing the regulator first. Note that we have also installed the regulator channel on the regulator arm. This makes re-assembly easier. Bolt the regulator into place and re-connect any wiring. Move the regulator and channel into place and re-install it aligning the bolts and marks that you made during disassembly.

21: The lower glass horizontal channel is now re-installed. Align it onto the regulator arm rollers and slide the rear glass run channel roller into the rear glass run channel. Again, you may have to move the regulator arms to align each roller assembly. With your helper, re-install the glass. Place the front glass run channel roller assembly into the glass run channel and lower the glass down into place. Re-align the lower glass horizontal channel and re-attach it to the glass. Now lower the glass all the way down into the door. Replace the glass run channel stops. Position them in their old alignment marks and snug them into place. Now snug the front and rear glass run channel bolts but do not tighten them.

22: You can now re-install the outer weatherstrip seal and moulding.

23: The window anti-rattles are installed now. They have to be fished through the access holes and put into place. They should rest against the glass with slight pressure. Snug them into place. Do not tighten.

24: Now carefully close the door and roll up the window. It should be parallel with the windshield pillar, resting on the rear pillar weatherstrip and just set into the roofrail weatherstrip. If it does, then roll the window up and down a few times to check it. If it is OK, then tighten all of your bolts. If it does not, then you will have to refer to the shop manual and adjust the window fore and aft, outboard and inboard, until it does. All of your adjustments are made through the regulator roller channel, front and rear glass run channels, glass run roller stops and the anti-rattlers. The trick is to find out what adjustments that you need and to do them one at a time, a little at a time.

25: After all your adjustments are made and everything is re-aligned, re-install the watershield, door panel and trim and be glad that your Corvette’s door glass is back on the right track.
Get Back on Track: 1968-1982 Corvette Window Regulator Roller Rebuild
Source: Zip Corvette Parts
8067 Fast Lane | Mechanicsville, VA 23111 | (800) 962-9632
Corvette Parts List Related to Article:
- 1968-1982 Window Regulator Roller Kit
- 1969-1996 Door Glass Window Anti-Rattle Bumper
- 1968-1982 Door Glass Channel Roller & Slider
- 1968-1982 Door Glass Front Roller
- 1968-1982 Door Glass Bushing
- 1969-1982 Door Window Glass Flat Nut
- 1969-1977 Window Track & Glass Mount Kit
- 1978-1982 Window Track & Glass Mount Kit
- Corvette Shop/Repair Manuals


Is a tutorial available on replacing ‘window regulator counter spring. My 75 vette driver side is broken and drops a bit while lowering window
Hi James,
Unfortunately we do not have an article on this but we do recommend picking up an assembly or shop service manual here if you plan on doing any work on your Corvette