Have you ever pressed your windshield washer button, heard the washer pump engage but the washers didn’t work? You check to make sure the reservoir is full, the lines are all connected and not broken and the nozzles are clear but still no washer fluid is pumped through the nozzles. The problem is usually the washer pump nozzle valve.This is the valve that is attached to the washer pump. This valve receives the water from the reservoir and then the pump forces the water out through the nozzle valves. The rubber diaphragms in the valve usually dry up causing the valve assembly not to operate. As with any project, you will need the right Corvette parts and Zip Corvette Parts, 8067 Fast Lane, Mechanicsville, VA 23111, 800-962-9632, will be able to supply all of your needs. You can usually repair this problem inside of 2 hours and for approximately $13 or less. This valve package fits 1963-1974 Corvettes plus some of the earlier and later Corvettes. Follow along as we repair our Corvette’s washer valve on our project 64 Corvette and see just how simple it is to make your washers work like new again.

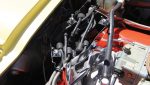
01: Here is our Corvette wiper motor with all of the items included with the WW-206 Washer Pump Valve Kit. We removed our wiper motor from the car so that we could show the repair more clearly.You do not have to remove the wiper motor for this repair. Consult your Corvette shop manual to see how to remove your particular wiper motor washer assembly.

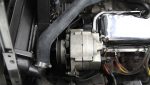
02: Remove your washer pump assembly. Now is a good time to check the washer pump gears and also clean and lube them.

03: Remove the washer pump nozzle valve assembly.

04: After you have removed the nozzle assembly, check the washer pump diaphragm. If it is cracked or torn, you will have to replace it before you go on.

05: Here you can see the old nozzle valve assembly on the left and the new one on the right. The one difference is that one is light colored and the new one is black. Zip’s new reproduction washer pump valves are white plastic and will ensure your Corvette maintains its original appearance.

06: Choose the nozzle assembly that is the same diameter, and direction as your original. Two different ones are included with each valve package to accommodate the two different hose sizes.

07: Install the o-rings on the valve assembly. Then match the nozzle up to the valve assembly.

08: Install the new washer pump valve assembly and nozzle onto the washer pump. Then install the pump back onto the motor.

09: Here it is assembled with the new valve package. Notice the difference between the old and new nozzles. As you can see, it will not make any difference in the installation. When you are ready to try your washer, it is a good idea to prime the valve and pump assembly first. Do this by forcing water through the reservoir hose into the reservoir side of the new valve assembly. This way your Corvette’s washer pump will not be trying to pump the diaphragm while it is dry.
Washer Pump: How to Replace the 1963-1974 Corvette Washer Pump Valve Repair
Source:
The Author would like to thank Richard Gaudio of Greg Donahue Collector Car Restorations, Inc. for his assistance with this article.
Zip Corvette Parts
8067 Fast Lane | Mechanicsville, VA 23111 | (800) 962-9632
Corvette Parts List Related to Article: