
by John Pfanstiehl
Brake pads are wearing components that most Corvette owners will consider replacing at some time. Fortunately, compared to the other major wearing components, replacing brake pads is a relatively painless task. Pads are less expensive than tires for example and take much less time to replace than a clutch. Not only are brake pads easier to replace or upgrade but many options are readily available at Zip Corvette for very reasonable prices.
On this Corvette, the pads are not being replacing because they are worn. The ceramic performance pads the owner installed squealed so loudly when cold that people would turn around to see what clunker was making so much noise. Plus, they dirtied the wheels with dark brake dust in less than forty miles and stopping power was not as good in normal driving. Perhaps they would have performed better under racing conditions.
Let’s look at how easy it is to change brake pads. The four-piston caliper system shown here was used on 1965 to 1982 Corvettes but much of the pad replacement procedure is the same on all years.

01: Remove the master cylinder cover and remove some of the brake fluid to lower the level an inch or so from the top. Remove even more fluid if the old pads are worn much thinner than the new pads. Installing new thicker pads pushes the caliper pistons back into the caliper and that pushes fluid back into the master cylinder.

02: An inexpensive baster works well for this, but a spoon or small cup will do. Warning: Be very careful to not drip any brake fluid onto painted surfaces. Most types of brake fluids will damage fragile paints, especially lacquer. Reinstall the cover. If the brake fluid is cloudy or old, consider flushing the system with new fluid. Learn more about brake flushing and bleeding here: Corvette Brake Bleeding

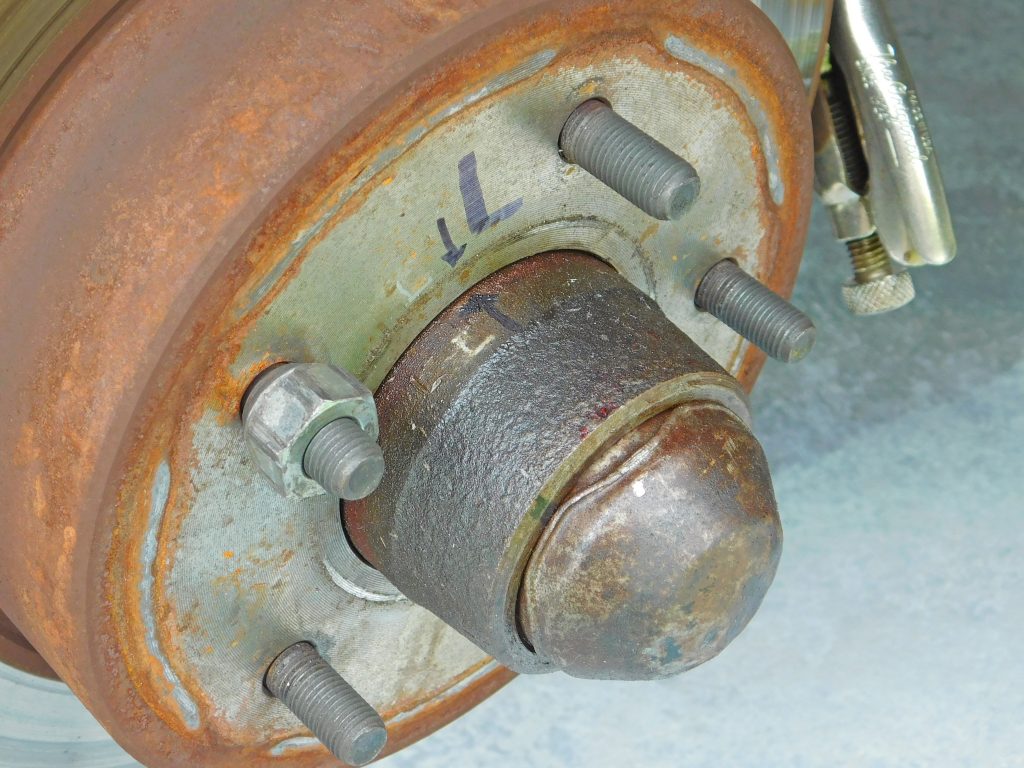
03: Remove the wheel. Brake pads can be replaced on just one wheel at a time. After removing the wheel, turn the steering wheel all the way to make brake inspection and access easier. If the rotor is no longer riveted to the hub, reinstall and tighten three or more lug nuts to hold it square to the hub.

04: Inspect the clearance between the caliper and the brake pad’s steel packing plate. If the clearance is not equal on both pads, the caliper mounting bracket is bent. A bent bracket is rare but is more likely on the rear calipers because the factory rear wheel bearing press can bend that bracket.

05: Inspect the rotor’s surface. Shallow radial grooves are not a problem — it may just take a few more miles for the pads to fully seat. I strongly advised against turning C2 and C3 rotors, particularly the original rotors, because turning original rotors can significantly increase rotor runout. The early Corvette rotors can be good for more than 200,000 miles, especially when organic pads are used.

06: Use pliers, a large screwdriver or similar tool to push the pads away from the rotor until the backing plate is completely against the caliper. Make sure the tool doesn’t scratch or gouge the rotor surface. Remove the brake caliper pad mount pin and pads.

07: Zip’s brake pad installation tool is inserted between the pad and pistons to make holding the pistons inside the caliper easy while the old pad is removed and the new pad is installed. Alternately, the rubber brake hose can be gently pinched with locking pliers to hold the pistons in.

08: Inspect each caliper piston and seal for any sign of dampness or leakage. If this area is wet, rebuild or replace the leaky caliper very soon. Zip has plenty of New and Rebuilt Brake Calipers that will help in this case. You can also learn how to rebuild you calipers here: 1965-1982 Brake Caliper Rebuild and Replacement

09: Zip’s 1965-82 Brake Pad Anti-Squeak Shims can be installed between each end of the pad and the caliper. Also a very small amount of brake grease can be applied to the surface of the steel backing plate that contacts the caliper. If any grease, oil, or fingerprints get onto the pad or rotor contact surfaces, remove them with brake cleaner or sandpaper.

10: Optional: Use a file or sandpaper to break the edge and chamfer the front and rear ends of the pad. This is often done by installers to reduce the chance of brake noise. Some performance brake pads are designed with a wide chamfer.

11: Insert the new pads, brake pad center pin and cotter. All that’s left is reinstalling the wheels and topping off the level of brake fluid in the master cylinder.

12: It is unlikely to be a problem but check to make sure there is clearance between the new brake pad backing plate and the caliper. The clearances don’t have to be perfectly equal but if there is no clearance, the brakes will overheat and strand the car on the side of the road until they cool down.

13: Refill the master cylinder with brake fluid. Zip offers a new master cylinder cap (cover) and rubber seal that brightens up the engine compartment. Reinstall the wheel. Make sure the brake pedal feels good before moving the car. Avoid hard breaking for the first 50 miles or so to help the new pads properly seat.
Tip: Re-torque aluminum wheels after 50 to 100 miles.
Optional Things to Do When Installing Brake Pads

a. To remove the rotor or hub, it’s necessary to unbolt the caliper and lift it off the rotor. To prevent strain on the rubber brake hose, hang the caliper on the sway bar link or wire it to the frame.
b. If the rotor is not riveted to the hub, mark their relative alignment before removing the rotor. Misaligning original rotors and hubs can increase rotor runout. Excessive rotor wobble can result in loss of braking when air is pumped into the caliper by the original style piston seals.
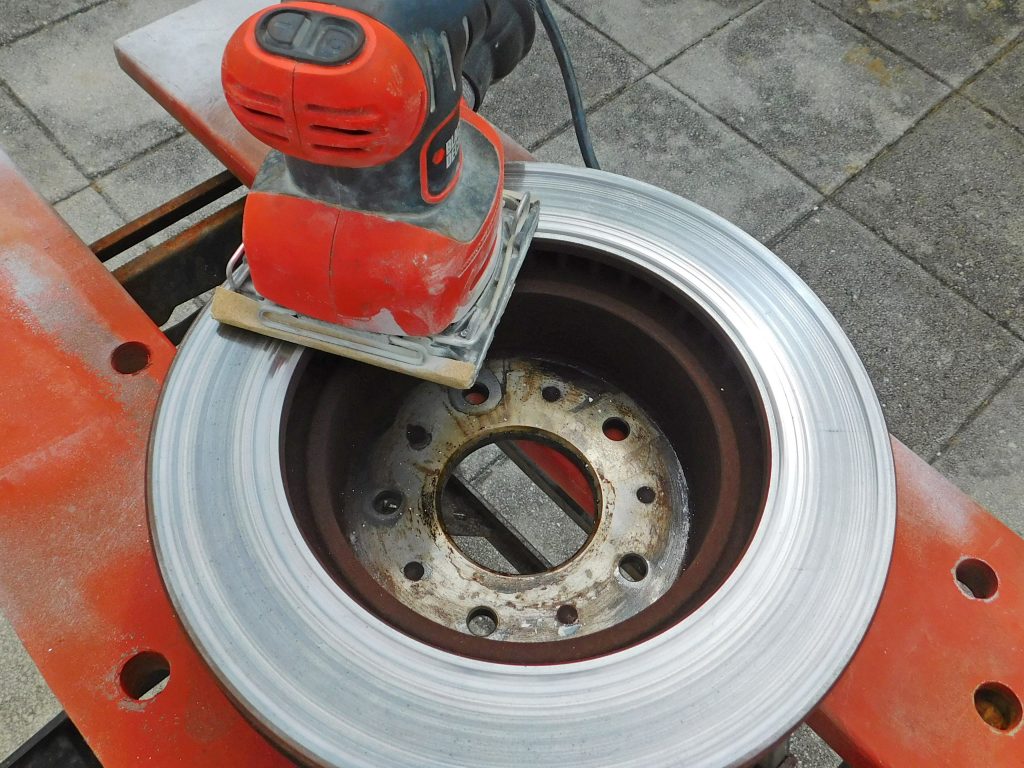
c. Some brake pad manufacturers recommend sanding the rotor surface to remove any glaze or embedded material left by the old pad. This is quickly and easily done with an orbit sander or by hand.

d. At this stage, it’s easy to remove the hub to inspect and repack the wheel bearings. Although good quality wheel bearings can last well over of 100,000 miles, it’s worthwhile to inspect and repack them when convenient.
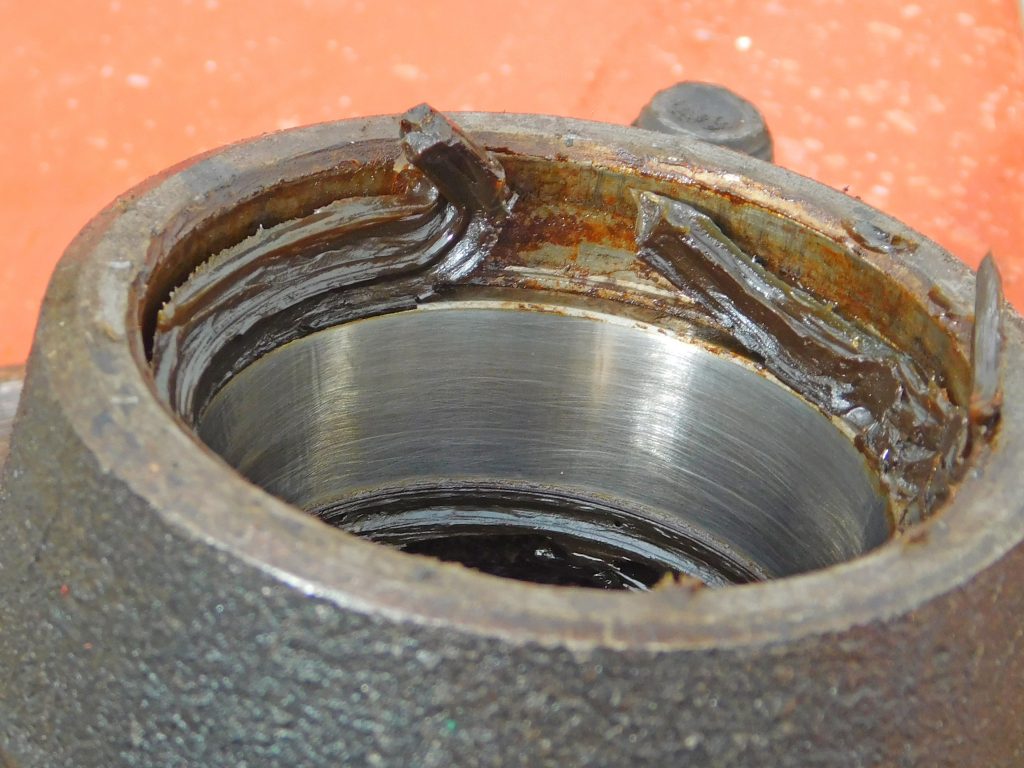
e. Before repacking, wipe the grease off the bearing race and rollers to inspect for wear or damage. Fine cross hatch hone marks may be visible but replace the bearings if there are any grooves, indentations, corrosion or pitting (brinelling, spalling or fretting in bearing lingo).
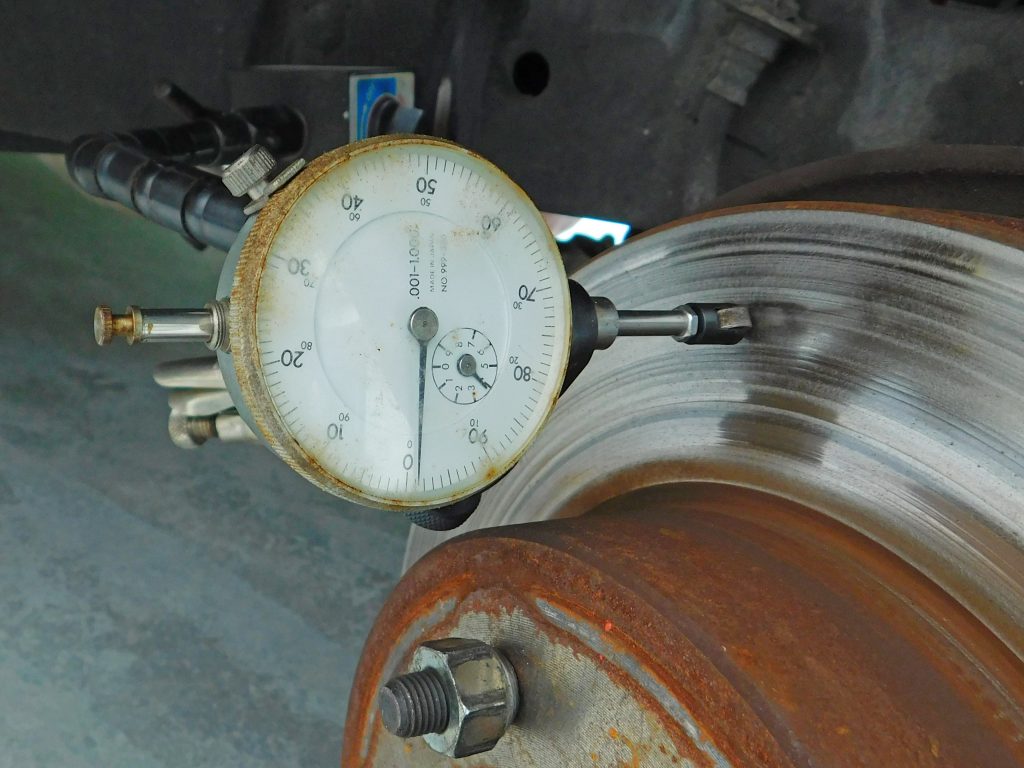
f. If a dial indicator is available, it’s a good idea to check the rotor runout. Runout should be less than 0.003 inch to prevent air pumping by the original seals. Newer o-ring seals are more forgiving of rotor runout.
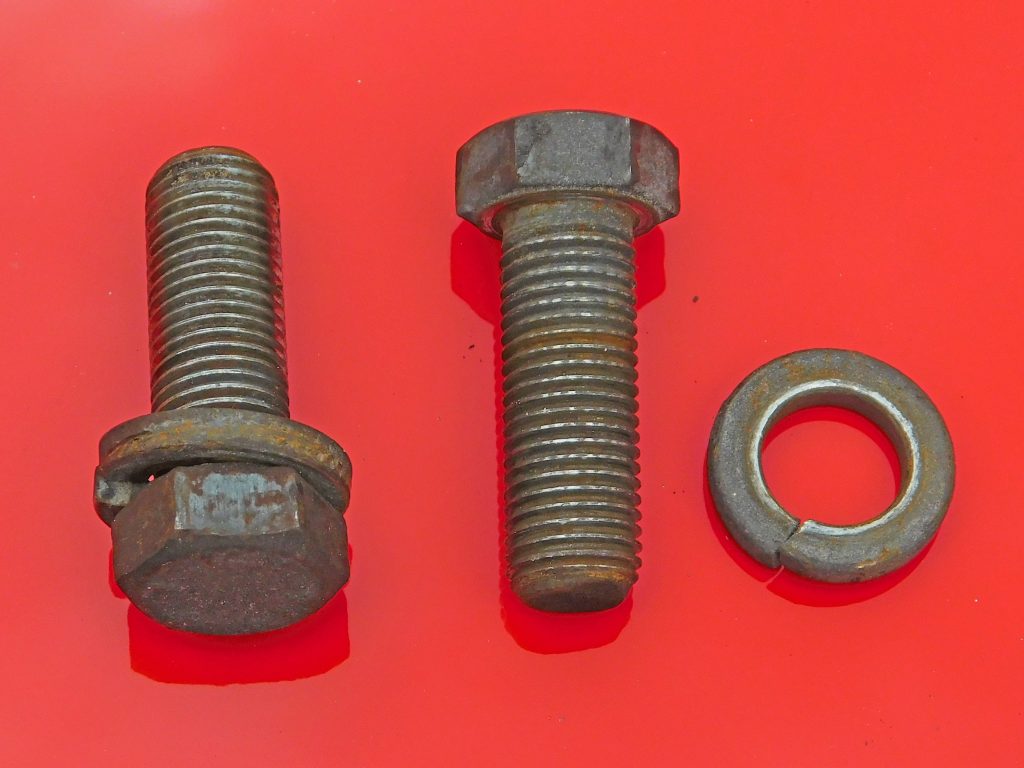
g. The front caliper bolts are threaded nearly to the head. Rear caliper bolts look similar but have an unthreaded shoulder near the head. Make sure to use the correct bolts on the front and rear. Both are grade 8 and use relatively thick washers.
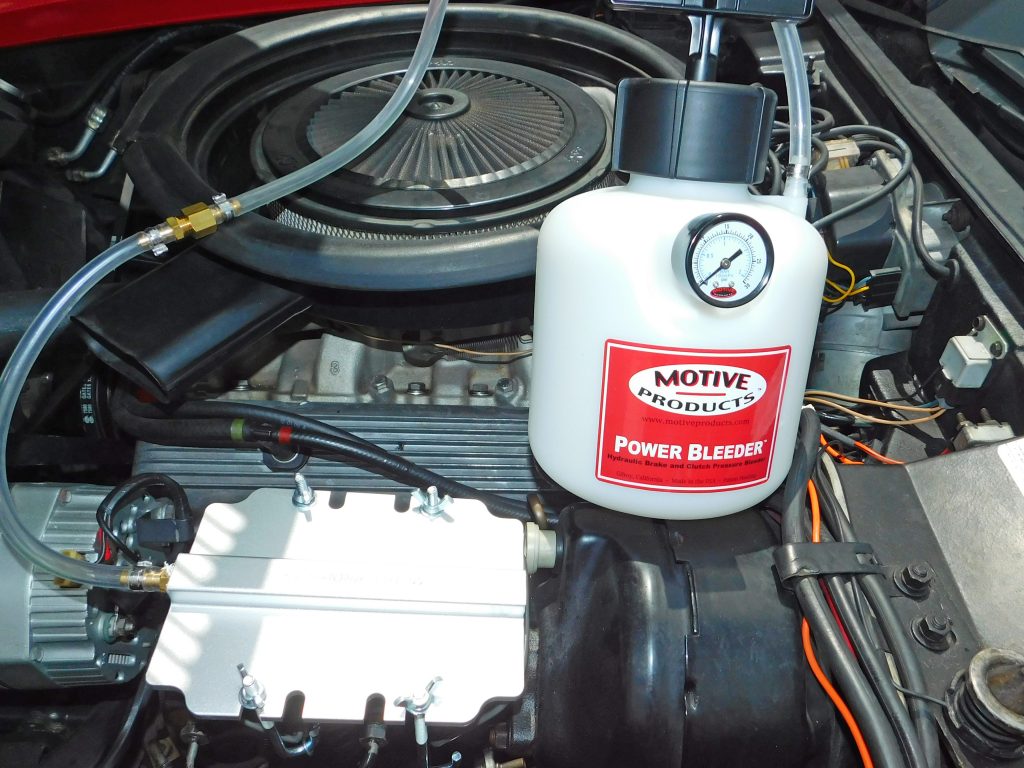
h. If the brake fluid is cloudy or old, consider flushing the system with new fluid. Zip offers quarts of DOT 3 brake fluid and Motive Manual Power Bleeders to make the job faster and easier.
1965-1982 Corvette Brake Pad Installation
Source: Zip Corvette Parts
8067 Fast Lane | Mechanicsville, VA 23111 | (800) 962-9632
Corvette Parts List Related to Article:
- 1965-1982 Brake Pads
- 1965-1982 Brake Caliper Pad Mount Pin
- 1965-1982 New & Rebuilt Brake Calipers
- 1965-1982 Caliper Mount Brackets
- 1965-1982 Brake Pad Anti-Squeak Shims
- 1965-1982 Brake Caliper Pad Installation Tool
- 1965-1982 Master Cylinder Cap & Gasket
- DOT 3 Brake Fluid
- 1965-1982 Caliper Mount Bolt & Washer Kit
- Motive Brake Bleeding
- Shop/Repair Manuals
Thanks so much for this article! Unfortunately, I found it 2 days after changing out my front passenger side caliper, but I still found some helpful tips. I discovered both my rear calipers leaking upon inspection and I enjoyed this read. I’ll use your tips when I do the other calipers. I’m replacing a window motor as well, do you have any advice? I have grounding issues and vacuum problems too. Eh, it’s an old car. 1980. But I love it!
Hi Tyrone,
This article should help you in your window motor replacement:
some lip seals or other seals are prone to developing an air leak if not used for several months..which are those? Will periodically starting the engine and applying brakes be a good idea?
Hi Nico,
Lip seals are prone to leaking if the Corvette sits for long period. Upgrading to O-ring seals is a worry free way to help protect against this.
You can read about this conversion process here: