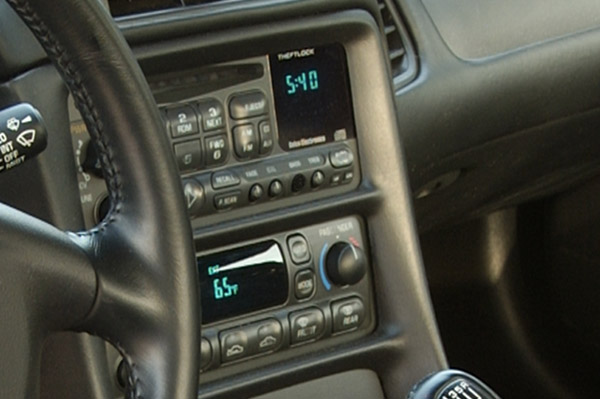
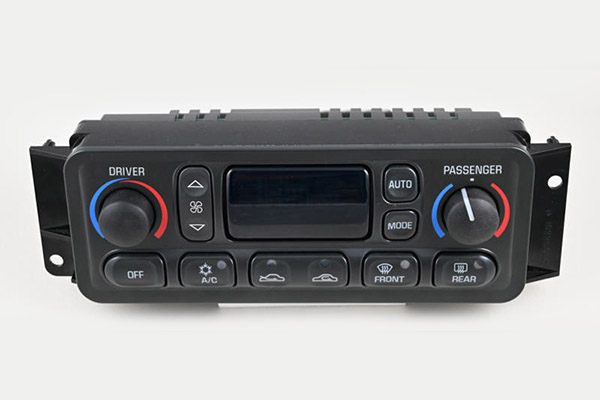
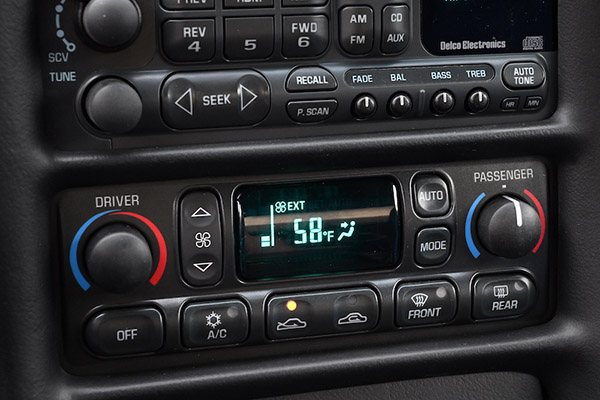
Corvette engineers call it the “center stack”. In your C5, that’s where the heating, ventilation, and air conditioning (HVAC or “aych-vak” as engineers say) control panel is located. Is the HVAC faceplate scratched and nicked? Are the markings on the buttons worn away? Are some of the buttons damaged? Are knobs worn or missing?
So–what to do about it?
Finding a good, used HVAC controller is difficult if not impossible. As for a new faceplate, buttons, knobs, or a complete, new controller from GM? That’s so not-gonna-happen because GM Parts service for C5 HVAC units has been discontinued.
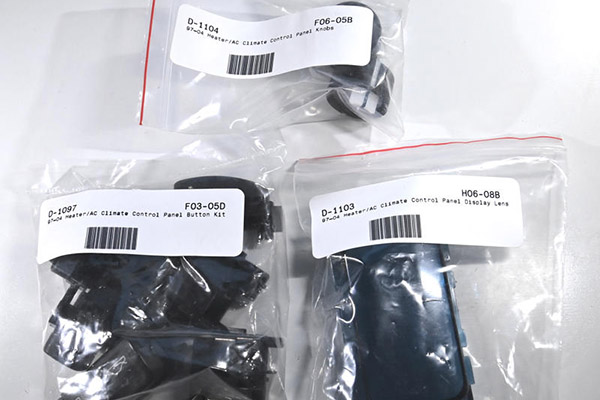
You can refurbish the controls of your C5 Corvette’s HVAC panel with either replacement of a single button, both knobs, a complete button/knob kit or buttons, knobs and faceplate. Zip Products’ 1997-2004 HVAC restoration parts are ideal for returning your Corvette’s center stack to factory condition.
Here are some examples of some of the HVAC control panel restoration parts.
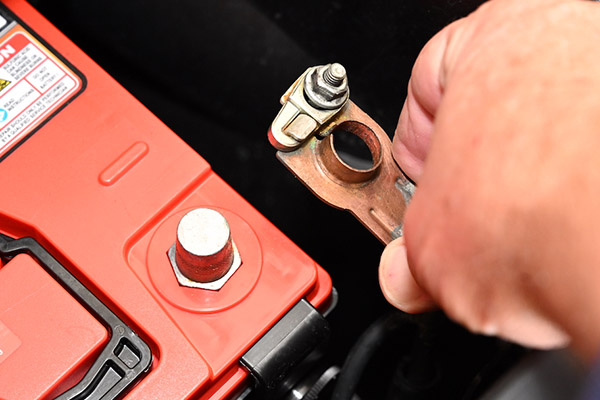
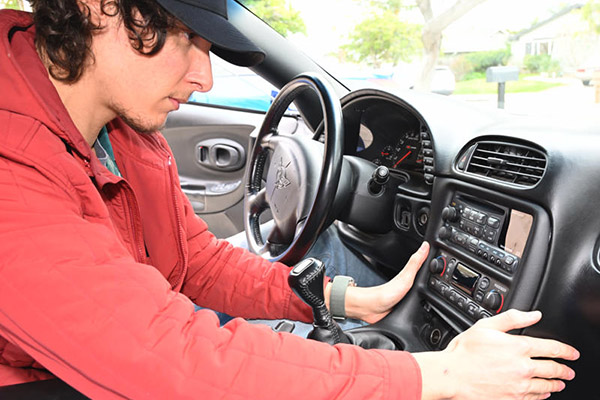
Park the car somewhere where you can fully open the driver's door. Disconnect the negative battery cable.
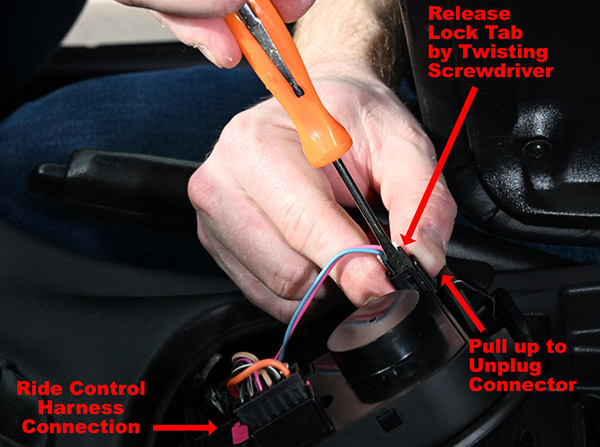
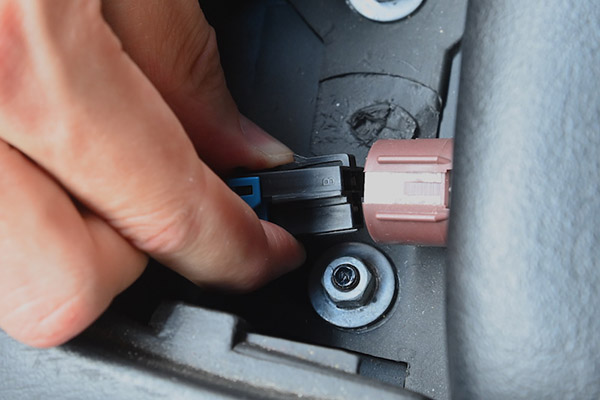
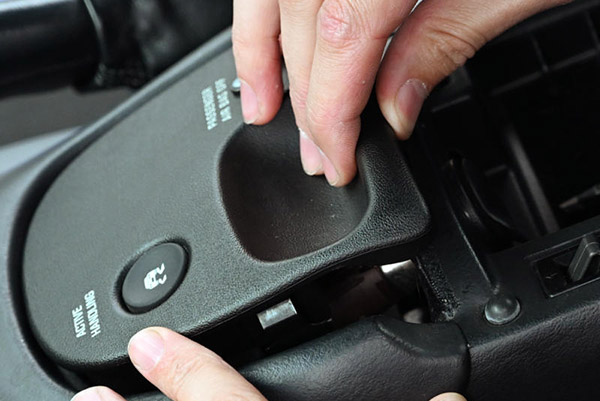
Open the console door, remove everything, put it all in a box then store the box in the cargo area or trunk. Next, remove the traction control/ride control panel by pulling up the rear of that panel to release its retainers. lift it off the Accessory Panel Trim Plate, then turn it over and disconnect the ride/traction control switch harness connector.
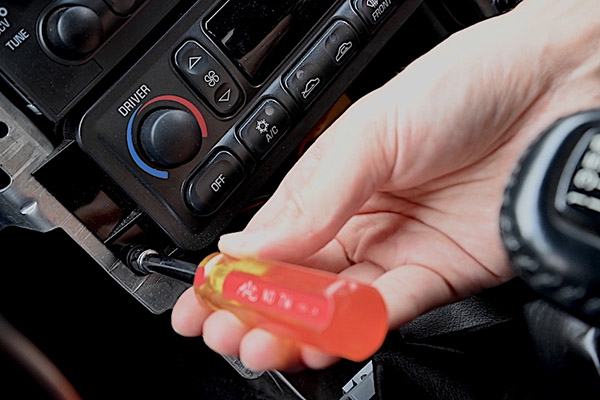
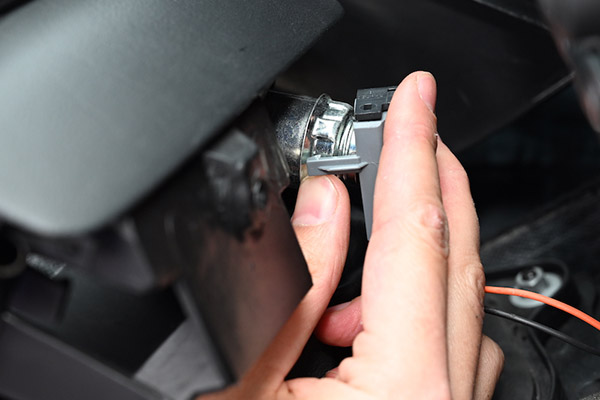
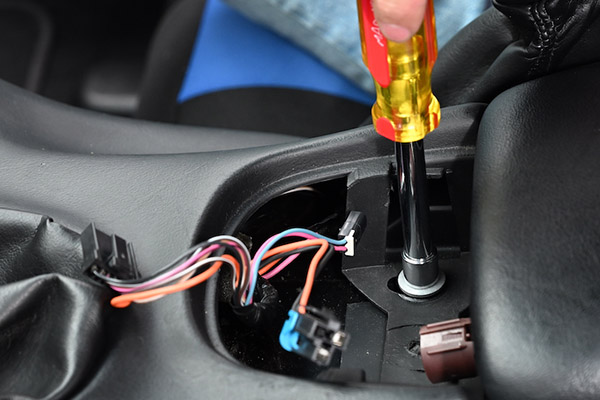
The LED Light connecter is difficult to remove. Lay the panel over the space in the Trim Plate with the ride control connection closest to the driver. Use a small screwdriver to release the connector locking tab. While the lock tab is retracted, use your second hand to pull the connector out of the panel. It fits tightly, so grip it firmly. Set the ride and traction control panel aside.
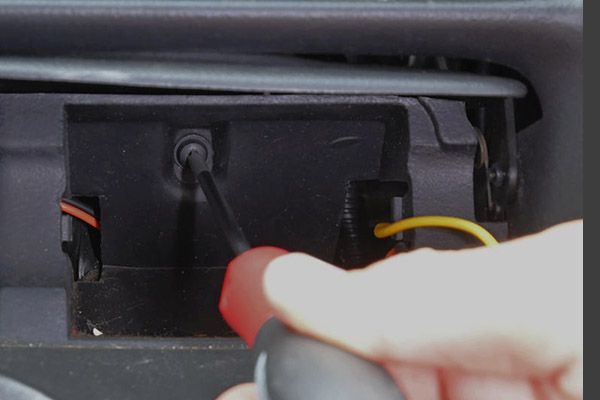
Disconnect the wiring to the accessory socket inside that's inside the console.
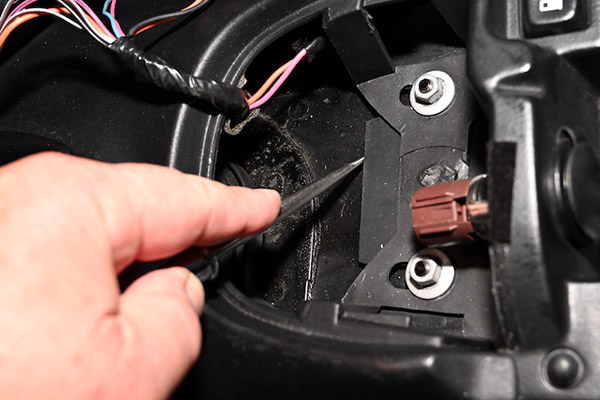
There are four 10-mm nuts holding the console, two at the rear and two at the front. The two front nuts are in the space under the ride control panel. Mark the position of the front of the console mounting flange on the rear mounting flange of the Accessory Trim Plate. We used an awl for that, but anything that will make a visible mark on black plastic works. That mark, along with witness marks the washers under front nuts leave on the console's front mounting flange will insure that both the Accessory Trim Plate and the Console are returned to the exact positions they were in prior to removal.
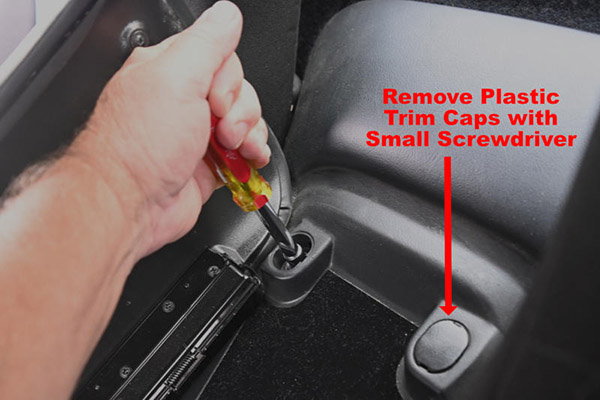
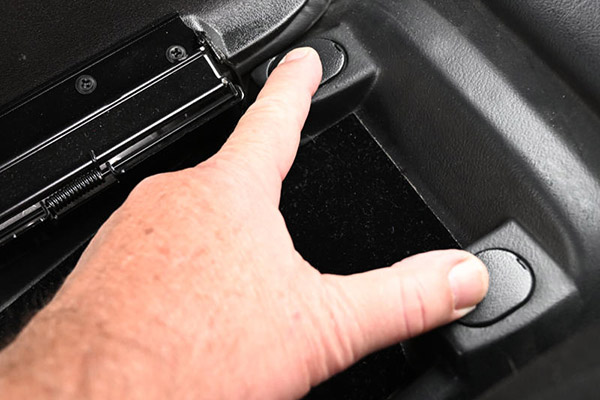
The two rear nuts are beneath two plastic trim pieces at the rear of the console box. Carefully remove the two trim pieces with a small, flat-blade screwdriver. Then, remove all four nuts holding the console to the torque tube tunnel.
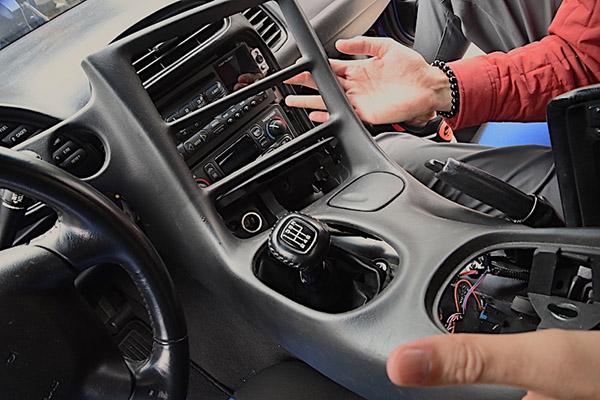
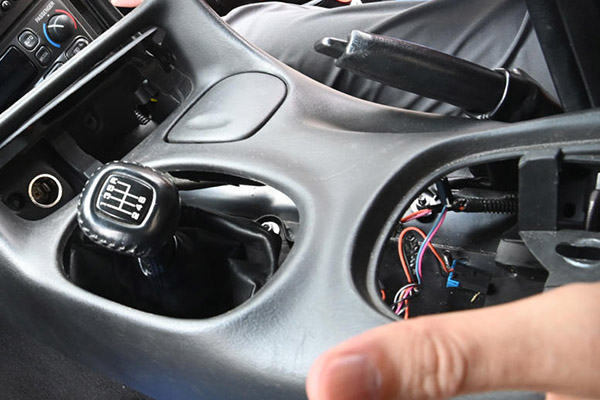
Pull the parking brake lever up to gain clearance between it and the Accessory Panel Trim Plate. Pull the console rearward far enough so the front edge of the console clears the rear corners of the Accessory Trim Plate. Typically the console needs to move back about an inch and a half.
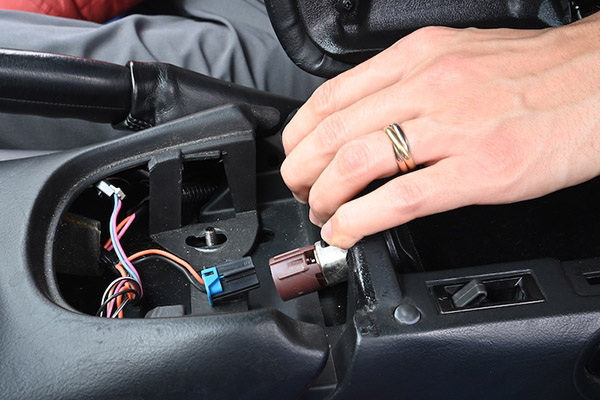
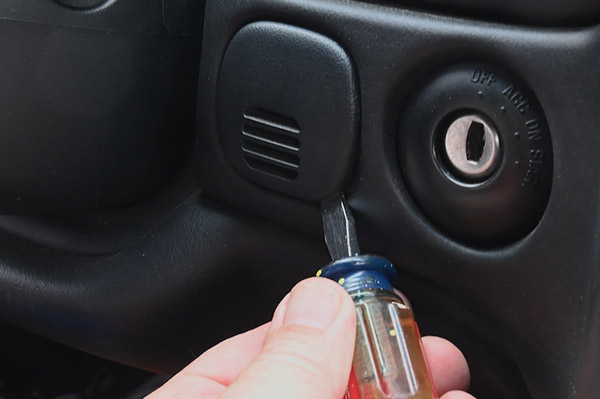
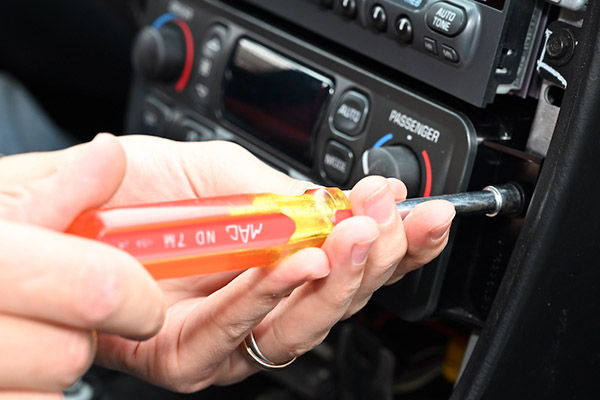
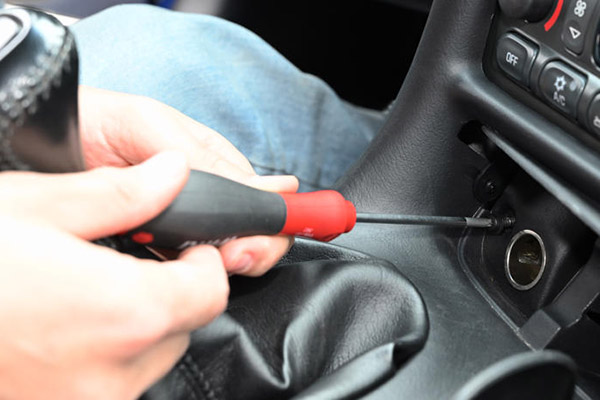
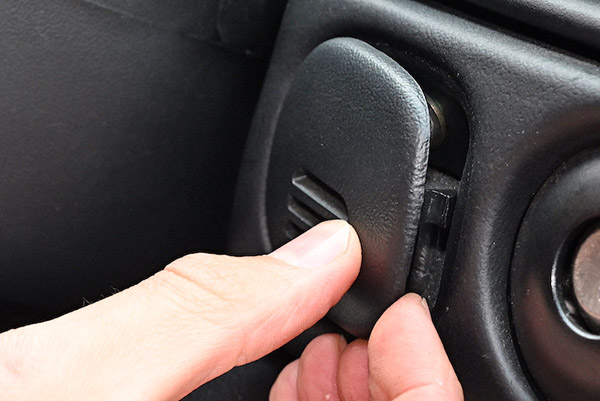
Using a short, flat-blade screwdriver, carefully remove the plastic grille to the left of the ignition switch, then remove the 7-mm screw behind it that holds the left end of the Accessory Trim Plate in place on the dashboard.
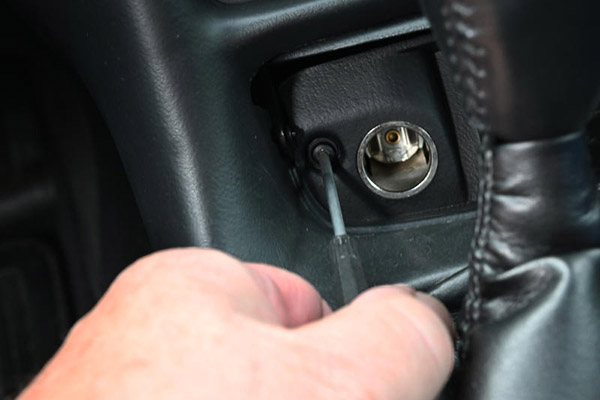
Remove the ashtray. Then, remove two Accessory Trim Plate T5 Torx screws, one next to the accessory socket and another on the ashtray mount.
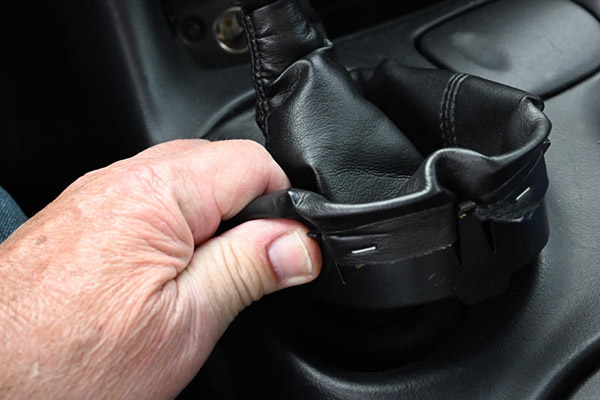
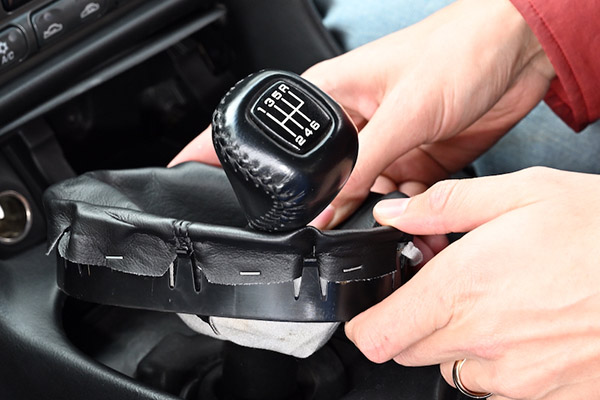
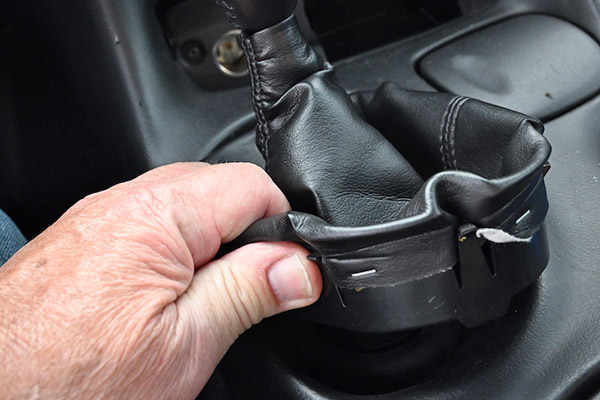
If the car has an automatic trans, select second gear. If the car has a manual trans, put the shifter in fourth gear. Push the edges of the shift boot retainer inward to free its locking tangs from the Accessory Trim. Lift it up, rotate it slightly then tilt it. Leave it in that position.
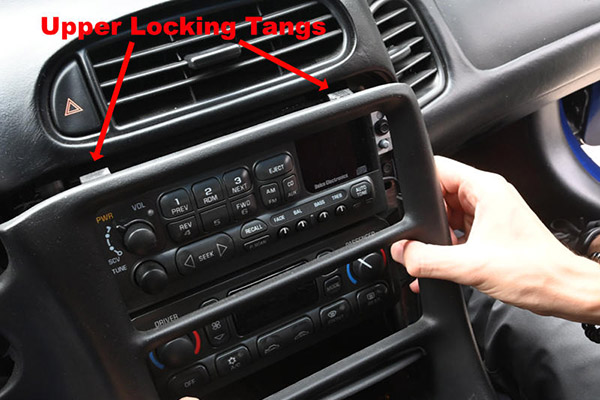
Carefully pull the top of the Accessory Trim Plate rearward to release its upper locking tangs.
Then lift the Trim Plate up and over the shift boot.
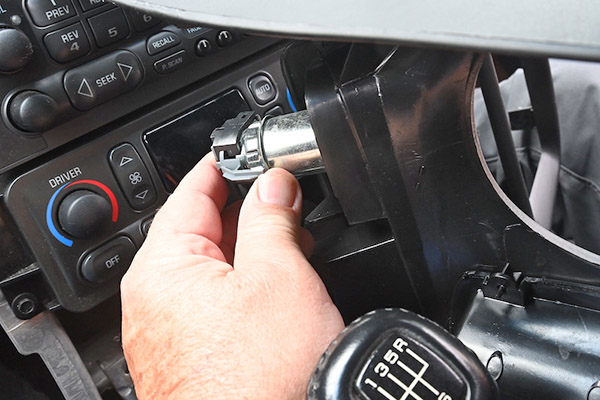
Holding the Trim Plate with one hand. With the other, reach behind the accessory socket and disconnect its wiring harness. Remove the Accessory Trim Plate and set it aside.
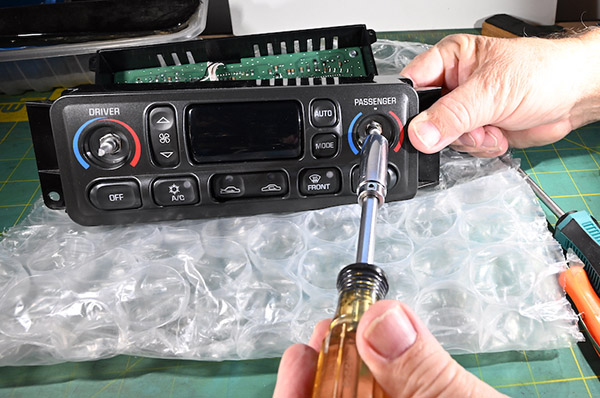
The Heating Ventilation and Air Conditioning control panel is held in the center stack's aluminum structure by two 7-mm hex screws. Using a 7-mm nut driver, remove those screws.
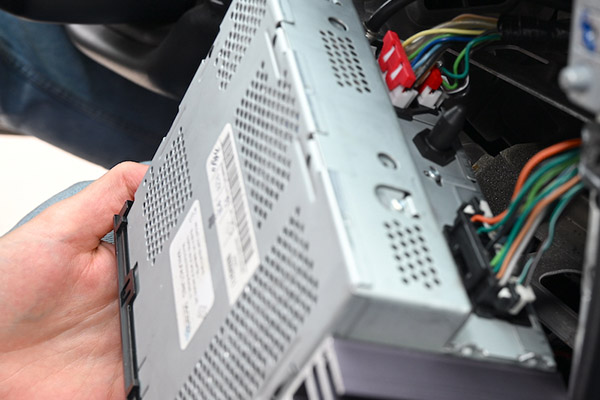
Pull the HVAC controller out of the center stack structure. You may find the anti-rattle sponge tape GM sticks on wiring has deteriorated. Use a vacuum to remove rotted sponge debris. If you need to replace the sponge tape, it is available from a variety of Internet vendors. A problem can be its availability in only large quantities when you only need a couple feet of the tape.
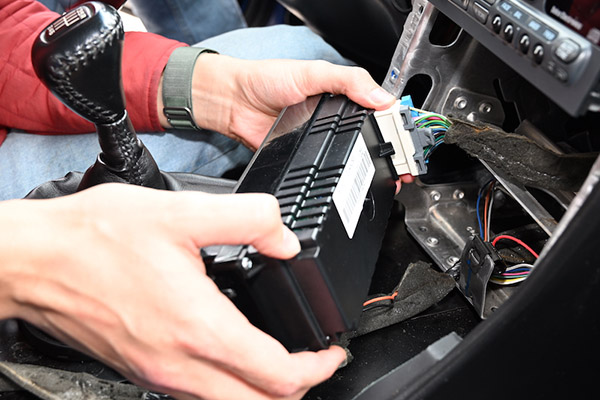
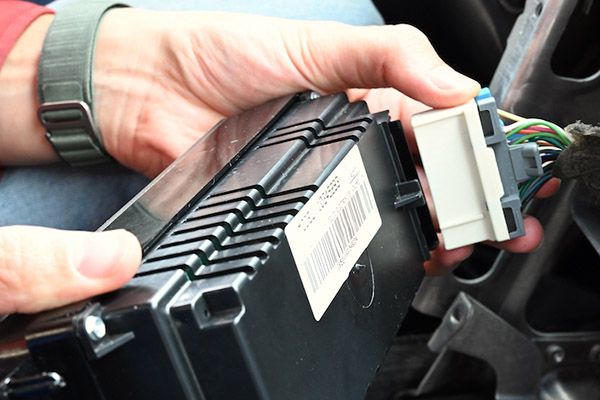
Disconnect the wiring harness from the HVAC controller, pull it out of the center stack and, place it on your work bench.
HVAC Controller Face Plate, Knobs and Buttons Replacement
The next steps require partial disassembly of the HVAC controller.
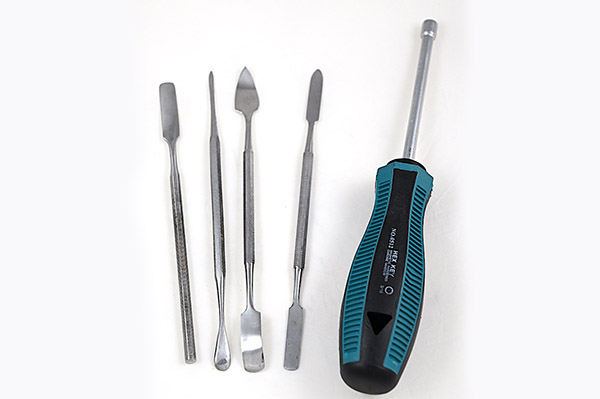
The task requires tools not common to most Corvette DIY toolboxes. You need a 3/16-in nut driver. You also need a set of small spatulas used for arts-and-crafts, electronics service and jewelry making. Vendors that sell tools for electronic service work are good sources for those tools.
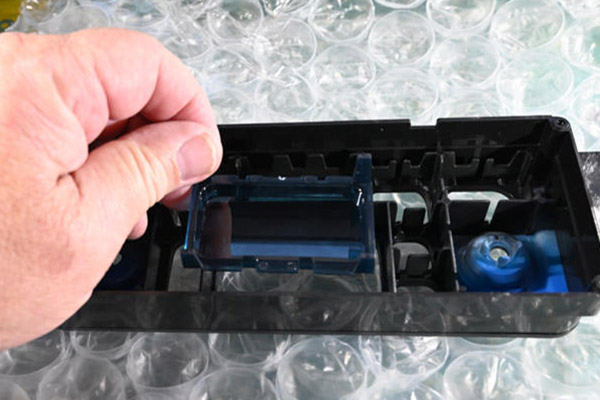
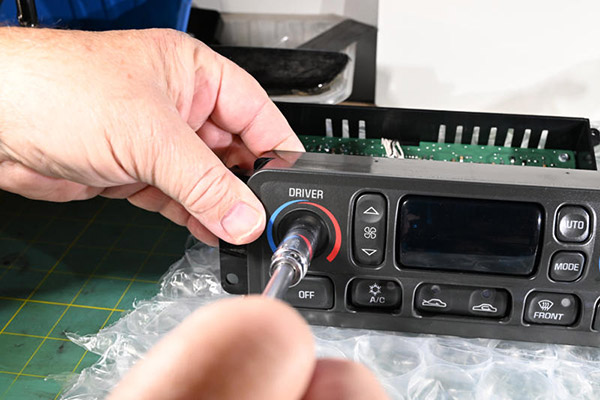
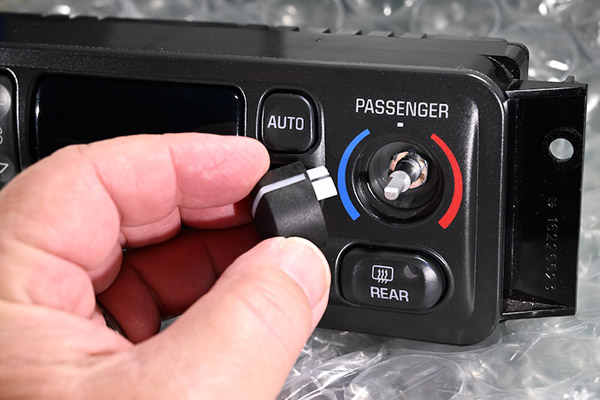
Pull off the knobs, then take a picture or make a drawing of the front of the HVAC controller that you can look at if you forget the locations of each of the controller's buttons. Place it, face down, on a soft surface. We used a mat of bubble wrap but a thick towel works just as well.
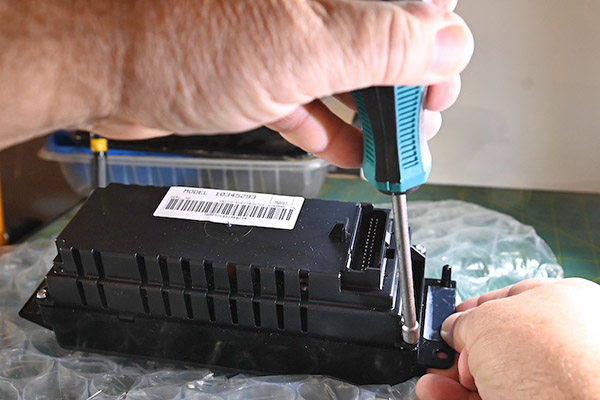
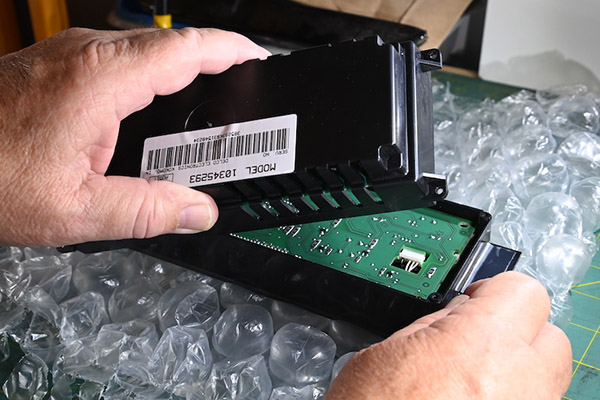
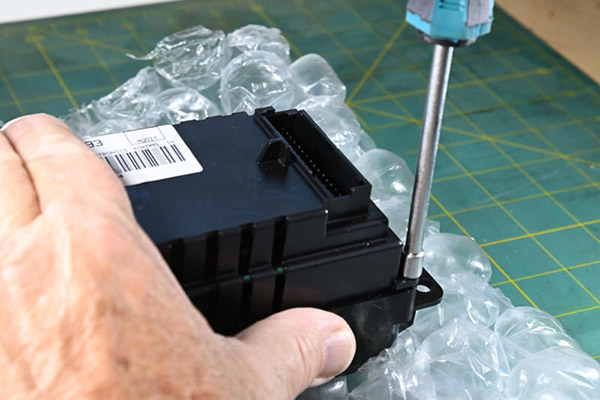
Using the 3/16-in nut driver, remove the four screws retaining the back of the device.
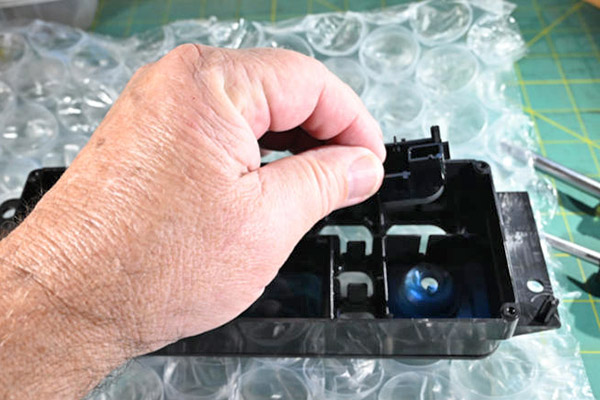
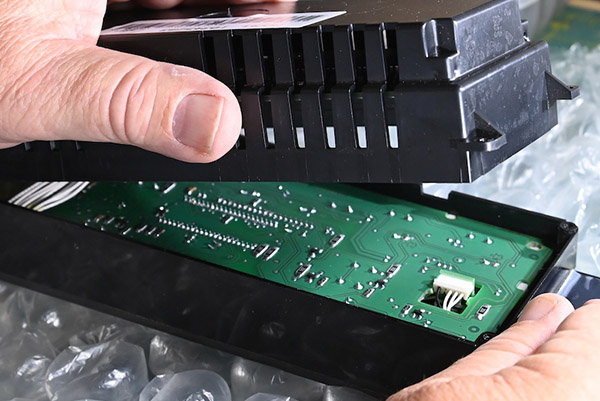
Remove the back, placing it upside down next to the front section. Be careful of the wires connecting the HVAC controller's two printed circuit (PC) boards.
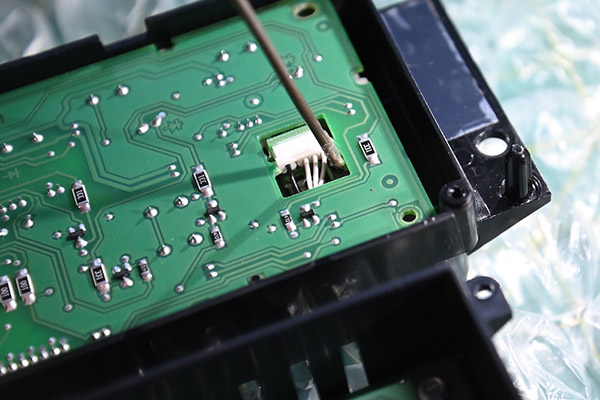
The PC board in the front half of the control must be removed to facilitate further disassembly. This board may be a tight fit over the wiring connectors on the back of the two variable resistors used to enter the temperature and the dual zone temperature differential. We fashioned a "hook tool" from a short section of coat hanger wire and used that to lift the PC board off the tops of the connectors on the back of each resistor.
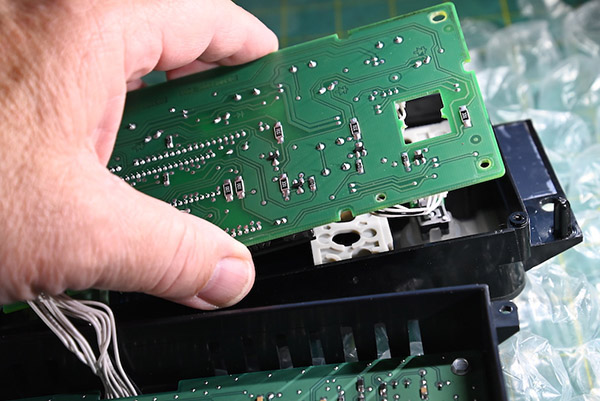
Rotate the front PC board up such that the section of white rubber is exposed. Avoid touching the lens above the HVAC information display. If fingerprints or dirt gets on the display lens, it must be cleaned prior to reassembly.
Using a 7/16, ¼-in drive, deep socket, remove the lock nuts from each resistor shaft. The temperature shaft on the left side of the faceplate has a flat washer. The other shaft does not.
Lay the HVAC face plate face down and remove the section of white rubber on top of the buttons and remove all the buttons.
Unwrap the new HVAC faceplate (PN D-1101) and lay it down on the workbench.
Install the new HVAC display lens (PN D-1103).
Install the HVAC Button Kit (PN D-1097) according to the picture or diagram you saved.
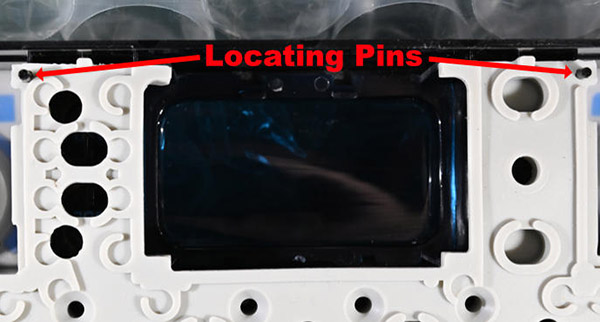
Lay the section of white rubber over the top of the display lens and the buttons. Make sure it fits over the two locating pins near the top of the HVAC faceplate.
In order to properly install the two variable resistors, make sure the face plate and the front PC board are oriented correctly, then reinstall the resistors. The flat washer goes on the shaft of the left-side, temperature control resistor.
The HVAC Controller's faceplate assembly is all plastic. When tightening the variable resistor shaft nuts, use a 7/16-in, ¼-drive, deep socket fitted on a twist handle or a stubby ratchet. If all you have is a ratchet with a standard handle, be careful to not over-tighten the nuts and crack the faceplate.
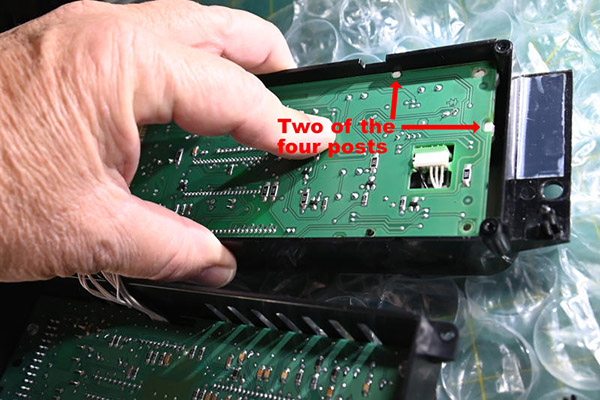
Drop the front PC Board back into place making sure the four posts on the rubber layer protrude through the holes in the PC board.
Set the back of the HVAC control in place on the front section.
Insert the screws and tighten them with the 3/16 nut driver.
Install new temperature control and dual-zone temperature differential knobs (PN D-1104).
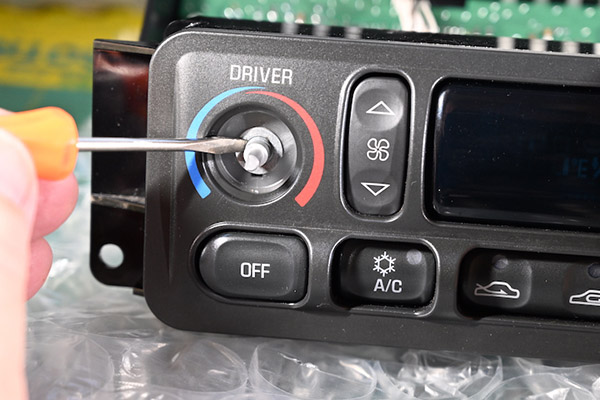
A C5 HVAC Control with new faceplate and buttons ready to go back into the center stack.
Reinstallation of HVAC Control Panel and Accessory Panel Trim
If you are reinstalling both the HVAC and radio controls, connect and install the radio first. Refer to this website's article on radio removal and replacement.
Reconnect the HVAC harness to the control module.
Push the HVAC control into its mount in the center stack and reinstall its two hex screws using the 7-mm nut driver.
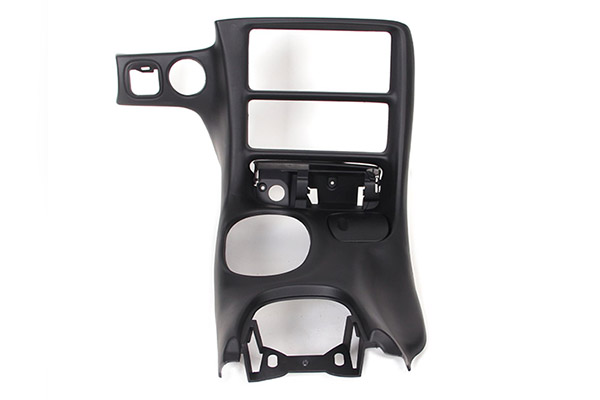
If your C5's Accessory Panel Trim Plate (also known as a "Center Dash Console Assembly") is damaged or worn, Zip Products sells a reproduction replacement (PN D-1033). It comes with a new ashtray door and cup holder insert. The part is black with the correct grain. For interior colors other than black, it must be painted to match using paint intended for automotive interior plastics.
To install the Accessory Trim Panel, confirm that the center console has been moved back far enough. Rotate the shift boot slightly and tilt it, then lower the Accessory Trim over the shift boot and onto the transmission tunnel.
Reconnect the accessory socket's wiring harness by snapping it into place.
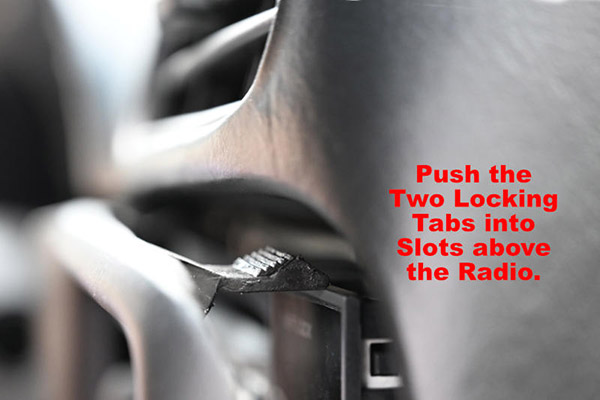
Push the panel's two upper mounting tabs into their slots above the radio.
Push the Accessory Trim Plate back into place, then pull the Console forward, back into position, such that the front of it overlaps the rear of the Accessory Panel Trim Plate.
Reinstall the two T5 Torx screws into the holes in the ashtray cavity.
Reinstall the 7-mm hex screw into the well next to the ignition switch and replace the grille.
Adjust the Accessory Panel Trim and the Console position to the marks you made previously. Reinstall the four 10-mm hex nuts that secure the center console and put the plastic trim covers back in place over the rear two nuts.
Slide the shift boot down, Align it with its mounting, then push down on the edges to lock it in place.
Retrieve the ride control switch panel. Reconnect its wiring harnesses and reconnect the glove box light harness.
Push the ride control panel back into place. Replace items removed from the center console compartment. Reconnect the negative battery cable.
Start the engine and take the car for a road test to verify that the HVAC is working correctly.
Source:Zip Corvette Parts 8067 Fast Lane | Mechanicsville, VA 23111 | (800) 962-9632