Is your 1990-1996 Corvette’s Delco-Bose sound system is acting up? When you put a CD in, does the stereo kick it back and display “Err”? Do your speakers go pop, pop when you turn it on? Volume knob scratchy? Some of your speakers are dead? Or, maybe the system doesn’t work at all?
There are three ways to go. First–keep it stock. Repair or replace original equipment (OE) components such that the system performs as well as when your Corvette was new. Second–the “affordable” upgrade: replace the in-dash control head with a modern aftermarket receiver of modest cost then repair or replace stock Delco-Bose speakers as necessary, Third–high-end replacement: swap everything for premium car audio products.
We can’t cover all three in one article, so we compromised between keeping it stock and a pricey, high-end approach. We’ll replace the radio control head with a modern Pioneer receiver, then, in Part 2, we’ll rework the stock, Bose speakers.
There are challenges to installing an aftermarket receiver in a late-C4 originally equipped with the up-level, UU8 or U1F Delco-Bose music systems. The most significant are: 1) generally, aftermarket receivers are not compatible with Bose amplifier/speaker units so with all such installations, wiring work is required. 2) modifications are also required to make the receiver compatible with the C4 Vette’s Central Control Module (CCM) on-board diagnostics. While it is possible to modify the sound system to achieve this compatibility, doing so requires soldering skills along with electronic components not included with aftermarket receivers. 3) some aftermarket radios do not fit the space where the stock radio control head fits so installing the receiver requires metal or plastic fabrication skills, and 4) 90-96 Corvettes have audio systems in two different configurations, one for ’90-’92 and another for ’93-’96. Installation of an aftermarket stereo in the latter is more difficult because the wiring work involved is more time consuming.
So…why a Pioneer?
Corvette parts vendor, Zip Corvette Parts, sells a Pioneer receiver kit for 1990-1996 Corvettes (Part Number XR-183) which includes: 1) a modified wiring harness to adapt the Pioneer to the existing late C4’s amplifier/speaker assemblies and make it compatible with CCM diagnostics and 2) parts which adapt the Pioneer to fit the space in the late model C4 center stack. This kit eliminates the need for advanced wiring work or with any metal or plastic fabrication work required to install a modern aftermarket receiver in a C4 and what remains is easily accomplished by do-it-yourselfers.
Zip makes upgrading to the Pioneer receiver “plug-and-play.” You remove the stock radio head, then, using Zip’s mounting adapters, install the Pioneer. The unique Zip Products wiring harness bypasses the OE tuner and connects the Pioneer direct to the stock Delco-Bose speaker units along with the stock radio antenna.
When we were done, we had a system which sounded better than the original. The Pioneer offered such modern conveniences such as: an equalizer, a subwoofer output, an HD Radio receiver, compatibility with an iPod or iPhone, the ability to control a USB device and a remote.
This late-C4 sound system upgrade takes a weekend to complete. While the instructions in this article are detailed, we recommend you have the Factory Service Manual available as an alternative reference when working on your C4’s sound system. Service Manuals are available from Zip Products.
We’ll start by stripping the interior of the OE radio control and hard trim pieces which need to be removed so the Zip/Pioneer receiver and the Zip adapter kit can be installed.

01:Begin by removing the shift knob. If the trans is an automatic, carefully pry off the shift button then, remove the retainer, the snap ring and finally the knob. If the trans is a manual, carefully pry the shift pattern insert out of the knob, pry the retainer out with a screw driver, then unscrew and remove the knob.

02:Open the console door. Unplug the door lamp wires. Remove the screws, then remove the door.

03: Remove the center console cup holder mat and take out the screw which is below it, then remove the rest of the console trim plate screws. Lift the trim plate up and disconnect wires going to electrical devices. Remove the trim plate and shift boot as a unit.

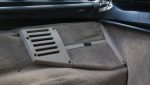
04:Remove the screws from the center air outlet assembly and remove it.

05: Remove the screws from the trim plate surrounding the radio control, the HVAC control and the DIC. Pull the plate loose. If the car is a ZR1, disconnect the engine power switch wiring before removing the plate.

06: Pop the cover off the right-side, instrument panel fuse panel then remove the I/P side trim panel.

07: Remove the passenger A/C outlet by carefully prying off the temperature sensor grille to expose the screws. We used a small plastic pry bar to prevent damage to the grill. Then remove the screws and then the outlet.

08: Remove the nuts holding the right I/P lower trim panel, work the panel loose, disconnect the courtesy light, then remove the panel.

09: Remove the styrofoam-and-aluminum knee bolster by removing the hex screws holding it in place. You may need to carefully push the console side trim panel in, towards the center of the interior to access the screws on the left end of the bolster.

10: On a 93-96, remove the passenger seat by releasing the seat cushion retainer and lifting out the cushion…

11: …then, carefully separate the vacuum connection and unplug the wiring harness. Finally, remove the four bolts holding the seat to the seat adjuster assembly and lift out the seat.

12: On a 93-96, you’ll need to route the Zip Products adapter harness along the top of the driveline tunnel on the passenger side. To facilitate that, the top of the right-hand tunnel side-trim plate needs to be pulled back. Take out the five screws along the upper edges of the panel. Then, remove the lower rear screw from the panel. Lift the tunnel side trim panel up to free it from the locating pin at the center, then pull the top of the panel away from the tunnel.

13: Disconnect the negative battery cable.

14: If you’re working on a 90-92, locate the radio receiver below the glove compartment on the multi-use relay bracket. It is marked by #7 in this GM Service Manual drawing. Unplug the radio antenna and speaker connections. You can remove the receiver and store it or leave it in place.

15: If the car is a 93-96, the receiver is in the well behind the passenger seat. To gain access, open the passenger side storage well door and remove the tray. Peel the carpet back off the cover of driver side well. Remove all the screws holding the door assembly. Open the passenger side compartment door and pull the carpeting out of the way such that you can remove the rest of the screws. Lift the front of the compartment door assembly up to a vertical position. Remove the jack and the Bose relay then pull the styrofoam tray up and out of the well.

16: The tuner is held to the tray by hook/loop fasteners. Pull it loose from the tray then set the tray aside. Unplug all the receiver connectors. You can remove the receiver and store it or put it back in place.

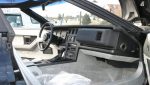
17: Remove the screws holding the radio control head to the instrument panel center stack structure. Pull the unit rearwards, then reach behind it and unplug the wiring harness. Remove the radio head.

18: Install the Pioneer mounting sleeve to the Zip Products mount adapter. Use the long, narrow plastic
“shims” between the back of the mount adapter and the bendable locking tabs on the mounting sleeve. Glue the bottom shim in place with contact cement. We strengthened the the mounting sleeve/mount adapter system by bonding the edges of the sleeve to the adapter with Valco Cincinatti HV-350 adhesive. We let it dry for several hours, then installed the Zip adapter into the center stack.

19: The Pioneer receiver is about 1/4-in. deeper than the stock control head mounting bay, so the I/P structure at the front of the bay must be modified to gain the clearance necessary to fit the Pioneer. Start by removing the lateral acceleration sensor below where the stock radio receiver was located. Treat the sensor with care because they are no longer available from GM and no aftermarket replacements exist. Test fit the Pioneer mounted in the Zip mounting adapter. Hold the receiver in place then, with an awl or other pointed device, scratch a line in the plastic behind the receiver using the bottom of the receiver as a guide.

20: Remove the receiver and use a white marker to enhance the visibility of that line.

21: From here, there are two ways to go. You can either cut away all of the plastic structure which interfers with the back of the Pioneer–do this if the OE radio will never be reinstalled. Mark the additional sections of the plastic to be cut before you start. Or, you can make the one cut in the I/P structure along the bottom of the Pioneer receiver, in the immediate vicinity of the OE radio’s rear locating pin socket, which will allow repair of the plastic and reinstallation of the OE radio. This method allows for a future restoration. Once the Pioneer is installed, it will push the severed I/P structure rearwards enough to allow clearance. To cut along that line, use a fine hacksaw blade fitted to a key-hole saw frame. Use a shop vacuum to suck up the saw dust as you are cutting.

22: The Zip Corvette Parts adapter harness bypasses the OE radio tuner allowing an aftermarket receiver to connect directly to the Delco-Bose amplifier/speaker assemblies along with extending the OE antenna cable to the antenna connection on the back of the Pioneer receiver. The smaller, black, male connector plugs into the Pioneer and the larger, black female connector goes into the OE radio head’s connector. Connect the antenna extension cable to the receiver. If you plan to add a subwoofer, connect audio cables of the appropriate length to the RCA connections marked “R-SW” on the back of the receiver.

23: An attractive option is to obtain some plastic split-loom conduit and put the first five inches of so of the harness beyond the splices inside it. On a 90-92, route the Zip harness to the OE tuner, unplug the speaker connectors from the tuner and plug the ends of the harness to the speaker connectors. Plug the antenna extension cable onto the end of the OE antenna lead. For the 90-92 application, the adapter harness has significant extra length. Use a cable tie to package the harness then secure it using additional ties or electrical tape. If you’re so inclined, you can shorten the harness by cutting then splicing or soldering. To facilitate future radio service, be sure to leave enough “slack” in the harness at the receiver it to be pulled out far enough such that one can reach behind it to unplug the wires.

24: On a 93-96, Feed the receiver end of the Zip harness through the opening just to the right of the radio cavity in the center stack. Position the harness so there is enough slack for the receiver to be pulled back far enough to be unplugged in the future.

25: Reconnect the Zip Adapter harness then reinstall the Pioneer receiver.

26: Beyond the red butt connectors, split the Zip harness in to two groups of three wires and wrap them with electrical tape to make two harnesses.

27: Run the two taped harnesses just below the existing wiring which is attached to the top edge of the tunnel behind the right-hand passenger side trim. Every 18-in. or so, tape the Zip harness to the existing stock harness, then, in a couple of spots, tape the whole works to the tunnel with duct tape.

28: At the rear of the tunnel, where it meets the intermediate panel behind the seats, make a 90° turn and, about halfway down the edge of the carpet, push the connector and the harness beneath the sponge rubber pad and carpet such that the sponge will protect the harness from the edge of the trim plate.

29: Route the harness beneath the intermediate panel carpeting, through the hole in the panel and into the well behind the passenger seat. While you’re working there, make sure the chassis ground is tight.

30: Connect the OE speaker connectors to the Zip Adapter Harness plugs. Fit the GM-female-to-Motorola-male antenna adapter to the end the antenna plug you pulled out of the tuner then plug that into the antenna extension. Reconnect the battery and test the system. If the receiver doesn’t play, check all wires and connections and repair as necessary.

31: Reposition the ride side tunnel trim. Lift the top of the panel, align it with the guide pin then seat the panel onto the pin and replace the fasteners which hold the trim in place.

32: Reinstall the lateral acceleration sensor into its mount below the receiver.

33: Take this opportunity to clean the DIC screen with a mild soap solution, rinse and wipe dry. Install the face plate included with the Zip Products adapter kit. If the car is a ZR1, to reconnect the engine power switch wires to the switch then reinstall the center stack trim plate taking care that the “snap-lock” fasteners engage properly before you out in the screws.

34: Put the center air outlet back in place.

35: Reinstall the right side knee bolster, the I/P lower trim panel…

36:…the passenger side air outlet…

37:…the I/P side trim and fuse panel cover.

38: As our original console trim plate was damaged, we replaced it with a new plate (PN I-1785) from Zip Products. Guide the center console trim plate and shift boot over the gear shift lever. Reconnect the trim plate wiring harness. Reinstall all the trim plate screws.

40: Reinstall the console door and reconnect the door lamp wiring.

41:Reinstall the gear shift knob.

42: Reconnect the seat adjuster wiring and the inflatable bladders’ air line. Put the seat back in and replace the seat cushion.
Turn the ignition to accessory, turn on the Pioneer, select “AUX”, connect your iPod and call up your favorite playlist. Take this opportunity to read the Pioneer’s manual to learn the unit’s many features.
Late C4 Corvette Sound System Upgrade: Part 1–Installing a Modern Receiver
Source: Zip Corvette Parts
8067 Fast Lane | Mechanicsville, VA 23111 | (800) 962-9632
Corvette Parts List Related to Article: