
One challenge of caring for C4 Corvettes can be aging sound system components. In part one of this blog, we showed you how to replace the radio control head with a modern Pioneer receiver. This second part will offer a cost-effective alternative: how to achieve a C4 Corvette stereo upgrade by repairing your current system.

The History of Speakers in C4 Corvettes
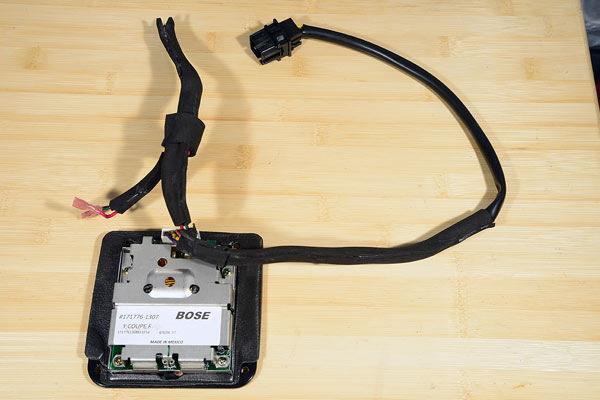
To begin, a C4 with the UU8 or U1F Delco-Bose Music Systems has an “amplifier/speaker assembly” located at each corner of the interior.
Each assembly has its own 50-watt amplifier along with, in the front, a pair of two-way speaker systems and, in the rear, a couple of 6 1/2-in. woofers. In the years since the C4 era ended, the speakers have proven exceptionally durable. While speaker failures do occur, they are not common.
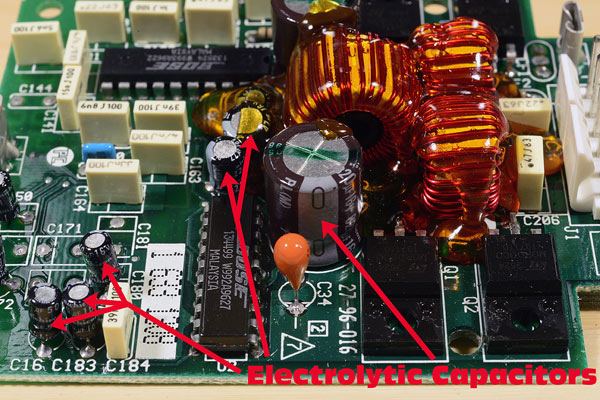
The Bose amps are the weak links. They are known for failure of one or more of the 10 electrolytic capacitors on the amp’s printed circuit board. When a capacitor goes bad, they leak their corrosive electrolytic onto the PC board. That usually causes either a partial or total failure of the amplifier. Sometimes, the amp can be repaired by desoldering the offending capacitors, cleaning the board then soldering new parts in place. Occasionally, corrosion renders the circuit board unusable, the amp has to be scrapped and a new one installed into the speaker enclosure.
Our ’95 Coupe project car had one bad Delco-Bose speaker along with, as we’ll discuss later, another invisible problem. In the interest of time, we replaced all four with new speaker assemblies from Zip Corvette. Your system might have components in better shape than ours or, maybe, you need a single item, such as an amplifier. Zip Corvette has 1990-’96 amplifiers available individually. If you’re a deep-geek and want to break out your soldering iron and fix the amps yourself, parts can be found from sources such as Radio Shack or electronic parts vendor Digi-Key.
We ordered four Bose amplifier/speaker units from Zip Corvette (part numbers I-1479, front, I-1378, rear). The left-front speaker assembly is the most likely to sustain damage due to impact (the driver’s left foot) or contamination (dirt and rocks in the driver side footwell and/or moisture from wet carpeting). Understandably, new left-front assemblies for C4 Corvette stereo upgrades have long been in short supply, making them unavailable from Zip or other vendors. Our solution was to order two right-front units and “rebuild” our existing left-front. We did this by transferring the new speakers and the amp from one of the right-fronts to our existing left-front enclosure.
Our left-front speaker rebuild had us discovering one of the challenges of using “new old stock” (NOS) amplifier/speaker assemblies. The last run of late C4 speaker enclosures were manufactured in the mid-’90s. Units which are truly “new” do not exist. Today, all NOS pieces offered for sale are likely 18 years or older. Most NOS amp/speaker units on the market today were purchased in lots when GM liquidated its remaining C4 Corvette parts. The speakers usually remain in usable condition after that much time but, as discussed earlier, capacitors on the amp circuit boards may have leaked. In fact, some mid-’90s enclosures may have had amplifiers replaced with newer units.

The foam tape wrapped around the speaker/amp assemblies’ wiring can cause another problem. It may have disintegrated or “rotted,” leaving a residue of plastic particles inside each enclosure. The adhesive-backed foam tape was applied to wiring throughout the car as a way to prevent squeaks and rattles.

By the late ‘80s, C4 had a terrible reputation for interior squeaks and rattles. In the early-’90s, Corvette Development ran a two-year program to identify and eliminate the noise sources. One chronic problem was wiring hidden inside various parts of the car’s interior or underbody structure rubbing on or hitting other parts. Foam tape applied to the wires was a way to stop the noise without having to redesign or reroute the wiring harness or redesign the car’s adjacent structure.
Unfortunately, the foam can disintegrate over time and how long it lasts seemingly depends on the environment. For example, its longevity would differ if stored in a place where there was a lot of air pollution—such as a parts warehouse in a big city—versus the parts department of a dealership in North Dakota. The onset of rotting seems to begin after about 15 years, often leading owners to explore C4 Corvette stereo upgrade options.
For this C4 Corvette stereo upgrade blog, we started by inspecting the insides of eight speaker/amp assemblies. The plastic speaker enclosures are date stamped. All four of our car’s originals were made in 1994 and two of those had rotted foam. The other four were NOS amplifier/speaker assemblies. Three were dated 1996 and one was dated 1997. Two of the 1996 units had rotted foam tape. Interestingly, all the NOS assemblies had amps with 2006 manufacturing dates.
It is unknown if the rotted foam particles, which migrate throughout the speaker amplifier unit, are detrimental to the unit’s function. If it does not affect the operation of the speaker/amp, in the case of the front units, undertaking a time-consuming repair may be wasted. It seems unlikely the front units’ wiring can move enough to rattle. As for the rear speaker/amps, if any rotted sponge is discovered, it should be repaired. The rears have one long wire which may rattle on the underbody structure if not foam taped.
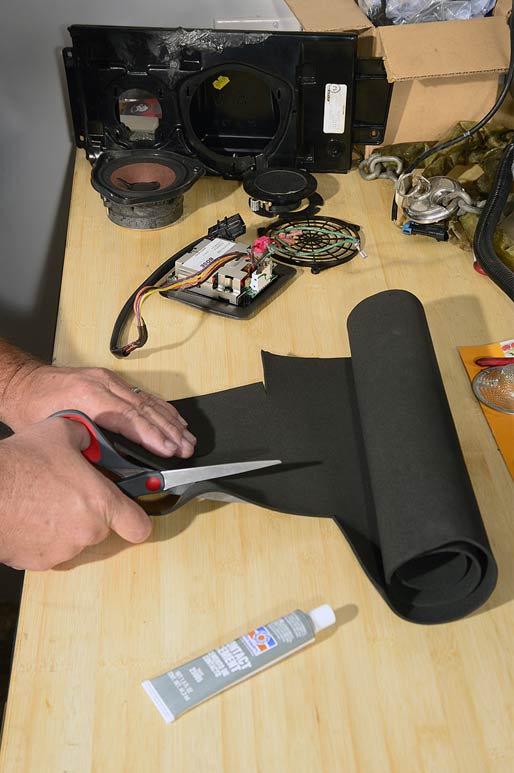
As a learning exercise, we disassembled one of the fronts, cleaned all the rotted debris out of the unit, and stripped the leftover adhesive tape off the wires. A source of OE-type foam tape was not available so, using a sheet of sponge material purchased out of a Granger catalog and some contact cement, we “refoamed” the wires. We had a rear with rotted foam, so we repaired it using the techniques we developed while fixing the one front assembly.
The bottom line is that some amplifier/speaker assemblies sold by parts vendors may have problems with rotted foam. That is a risk you take when purchasing NOS parts. It is not the fault of the parts vendors, but rather of General Motors for its unwillingness to provide parts support for older vehicles unless required by federal emissions controls laws. Because new Delco-Bose speaker/amp units don’t exist, the buyer needs to be prepared to repair some NOS assemblies.
Without further ado, let’s start our C4 Corvette stereo upgrade by replacing those speakers.
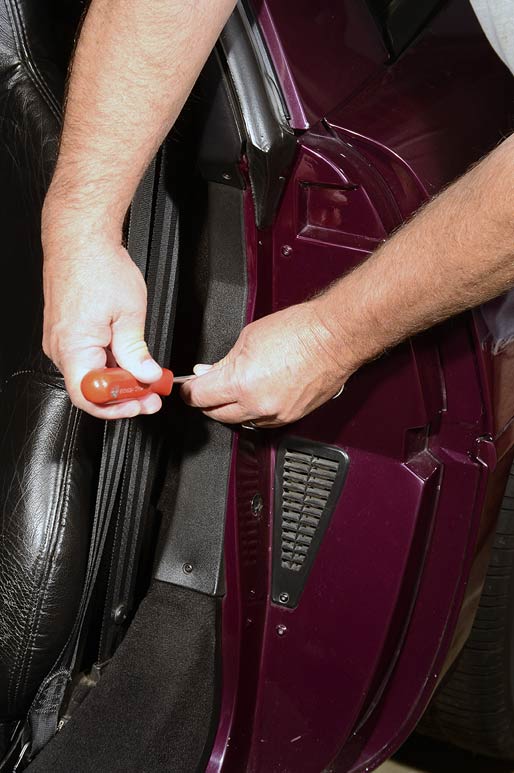
Step 1: Remove Door Sill Covers
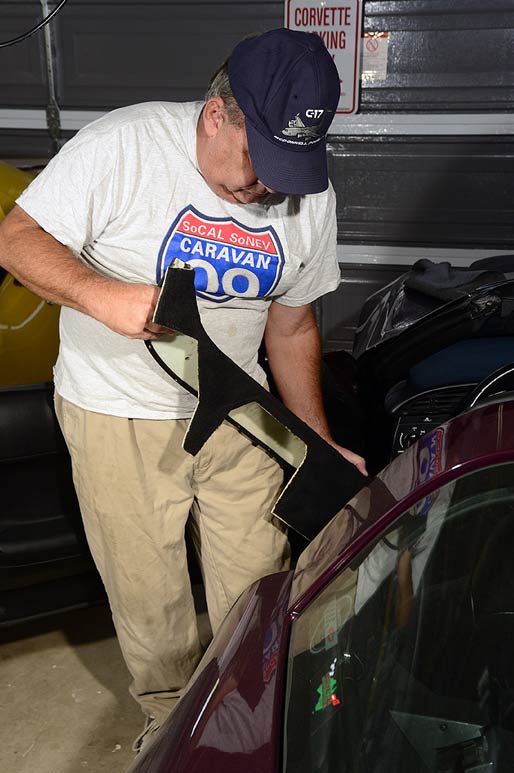
The front speaker grilles are part of the door sill covers. Remove the upper door sill plate, then remove the screws from the sill cover. Hook/loop fasteners hold the lower front corner of the sill cover to the speaker enclosure. Pull that loose before attempting to get the cover off.
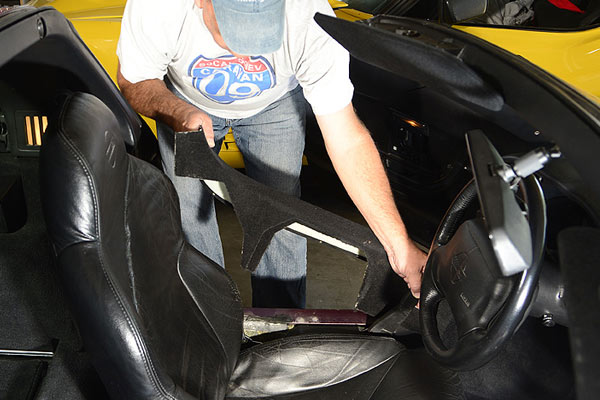
Step 2: Move Parking Brake to Lift Off
The left sill cover must, first, be raised in the rear, then the parking brake handle must be positioned such that it clears the sill plate as you pull it out. The right sill plate can simply be lifted off.

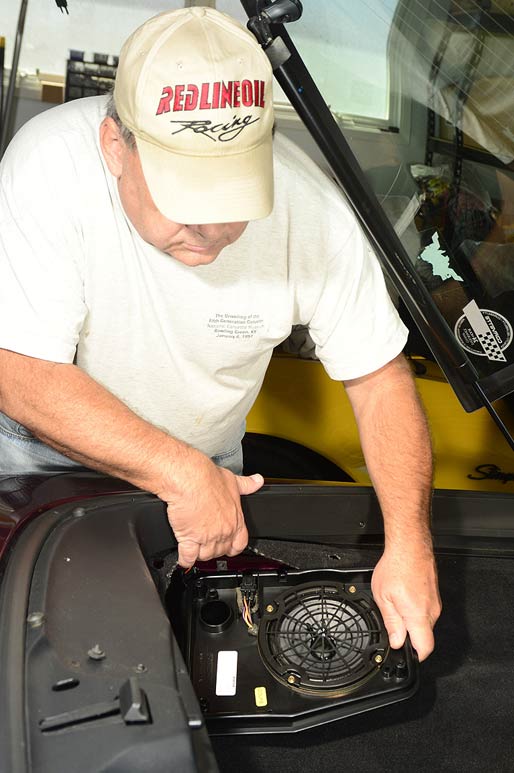
Step 3: Unplug Wiring and Remove Speaker Assemblies
Unplug the front amplifier/speaker assemblies’ wiring at the lower rear of each speaker enclosure. Remove the screws holding each assembly to the underbody structure, then remove the speaker assemblies. Once you have them out, you’ll probably find dirt below and behind them. Use a shop vacuum to suck up the mess from your C4 Corvette stereo upgrade project.
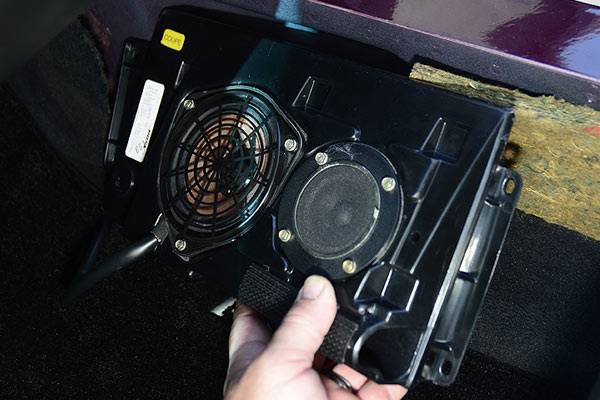
Step 4: Removing the two Speakers
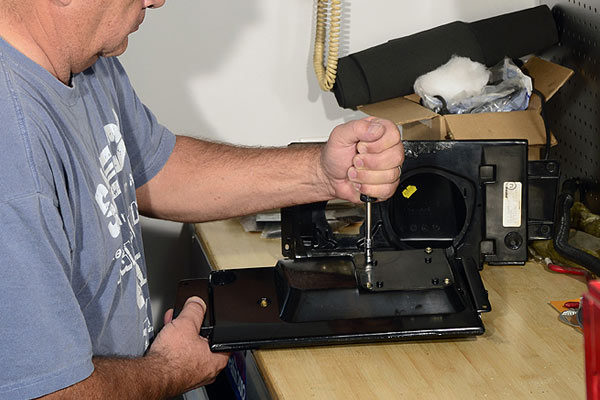
Strip one of the new, right-front speaker assemblies by removing the two speakers and the cotton stuffing behind the woofer. Turn the speaker enclosure over and remove the square amplifier mounting plate.

Step 5: Ensure Rear Mounting Ears are Ready
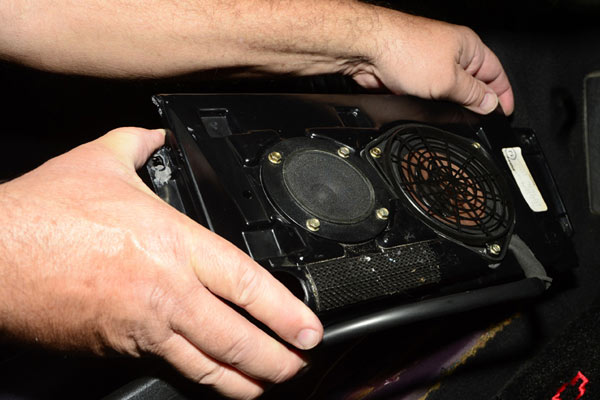
Strip your left-front enclosure of its speakers, amp and wiring. If you find the rear mounting ears of the speaker enclosure broken, you may be able to repair them with a two-part epoxy kit such as “JB Weld.” If they can’t be repaired, you’ll have to drill new holes in the enclosure and the car’s structure and reposition the mounting screws.
Step 6: Screw in Your Left-Front New Assembly
Install the new Bose speakers and amplifier to your left-front enclosure. Screw your rebuilt, left-front speaker assembly onto the body structure.
Step 7: Move Parking Brake and Reinstall Your Left-side Sill
Finally, put the parking brake handle in the full-up position and reinstall the left-side sill plate parts. Push on the bottom of the speaker grille to make sure the hook/loop fastener is engaged.
Step 8: Install Your Right-side New Assembly
Install the remaining right-front speaker assembly by reinstalling the retaining screws and connecting its wiring harness. Reinstall the right-side sill cover.
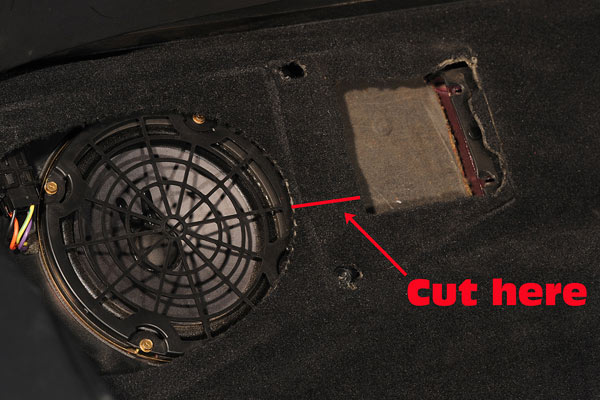
Step 9: Remove Rear Speaker Grilles
To replace both rear speaker assemblies, remove the speaker grille retaining screws then remove the grilles and unplug the wiring. Cut the carpeting along the red lines.
Step 10: Cut Carpeting for Easy Assembly
Cutting eliminates having to disassemble more interior trim to facilitate moving the carpet out of the way. Removing that small section will not affect the carpet once the grille is back in place.

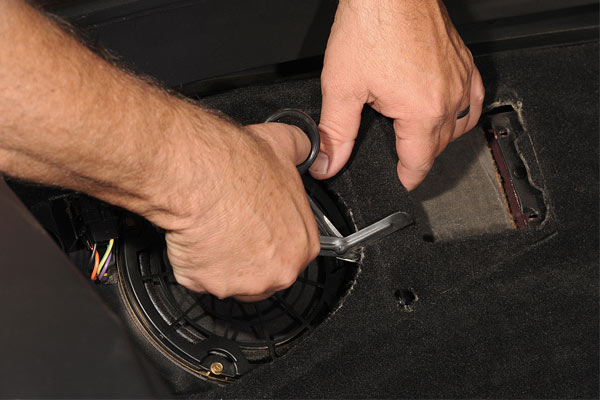
Step 11: Remove Rear Assembly Screws
After cutting, remove the screws which hold the assemblies to the body structure.
Step 12: Turn and Tilt to Fully Remove Rear Assemblies
After removing the screws, turn and/or tilt the speaker assemblies to remove them.

Step 13: Connect the Wiring for Your New Assembly
Reconnect the wiring harness and make sure the connector is pushed into its holder. If the foam inside the holder is rotted, replace it. Smooth the carpet around the assembly.
Step 14: Put Your Speaker Grilles Back On
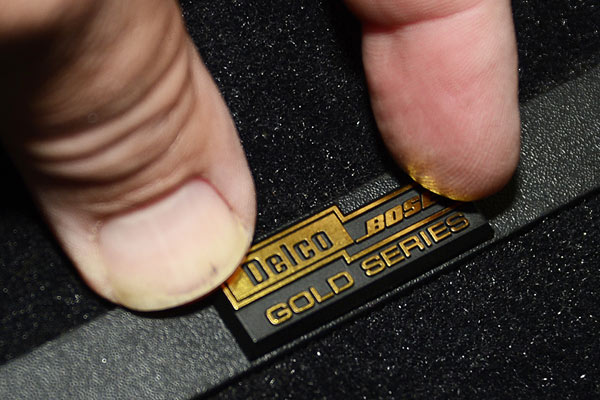
Reinstall the rear speaker grilles. The Delco-Bose nameplates on the rear grilles have a habit of falling off. Zip Corvette sells adhesive-backed, replacement nameplates. Now that your C4 Corvette stereo upgrade is complete, take your new speakers on a test drive.
Ready for Your C4 Corvette Stereo Upgrade?
If you want your ride to sound like new, you can turn to reputable parts vendors for your C4 Corvette stereo upgrade. Check out high-quality parts from Zip Corvette or Corvette Central.
I couldn’t see spending 1k on an out dated system. I put a 7″ Pioneer touch screen with 6.5″ speakers in all 4 corners, a 1000 watt Amp and 10 ” sub, all stuff I already had. I did save all my Bose stuff, maybe will rebuild it later.
1990 ZR-1.