
by John Pfanstiehl
As the seventies progressed, there were fewer and fewer pieces of brightwork on Corvettes. 1972 was the last year for a chrome front bumper and after 1973, Corvettes lost the rear chrome bumpers as well. However, the polished aluminum rocker moldings provided some flash to 1970-1977 Corvettes. They are anodized so corrosion is not much of a problem but road grime and grit can make them dull over the years. And they can get scratched and banged up during repairs or by passengers. Sometimes well-meaning passengers tap their feet on the rocker panels to knock off dirt or sand before getting in. While that may reduce the need to vacuum the carpet, it can damage the soft aluminum.
Rocker molding replacement requires removal of just six screws (and one bolt on early models). When those fasteners come out easily, replacement of this part is about as fast as it gets. If any of the screws are stripped or seized, Zip Corvette has a repair kit to handle that, too. Replacement of the black moldings on 1968, 1969 and 1978 (except pace car) – 1982 Corvettes is similar.
Follow along to see how to restore the rocker moldings shine to a C3’s exterior appearance.

01: Scratches, scrapes and gouges marred the appearance of the old molding. The circular scratches are evidence that a DA sander got away from someone.

02: These rocker moldings also suffer from dings and dents. The molding’s aluminum is soft and easily dented.

03:Spray penetrant behind the moldings, especially the inner end of screws number 2, 3, and 4, counting from the rear. Apply the penetrant days before if possible.

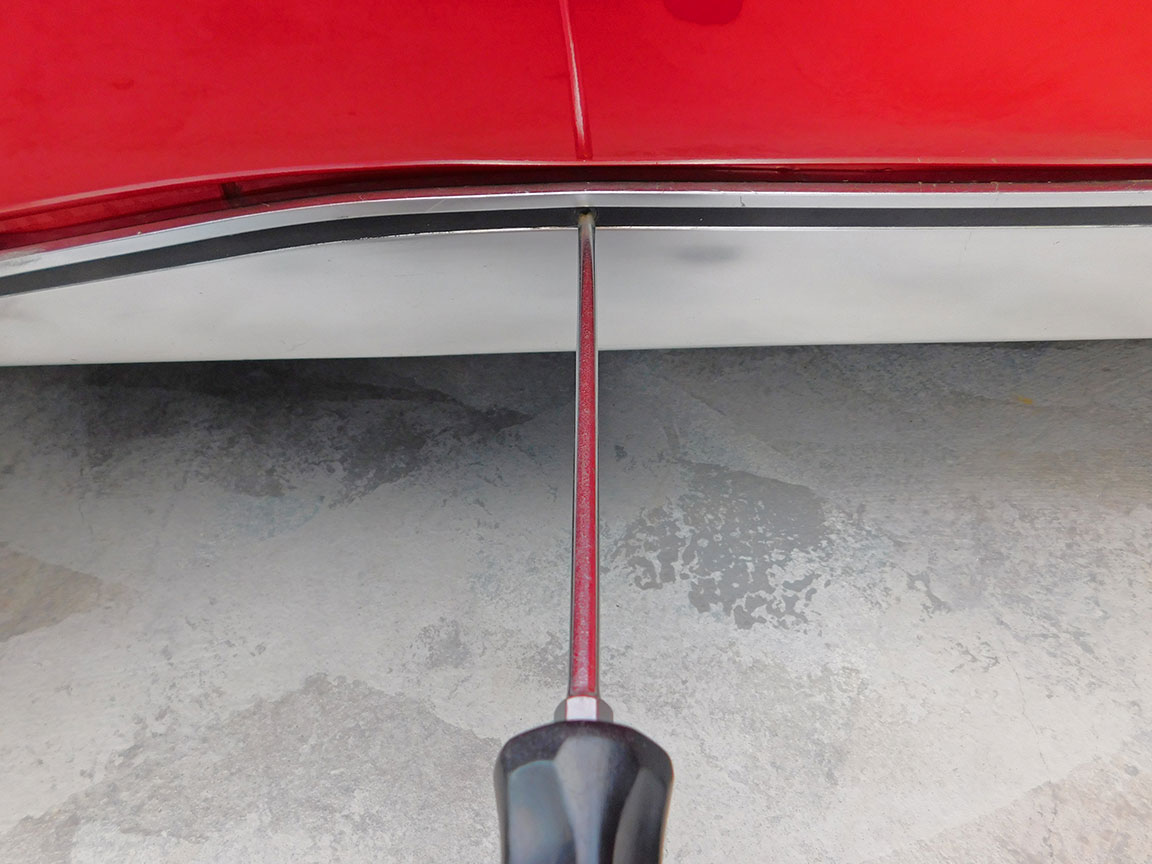
04: Tip: Before removing the rocker moldings, note the gap between door and molding. It is larger than a person installing the moldings might think.
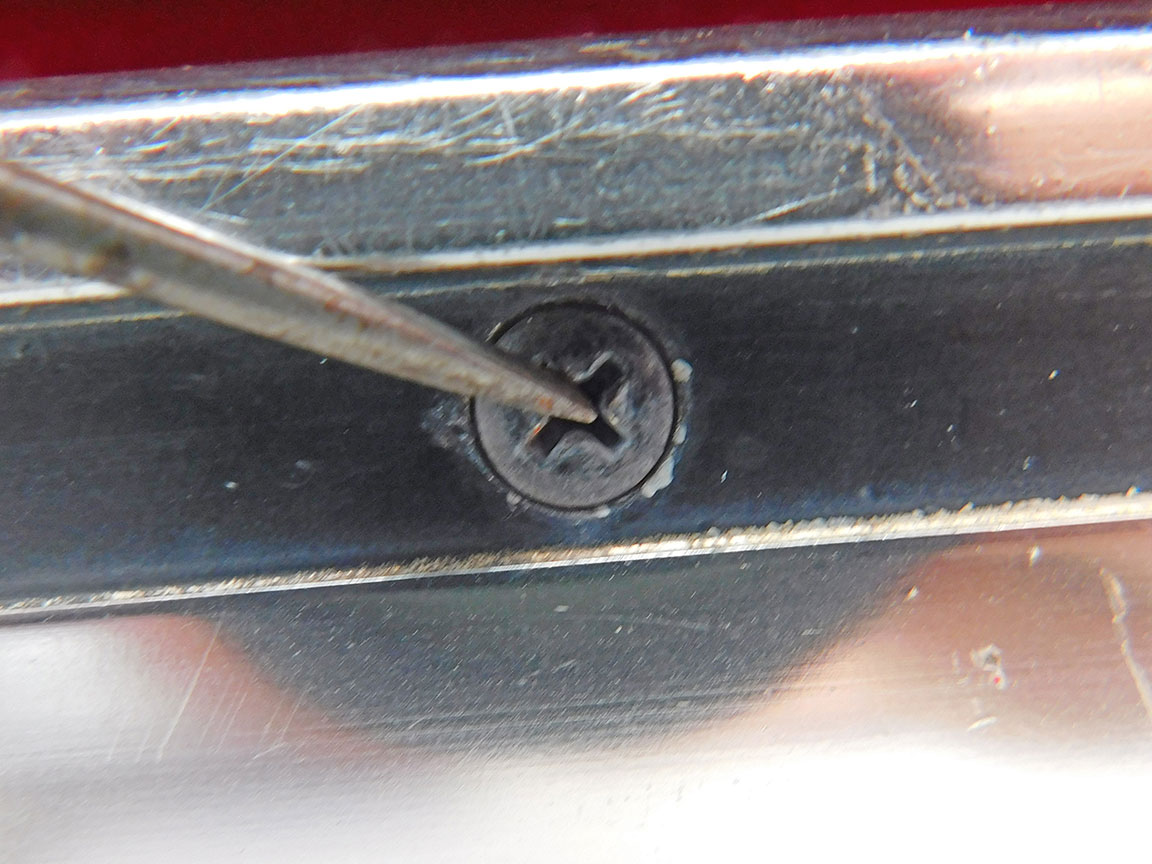
05: Clean out the head of the Phillips screws with an ice pick, small screwdriver or similar tool. Dirt or corrosion can interfere with a good contact between the screwdriver and the screw head.

06: Make sure to use a Phillips screwdriver with a tip that is not worn or rounded over. The screw threads are often rusted. It’s much better to get the screws out without rounding their heads.
07: Hold the screwdriver shaft square to the screw and press in firmly to help break the screw loose. Tip: a little bit of valve grinding compound can give the screwdriver’s tip a better grip.

08: Reach behind the rocker molding to hold the nut that attached the front two screws and the rear screw.

09: Be aware that large flat washers or lock washers may fall when you remove either of the front two screws or the rear screw. Note their location and save them. It’s likely they’ll have to be reused behind that screw.

10: Remove the rocker moldings. This screw hole in the fiberglass was greatly enlarged, hence the need for the large flat washer.

11: Three of the screws that hold the rocker molding go into a metal reinforcement behind the fiberglass.

12: If damaged, Zip Corvette offers a 1970-1982 Rocker Molding Mount Hole Repair Kit and a technical article that shows how to do the repair. The kit has all the fasteners needed for both rocker moldings and is made in the USA.

13: 1970-1973 Corvette rocker moldings had a tab at the front that was secured with a bolt. This was eliminated in the later models and is not on the new reproduction rocker moldings.

14: The surface of the new 1970-1977 Rocker Moldings is much more polished than the now dull appearance of the old moldings. The moldings are sold as a pair for both left and right sides.

15: New black oxide 1970-1982 Rocker Molding Mount Screws are available from Zip Corvette. The set contains twelve screws and six nuts – all that’s needed for both rocker moldings and is made in the USA.

16: The lower portion of the frame is visible, at least from a distance or when bending down. It’s a good time to give this area a quick scuff and paint while the rocker moldings are off.

17: Apply a little grease or anti-seize compound to the screw heads to aid in future removal.

18: Hold the new molding up and install the center bolt first to balance it. Then install the screws next to it and finally the screws on the end of the molding.

19: An ice pick or awl can help locate the screw holes behind the rocker molding.

20: Gently tighten the screws to avoid bending or warping the molding. The factory assembly manual lists 10-15 inch pounds but remember these moldings are cosmetic not structural, so easy does it.

21: Six screws later, the new reproduction rocker molding is on. New moldings do a lot to dress up the appearance of these C3 Corvettes.

1970-1977 Corvette Rocker Molding Install
Source: Zip Corvette Parts
8067 Fast Lane | Mechanicsville, VA 23111 | (800) 962-9632
Corvette Parts List Related to Article:
- 1970-1977 Rocker Moldings
- 1978-1979 Rocker Moldings (uses the same install procedure)
- 1970-1982 Rocker Molding Mount Screws
- 1970-1982 Rocker Molding Mount Hole Repair Kit
Related Articles: