
Years of climbing in and out of a C3 can damage or scuff its sill plates. These anodized parts take a beating when shoes are dragged across them. This wear is compounded when gravel or road debris finds its way on top of them. Fear not – this part of a Corvette’s interior compartment can be returned to its original condition easily, as shown here. Replacing the sill plates is one of the fastest ways to improve the interior’s appearance.

01: The sill plate’s anodized aluminum finish holds up well to the elements but is easily scratched by grit on the bottom of shoes. The black painted surfaces can also degrade over time.
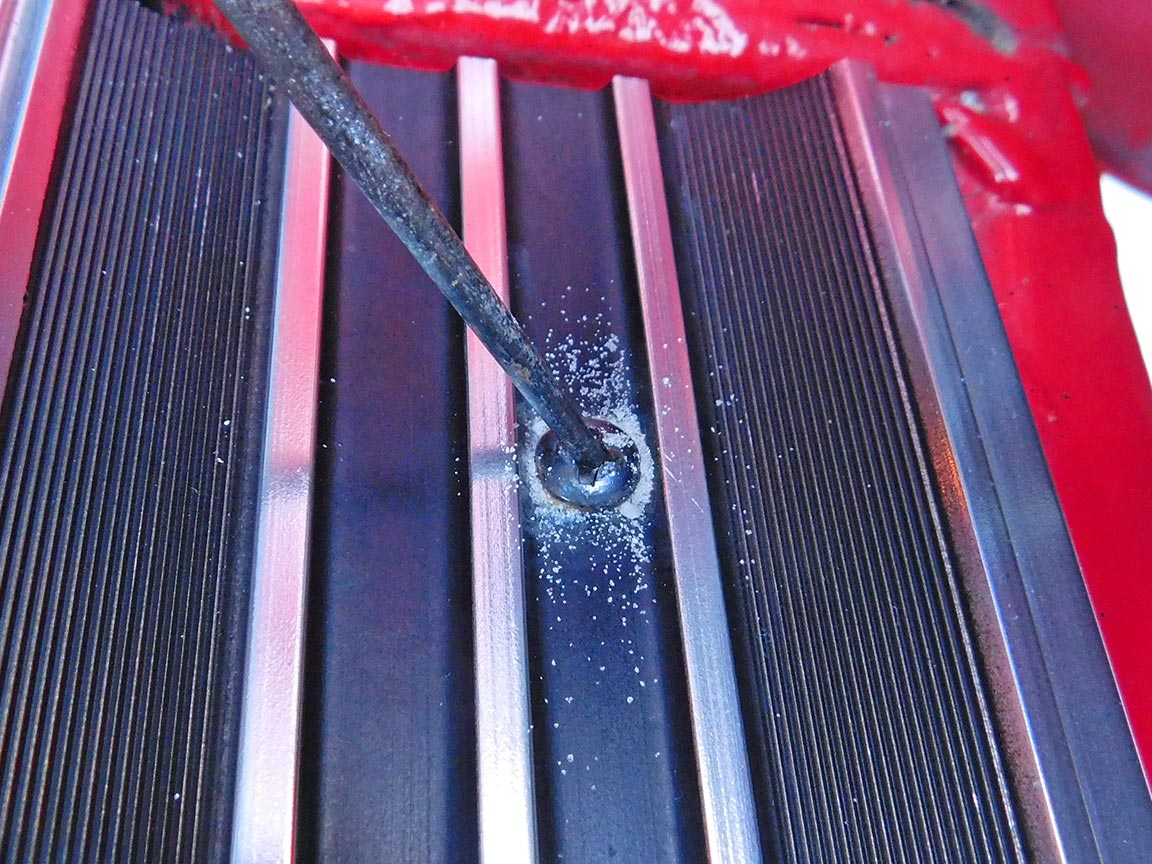
02: Tip: Use an ice pick to clean dirt out of the screw heads. The screw driver tip may need a good grip on the screw head because the screw is threaded into steel.
03: Tighten each screw before removing it to see if its screw hole is stripped. Mark stripped screw holes on the old plate to help note which need attention after the sill plate is removed.

04: Take extra care removing the old sill plate. Its sharp metal corners can easily scratch or chip the door jamb’s paint. Tip: lift the rear of the old plate up and cover it with your hand as it is removed.

05: Zip Corvette offers a set of two replacement 1964-1982 Door Sill Rocker Panel Plugs (WS-4556). There are two plugs per side and the old plugs can be pried out with a screwdriver or pulled out with pliers. The new plugs are made in the USA, fit well and push in easily by hand.

06: Tip: A piece of a paper clip bent to a sharp right angle can repair enlarged screw holes. Insert one or two of them into the screw hole and place tape over the exposed ends to hold them in place.

07: Zip also offers 1972-1977 Sill Plate Rear Rain Diverters (I-2946). These are made in the USA and go under the sill plates. Specify Left or Right when ordering.
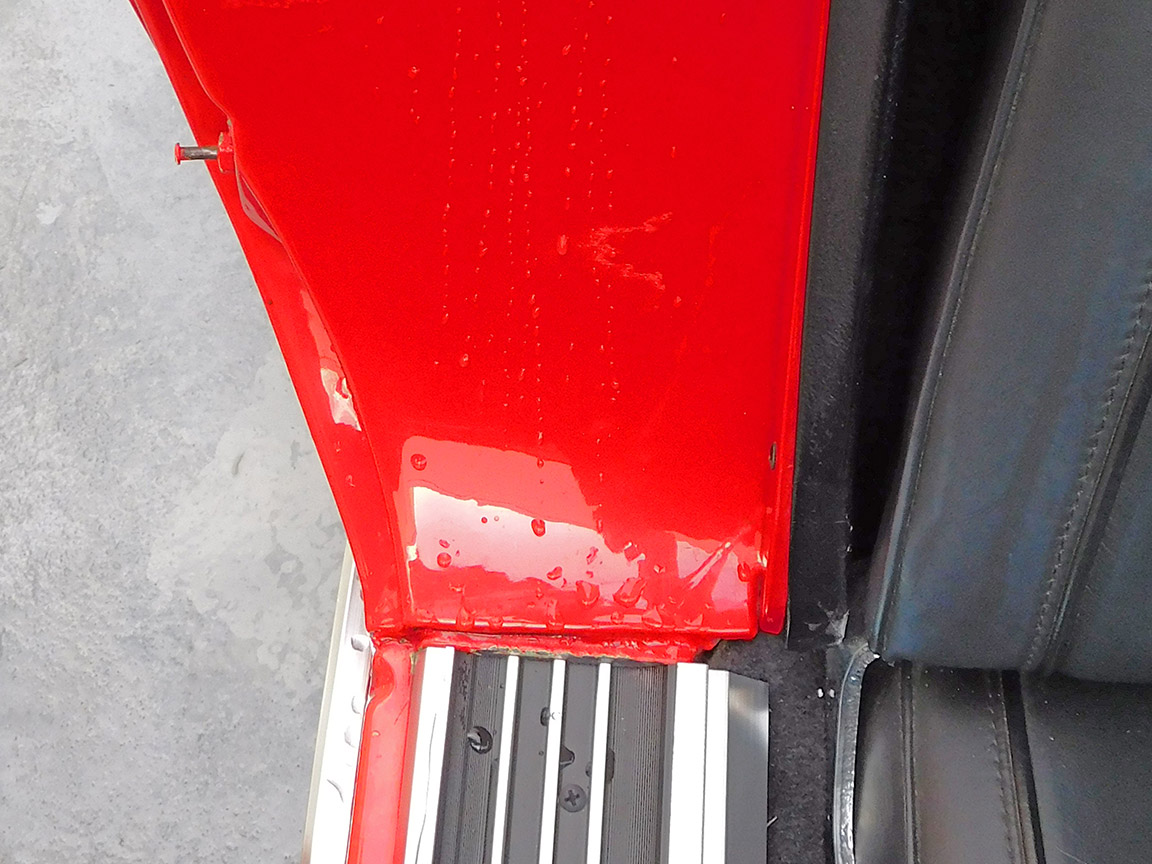
08: Early Corvettes are not known for being watertight. Water can run down the door jams and into the passenger compartment even during a gentle washing. If water gets under the seats it can rot the carpets or corrode the seatbelt mechanism.

09: Zip does a very thorough job of packaging the sill plates so they don’t get damaged during shipping, storage or handling.

10: The bright new anodized aluminum accented by the satin black recesses looks terrific. Installing new 1968-1977 Sill Plates is a fast and easy way to dress up the passenger compartment. A little over spray on one was removed quickly with a wipe of acetone, which doesn’t harm the anodized finish.

11: When installing the sill plates, cover the rear edges with your hand and place the front edge down against the kick panel. Tuck the carpet under the inner side.

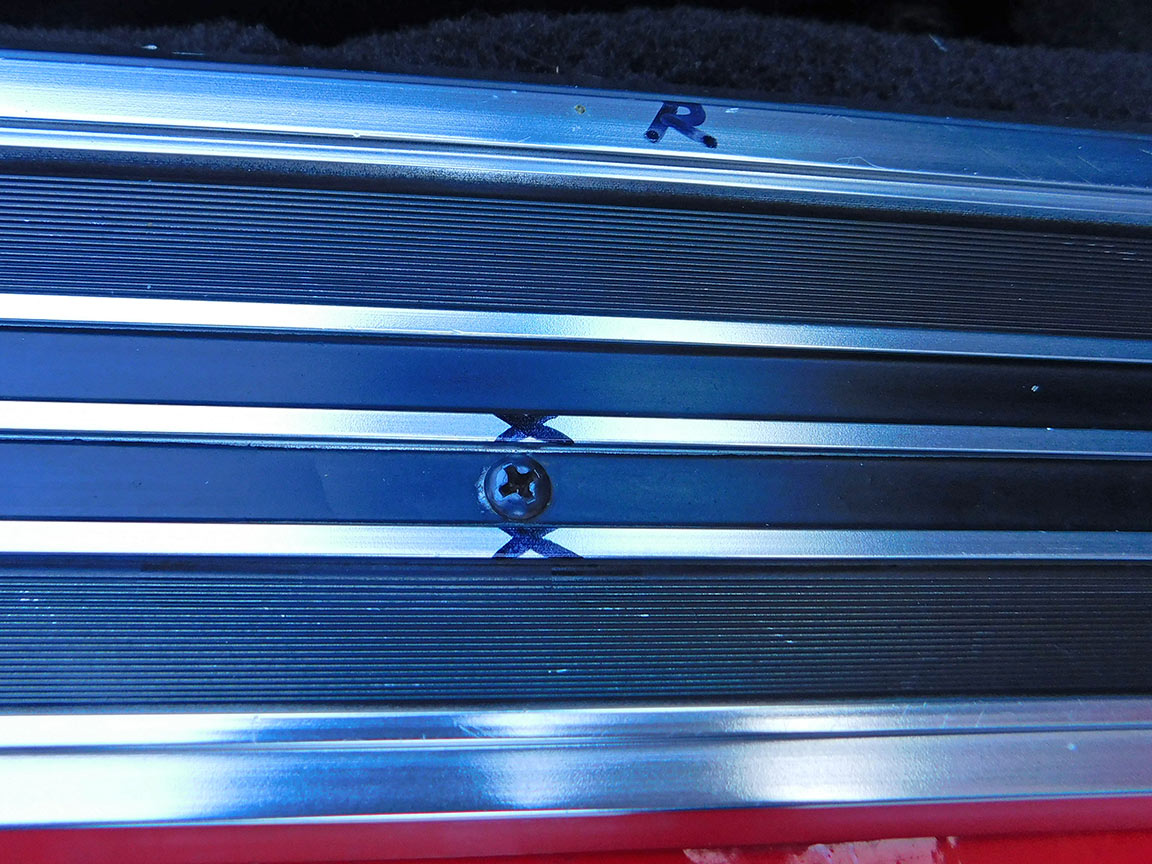
12: Zip offers a replacement set of eight 1968-1977 Sill Plate Screws (ZI-646B) to attach both plates. These #10 screws are made in the USA and have a black finish that matches the painted recesses in the sill plates.
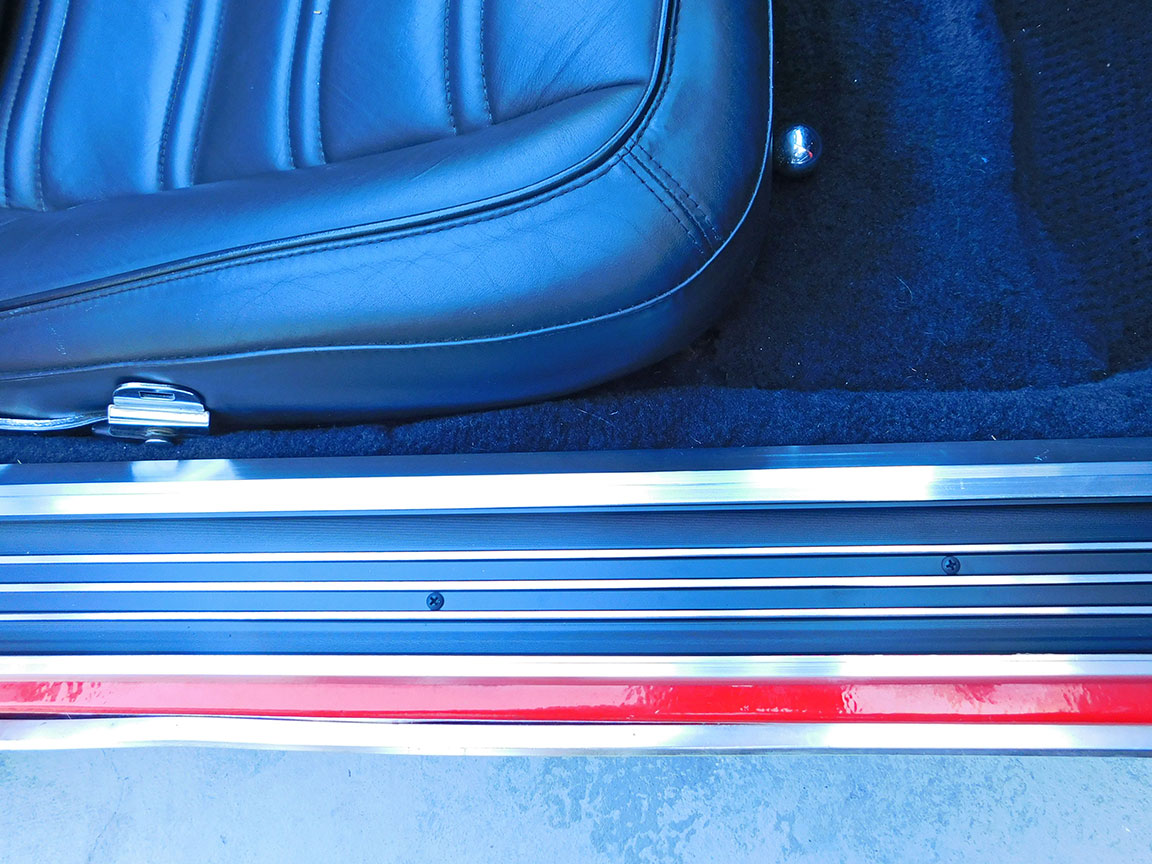
13: The new sill plates look great. Very few cars, in any price range, have sills that present such a good appearance when entering a car as these 1968-1977 Corvette sills.

14: While the sill plates are out, the kick panels can be removed, repainted or replaced. There’s just one screw located at the front corner that attaches them. This screw is often left out from prior work because it’s a challenge to find its screw hole when reinstalling the kick panels.
1968-1977 Corvette Sill Plate Replacement
Source: Zip Corvette Parts
8067 Fast Lane | Mechanicsville, VA 23111 | (800) 962-9632
Corvette Parts List Related to Article: