
by John Pfanstiehl
The major visual differences between C3 Corvette coupes and convertibles are T-tops vs. soft tops. However, there are a number of smaller differences. Here we will show how to replace several wearing parts that are unique to the convertible: the door alignment pin receiver, the receiver seal, the door lock pillar plastic wedge and deck lid guide pin bushing. All are located in the same area and are easy to replace.
The door alignment pin receivers were used on 1970-1975 Corvette convertibles to more securely hold the doors in alignment to the body when driving down the road. Although all C2s and C3s have a beefy boxed steel perimeter frame, the convertibles lack the added strength provided by the extra steel reinforcements that the coupe bodies have.

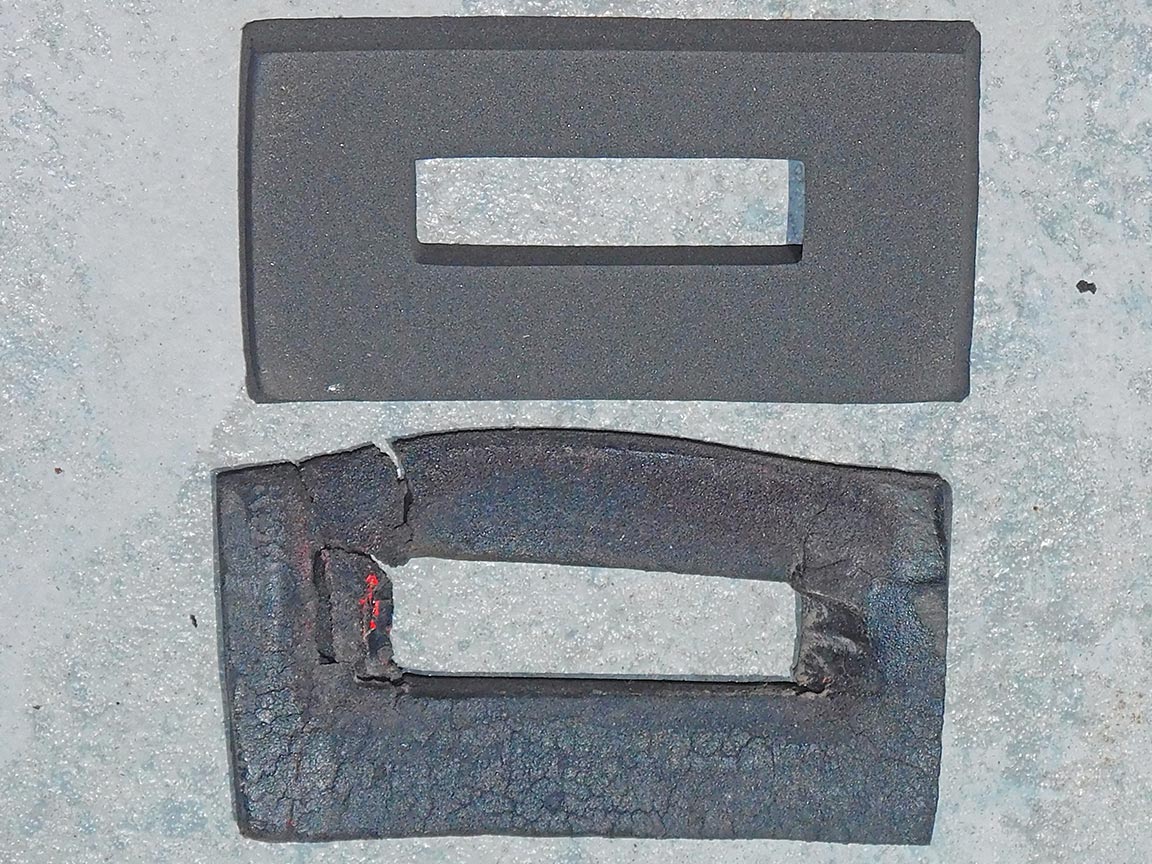
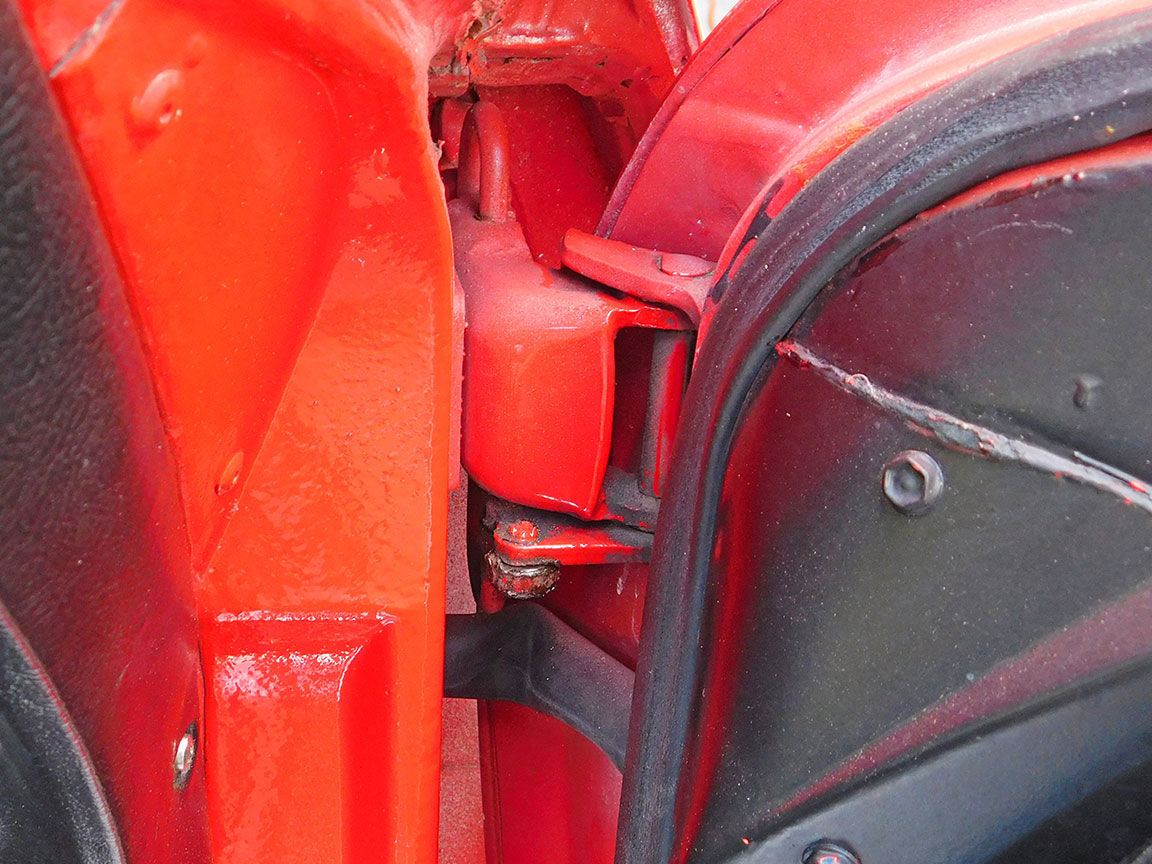
01: Three of the parts being replaced are the door alignment pin receiver on the left, the door lock pillar plastic wedge in the center left and the white deck lid guide pin bushing on the right.
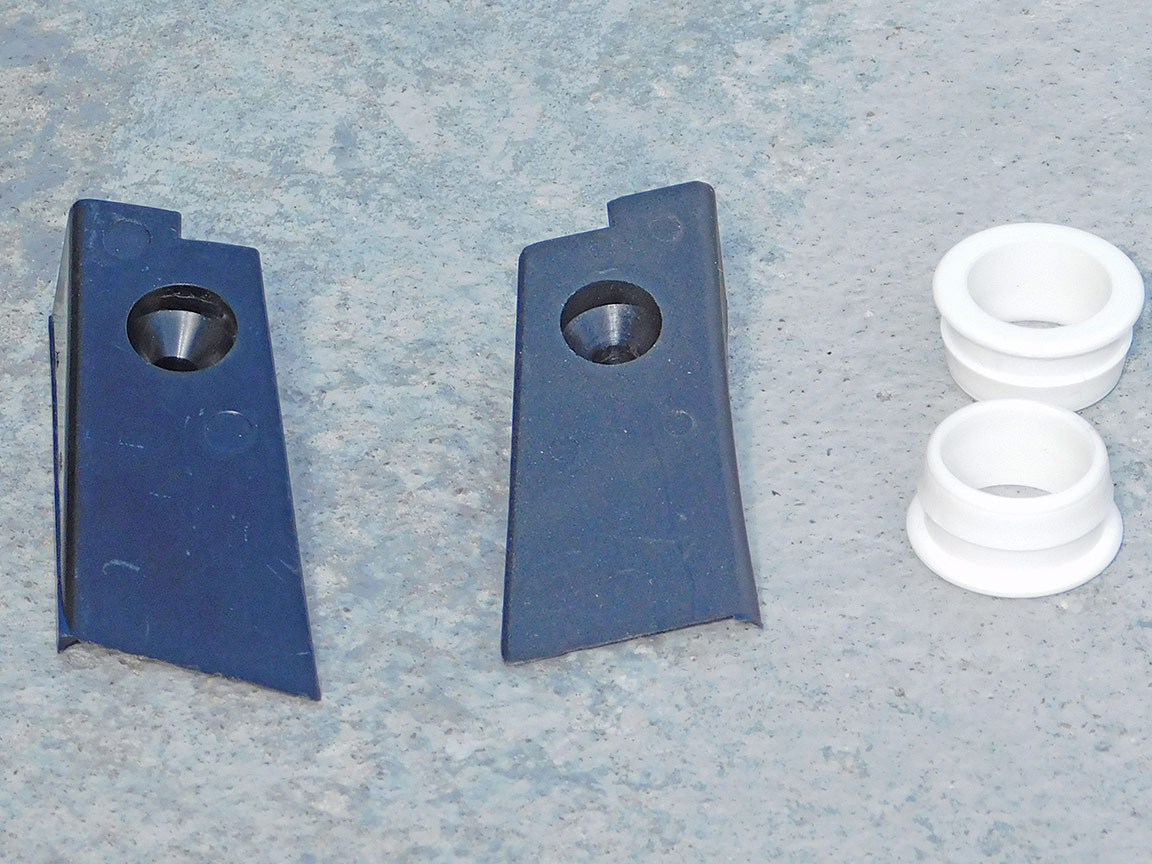
02: The left and right 1969L-1975 Door Lock Pillar Plastic Wedges are available from Zip Corvette as a set. The white 1970-1975 Convertible Deck Lid Guide Pin Bushings are sold separately.
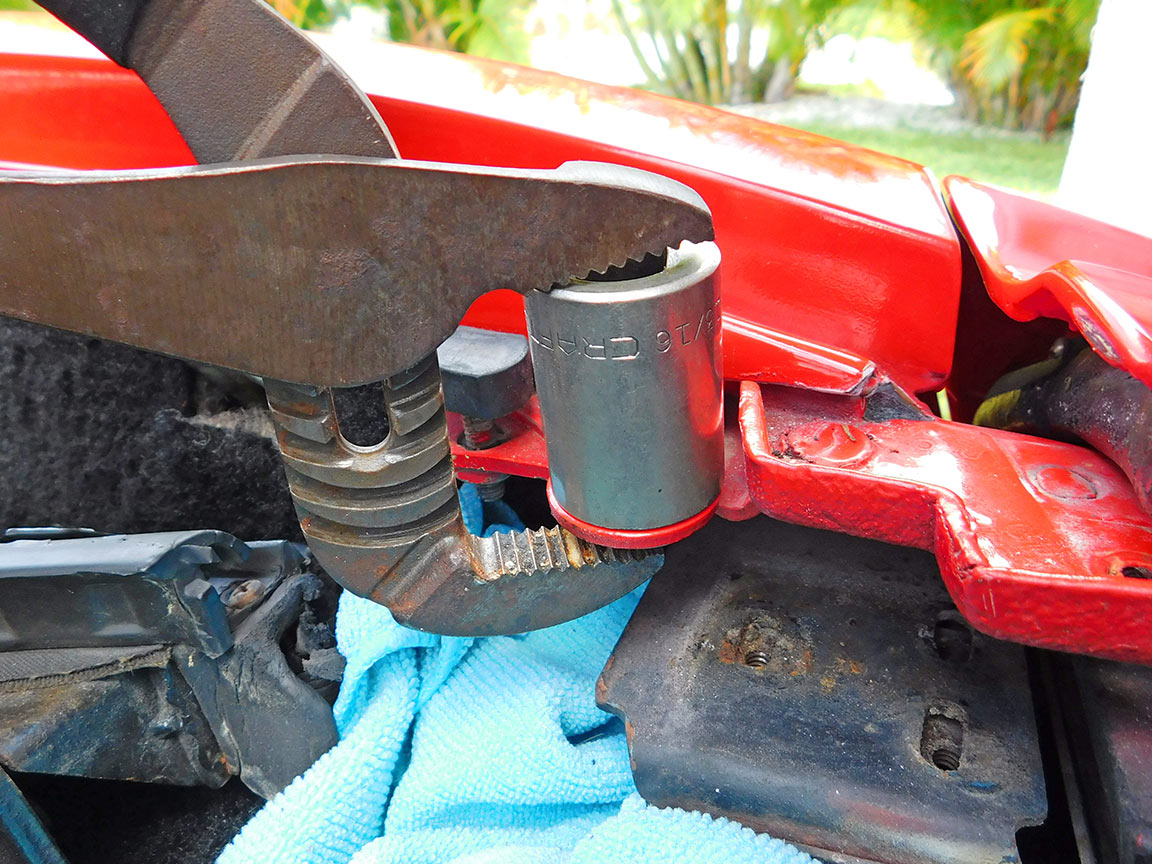
03: The deck lid guide pin bushing is a good place to start and is the easiest part to replace. The old bushing can be quickly popped out with water pump pliers. Tip: placing a 13/16-inch socket on top prevents scratching or chipping the surrounding paint.

04: The new bushing is easily pressed in with the same pliers. Place a ¾-inch socket underneath to allow the bushing to go through the bracket. Tip: place a rag underneath to prevent any nuts or bolts from getting lost if they are dropped.

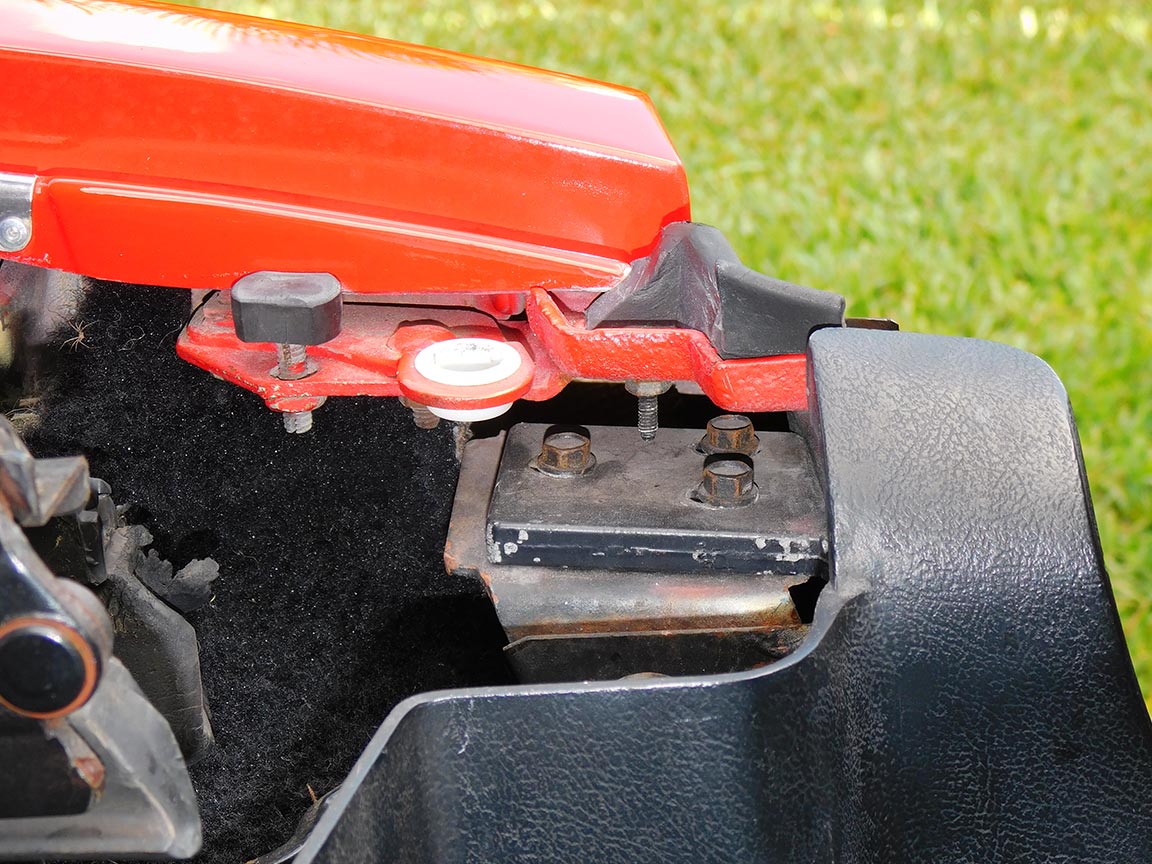
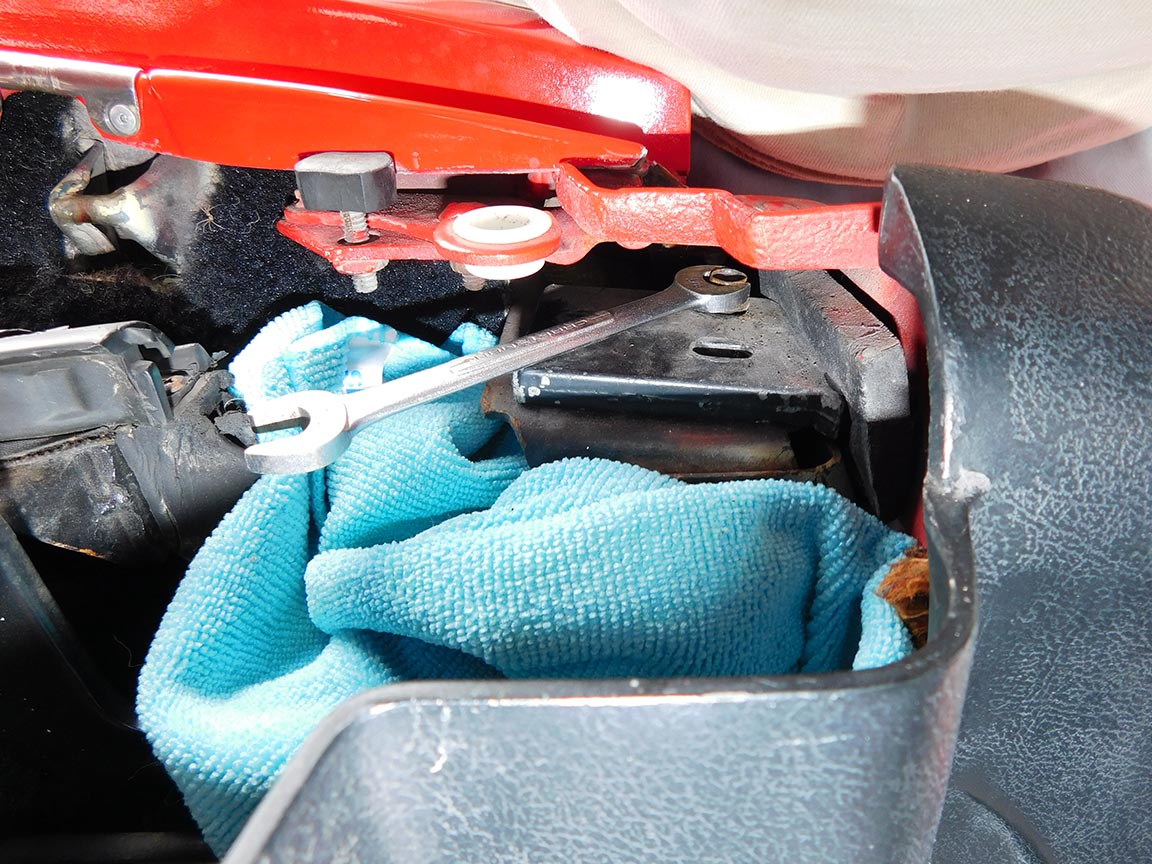
05: The door lock pillar plastic wedges are attached with a single machine screw. Tip: holding the nut with locking pliers prevents it from getting dropped. Note: a flat washer may be above the nut.

06: Any sharp edges on the plastic wedges can be quickly smoothed with a fine file or 400 grit sandpaper.

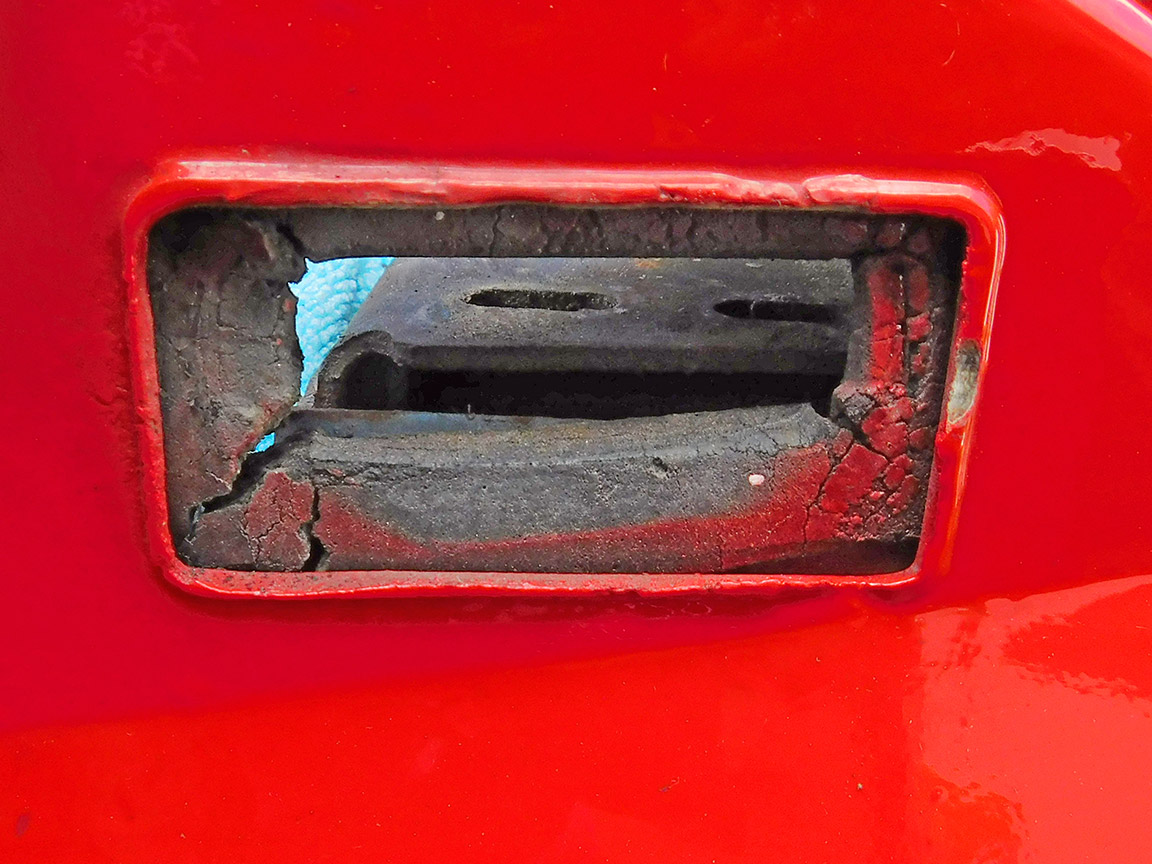
07: The rubber cushioning in the door alignment pin receivers breaks down after the stresses from years of use. The wear marks on the metal showed that at one time the receiver was too close to the alignment pin on the door.
08: The three bolts that attach the door alignment pin receiver are easy to see. However, there is not much room above them. Removal of the screw that attaches the rubber weather strip provides a little more working room.
09: The bolts are ¼-20 but have a 3/8-inch hex head. The outer bolt is more challenging to grasp than the inner two bolts. Small hands and patience can help with installation of this bolt.

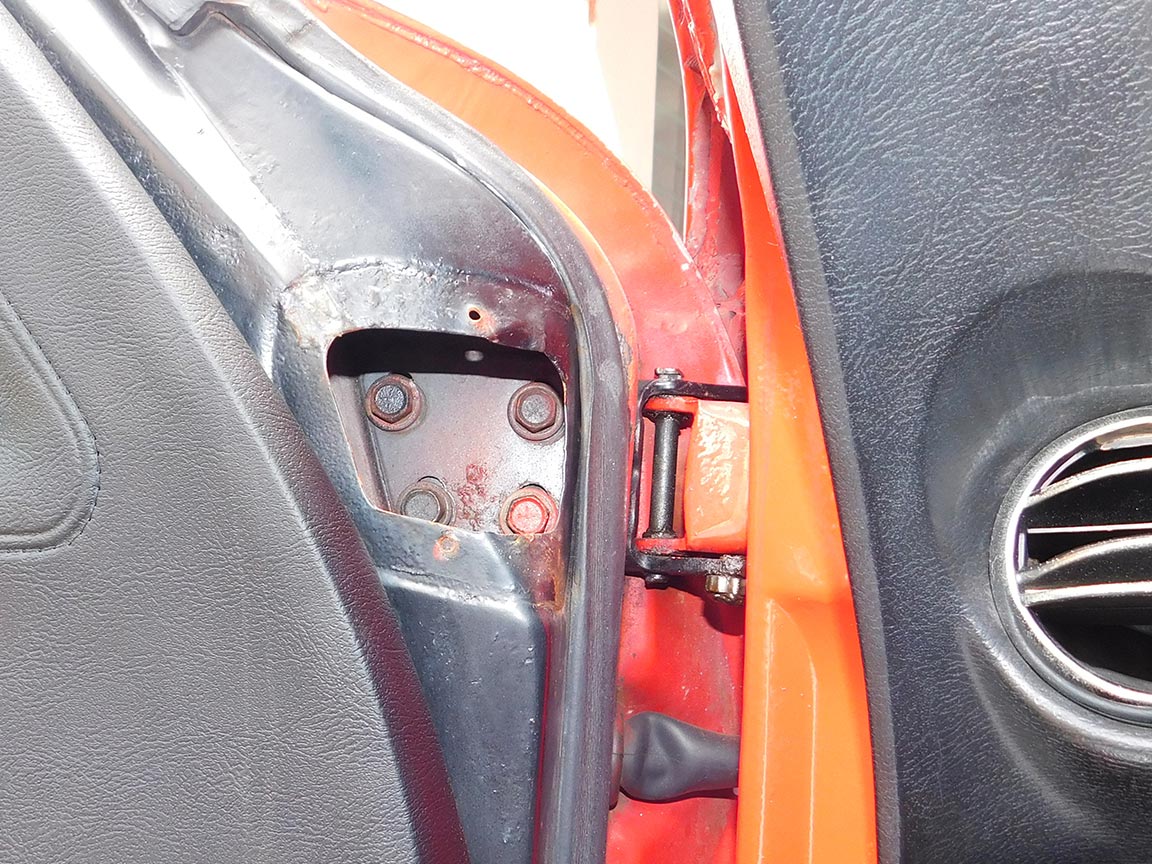
10: The replacement 1970-1975 Convertible Door Alignment Pin Receiver from Zip is a big improvement over the old receiver in both function and appearance. The receiver fits both left and right sides.
11: After the receiver is removed, it’s obvious that the seal is in pretty sad shape. Replacement 1970-1975 Convertible Door Alignment Pin Seals are available from Zip.
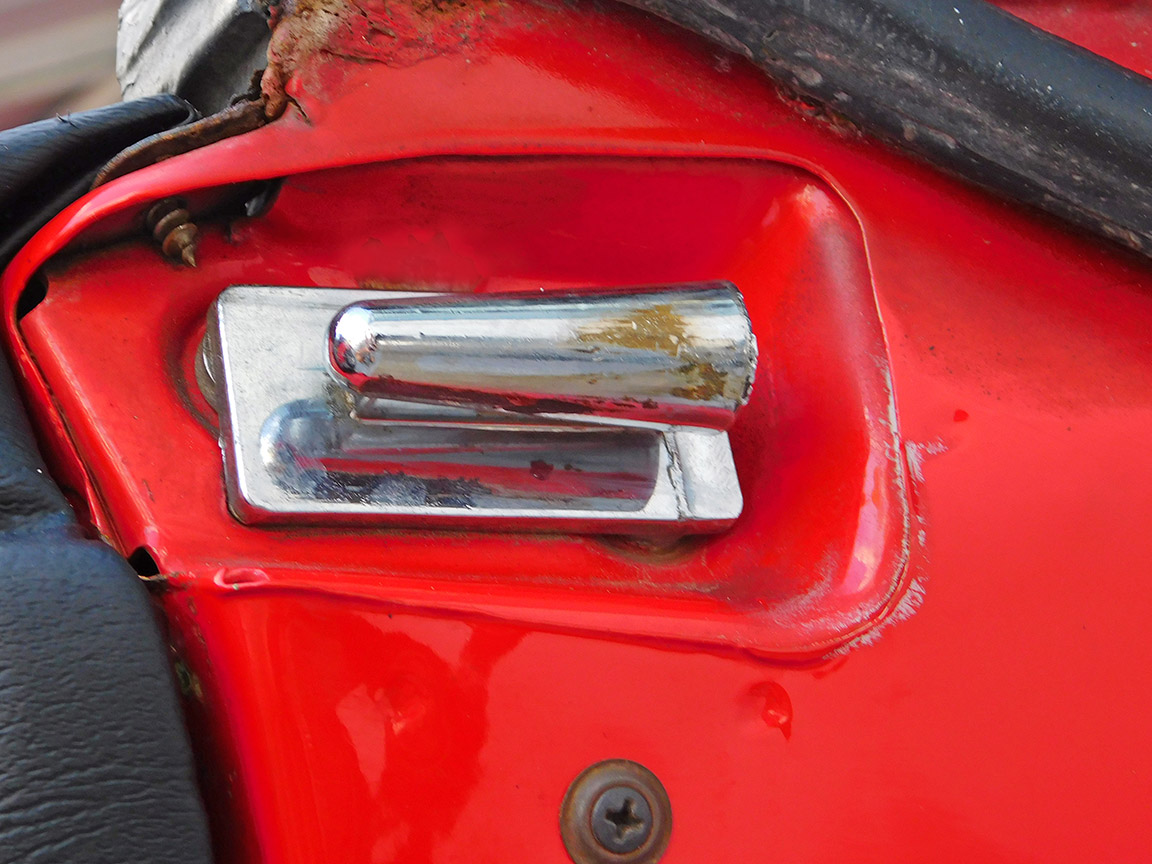
12: Position the wider part of the seal under the alignment pin receiver. The seal can be held behind the door lock pillar while the receiver is inserted through it or the seal can be installed on the receiver and worked in with a dull tool.

13: Zip offers a replacement set of six 1970-1975 Convertible Door Alignment Pin Receiver Bolts for the two door alignment pin receivers. The replacement bolts also have 3/8-inch hex head.
14: A Door Alignment Pin is located on the rear inside of the doors on 1970-1975 Corvette convertibles. The pin mates with the receiver to help securely hold the rear of the door as the body flexes while driving. Replacing these pins requires removal of the door panel.

15: Close the door and then pry the receiver outward until it firmly contacts the pin. Tip: use a long screw driver and a nut as a spacer. Tighten the receiver bolts and then check that the pin and receiver are making good contact.
16: Replacement of these parts is complete after installing the rubber weatherstrip and the new door lock pillar plastic wedge. The door jamb area now looks a lot better and the door is once again secure.

17: The top of the door should line up with the body before the door is closed and the alignment pin and receiver engage. If the door hangs down, check the condition of its hinges.

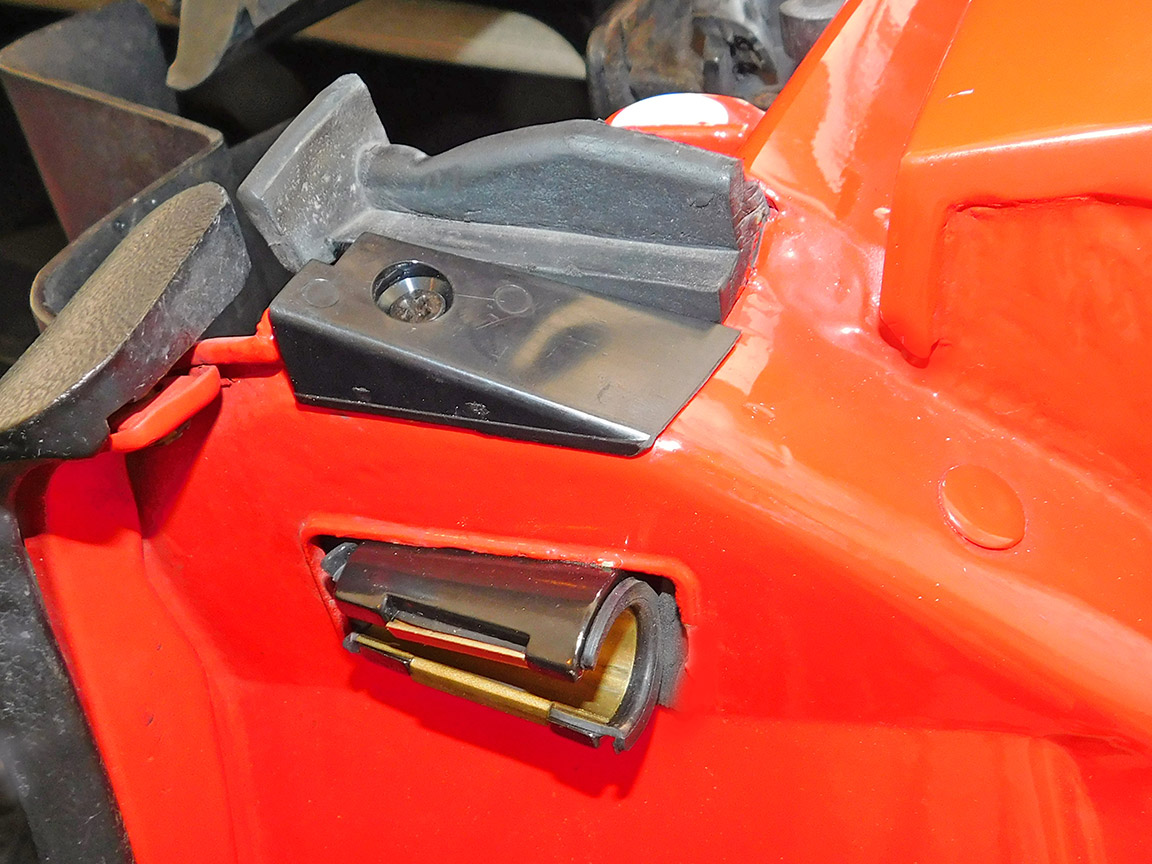
18: Lift the rear of the door to check the condition of the hinge bushings. If the door comes up ¼ inch or more, the bushings are worn and should be replaced. The receiver will wear out sooner if it has to hold up the weight of the door.
19: Replacement 1968-1982 Door Hinge Pin & Bushing Kits for the door hinges are inexpensive and available from Zip. Applying a drop of oil to the hinge bushings every now and then is good preventative maintenance.
20: A degree of adjustment of the door height is possible at its attachment to the upper hinge. This can be accessed by removing the plate on the front of the door. Loosen the four bolts and then tighten one of them while lifting the rear of the door. Replacement 1968-1982 Door Hinge Bolts are available from Zip as well.
1970-1975 Corvette Convertible Door Alignment Fix
Source: Zip Corvette Parts
8067 Fast Lane | Mechanicsville, VA 23111 | (800) 962-9632
Corvette Parts List Related to Article:
- 1970-1975 Conv Door Alignment Pin
- 1970-1975 Conv Door Alignment Pin Seal
- 1970-1975 Conv Door Alignment Pin Receiver Bolts
- 1970-1975 Conv Door Alignment Pin Receiver
- 1969L-1975 Door Lock Pillar Plastic Wedges
- 1970-1975 Conv Deck Lid Guide Pin Bushing
- 1968-1982 Door Hinge Bolt Set
- 1968-1982 Door Hinge Pin & Bushing Kit
- Shop/Repair Manuals
Great Tips !!!
Hallo from Germany,
This is exactly what I need to do. Perfect Tips thanks.