
Your C4 Corvette serpentine belt has started to make noise, so you apply belt dressing and the noise goes away – but then comes back louder than ever. Well, partner, it’s time to change the belt.
Noisy serpentine belts can be caused by wear or a loose or broken belt tensioner. A broken belt tensioner can even cause the belt to be thrown off. Thankfully, replacing the belt or tensioner is not a major project. Anyone who can use a breaker bar and follow a diagram can do it. Start the project by contacting Zip Corvette, where you can obtain the correct belt and the tensioner. The only other items you will need are a few common hand tools and about an hour of your time.
Our C4 had a serpentine belt that was really singing the blues. We also discovered that the belt tensioner was broken. In less than an hour, the entire project was completed and our C4 was back on the road, minus the noise.
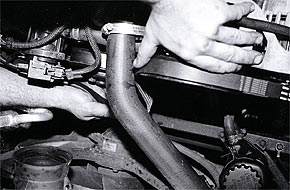
 01: For access, remove the mass air flow sensor and flexible duct by unclipping the mass air flow sensor from the air inlet duct at the front, then loosening the band clamp that holds the flexible duct onto the throttle body. Remove the flexible duct and position the mass air flow sensor off to the side.
 02: Disconnect the mass air flow sensor wiring harness and remove the sensor and duct. You now have an open area for access to the belt.
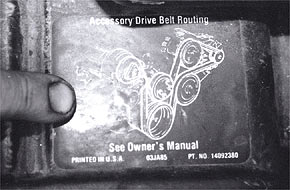 03: Before removing the belt, make sure you have a belt routing diagram or decal, usually located on the top of the radiator shroud. If not, a diagram is in the owner’s manual or the shop manual. If you do not have either of these, draw a diagram or take a picture. Without it, routing the new belt will be a nightmare.
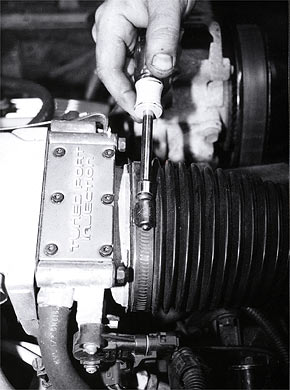
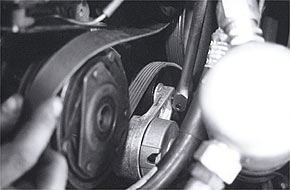
 04: To remove the belt, place the end of the breaker bar or tensioner bar into the square hole on the belt tensioner. Press the tensioner down to relieve the tension on the belt so it can easily be removed.
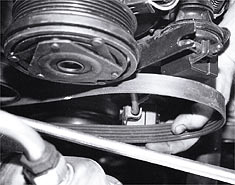 05: Carefully remove the belt from each of the pulleys.
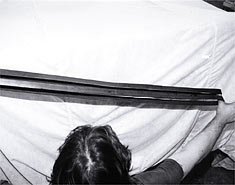 06: Compare the new belt to the old one to make sure you have the correct one. Place both belts on each thumb and spread your arms apart. The new belt should be slightly shorter because the old belt has stretched with use.
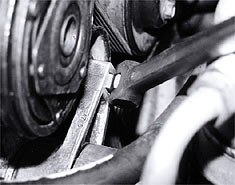
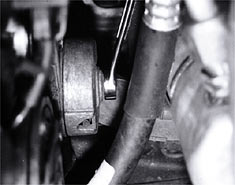 07: If the belt tensioner is loose, weak, or broken, you will have to replace it. Use a 15mm wrench to remove the tensioner retaining bolt. Now slide the tensioner out.
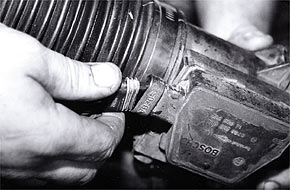
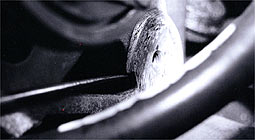
 08: Our old tensioner (right) would not keep the belt tight because the alignment tab had broken off. Without this tab, the tensioner can’t stay in place to keep the correct tension on the belt.
 09: To replace the tensioner, align the tab on the tensioner with the alignment slot in the bracket. Install the retaining bolt and torque to 60 ft. lbs.
 10: Route the new serpentine belt onto the pulleys as indicated by the routing diagram. Make sure the belt is aligned properly with each pulley and the grooves in the belt align with the grooves in the corresponding pulley.
 11: Place the end of the breaker bar or tensioner tool into the belt tensioner slot. Push the tensioner down and install the belt over the tensioner pulley. Make sure the belt is aligned with each pulley, then slowly release the belt tensioner. With the belt installed, reinstall the mass air sensor and duct, and you’re done.
Corvette Serpentine Belt
Source: Zip Corvette Parts
8067 Fast Lane | Mechanicsville, VA 23111 | (800) 962-9632
Corvette Parts List Related to the Article: