A light-emitting diode (LED) is an electroluminescent semiconductor that emits photons–the atomic particles that makeup light–when an electric current passes through it. Like all diodes, LEDs only allow current flow in one direction. A diode has two semiconductor parts: “N” and “P”. N-material has free electrons and P-material has a shortage of electrons or “electron holes”. When current flows from the P-side of the LED to the N-side, the holes cross the junction between N- and P-type parts and are filled with free electrons. In the process, light is emitted.
An LED emits light when electron holes cross over into the N material and are filled by the free electrons in the P side.
LEDs are “solid-state” devices, distinguishing them from other automotive lighting–incandescent bulbs, which contain a coil of wire that glows brightly when current passes through it, or high-intensity discharge (HID) bulbs, which light up when current arcs across a gap between two electrodes. From 1953 to 2004, Corvette headlights were incandescent. From 2005 to 2013, they had HID low beams and incandescent high beams.
In the last dozen years or so, LEDs have gained wide acceptance by the automotive industry for virtually all types of lighting applications because of their efficiency, versatility, durability and cost. Since 2014, Corvettes have been built with LED headlights.
LEDs have advantages over the incandescent headlight bulbs used on ’58-’04 Corvettes. The first is efficiency. Incandescent bulbs generate a lot of heat because their filaments must be hot to emit light. That energy is wasted because it’s not producing visible light. Conversely, LEDs generate comparatively little heat so an LED’s electrical demand is far lower.
LED bulbs last longer than incandescent headlight bulbs. They are capable of more lumens (a measure of visible light) per watt of power consumed. For example: a 55-watt, incandescent headlight bulb generates 700-825 lumens. The same output from an LED bulb requires only 6-8 watts.
They are distinctive for their brightness. Why so bright? Most LED headlights are engineered to both consume less power and have greater brightness. In addition, most LEDs used in headlight applications are noticeable because of their “color temperature” a measure of the predominant wavelength of light they emit. “Kelvin” (K) is the unit of color temperature measurement and the typical C3 55-watt incandescent headlight bulb has a color temperature of 3000K so its light is yellowish. Most LEDs used in automotive headlight applications are 5000K and their light is white, like daylight on a sunny day at noon.
LED Headlights for Older Corvettes
Given the widespread use of LED lighting by car companies and their distinctive appearance, it’s no surprise that LED headlight conversions for cars not originally equipped with them have become a popular aftermarket upgrade. Since LEDs look so cool, we wanted to put them on our ’71 Coupe. Known as the “Big Block From Hell,” it once was a Vette Magazine project car and currently is a Corvette Action Center website project as well as being featured here on corvettemagazine.com.
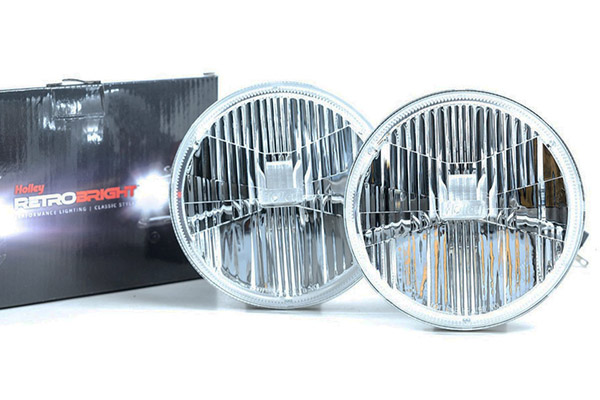
The Internet is awash with LED conversions for 5.75-inch, four-light “sealed-beam” lighting systems typical of ’68-’82 C3 Corvettes. A couple of years ago, for the C6 Section of corvettemagazine.com, we converted a 2012 Z06 to LED headlights using products from Morimoto, an Atlanta-based supplier of aftermarket lighting products. As luck would have it, in early 2022, Holley Performance Products introduced a line of LED headlights for C1, C2, C3, and C4 Corvettes. Branded “RetroBright”, they were designed, developed, and manufactured by Morimoto. RetroBright LED conversions are available for 7-inch round two-light systems used on ’55-’57s, the 5.75-inch round, four-light systems used on ’58-’82s, and the 5×7-inch, rectangular, two-light systems on ’84-’96s.
A pair of the Morimoto-engineered, Holley RetroBright LED Headlights sold by Zip Products. Image: Holley Performance Products.
This drawing is typical of all the Holley RetroBright 5.75-in headlights. Image: Holley Performance Products enhanced by the Author.
We emailed John Tobias, our contact at Morimoto with whom we worked on the C6 conversion, and he told us, “RetroBrights look identical to stock. Many other LED sealed-beam conversions do not have an ‘OE look.’ RetroBrights are also brighter than stock. Many LED headlight conversions out there are not as bright as the stock headlights.” Tobias continued, “Another feature that sets the RetroBright apart from other conversions, is that they are available in two color temperatures, 5700K ‘Modern White’ and 3000K ‘Classic White (similar to the yellowish light put out by stock incandescent sealed beams). Also, the RetroBright LED headlights are DOT-compliant. The LED conversion market is flooded with products that are not DOT compliant, even though many have ‘DOT’ embossed on the glass.”
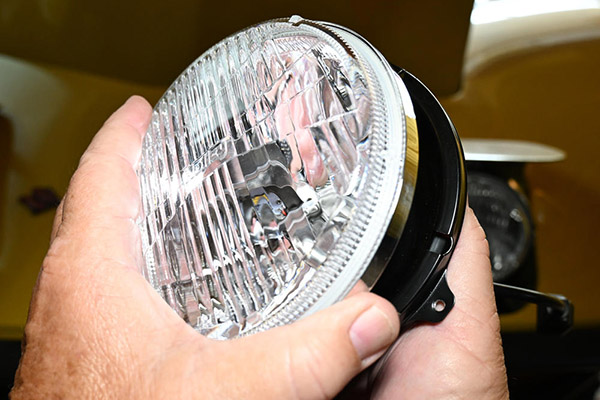
While the Holley 58-82 Corvette RetroBright Headlight Bulbs sold by Zip (PN HDL-434, HDL-435) look like OE sealed-beam lights, they are a multi-piece design consisting of a polycarbonate lens bonded to an aluminum reflector and an LED “cartridge” that bolts into the back of the reflector. Each has a pigtail wire that plugs into either stock, three-pin (low/high beam) connectors, or stock, two-pin (high beam) connectors.
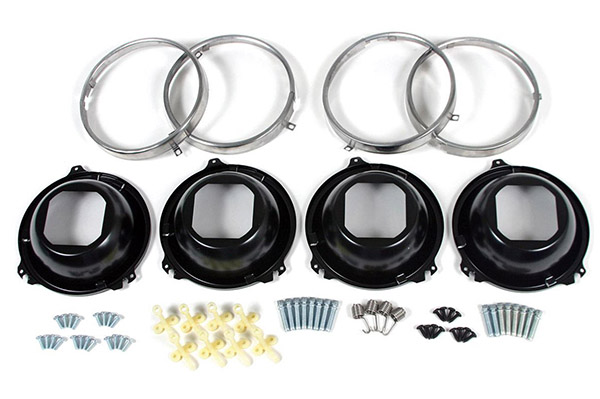
The 5.75-inch RetroBrights fit both original GM and Zip Products reproduction C3 headlight cups. They use all the stock hardware such as retaining springs and adjuster screw assemblies. Since all the headlight mounting hardware was over half a century old on our project car, in preparation for the conversion, we ordered a Zip Products 68-82 Headlamp Bulb Replacement Kit (PN HDL-333) which includes reproduction headlight cups, retaining rings, headlight cup retaining springs, headlight adjuster screw assemblies and headlight retaining ring screws.
There is one potential problem with a C3 RetroBright conversion and that is the holes in the die-cast aluminum headlight housing usually interfere with the rear of the LED cartridges bolted to the RetroBright reflectors. Those holes need to be enlarged and the procedure is covered in the how-to text.
A stock, Corvette T3 headlight compared to a Holley RetroBright. At right, on the back of the RetroBright reflector is the LED cartridge. The rear corner of the cartridge may interfere with the hole in the headlight housing that is behind the headlight. Image: Morimoto.
LED Headlight Conversion
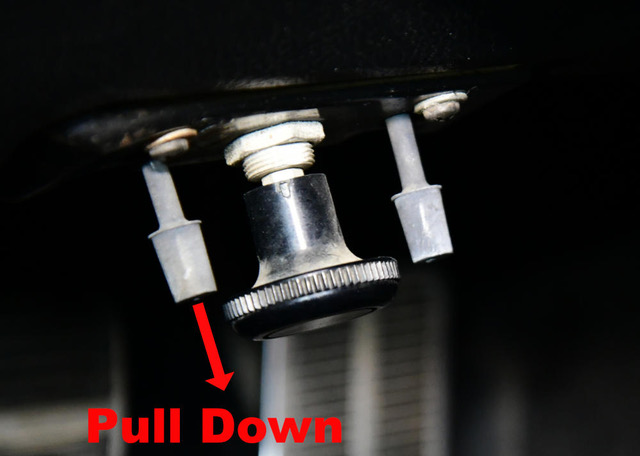
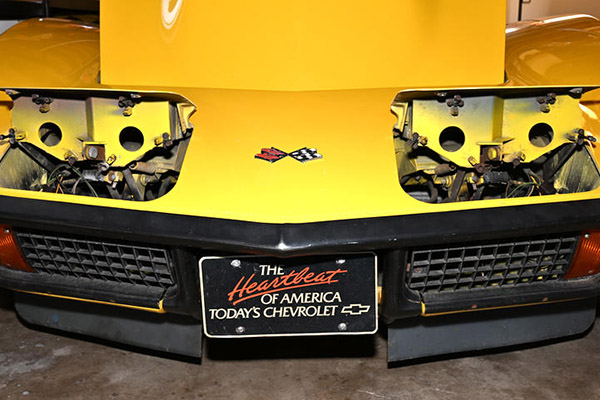
The first step is to lock the headlights in the up position. Start the engine. Turn on the headlights then pull down the left vacuum valve below the steering column. Turn off the headlights and shut off the engine.
The headlight lock valve is below the steering column on the left side of the large knob.
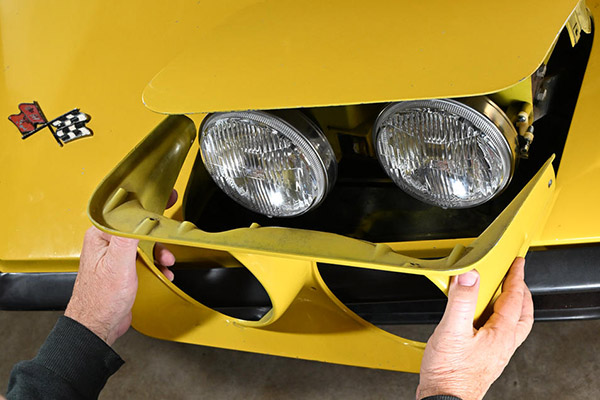
The headlight bezels that cover the front of each headlight assembly are each held by four screws. Remove those screws then pull the bezels off and set them aside.
Headlight bezels are retained by four Phillips head screws.
Once the screws are removed, lift the bezel up and away from the housing. Set them aside in a place where they will not get dirty or scratched.
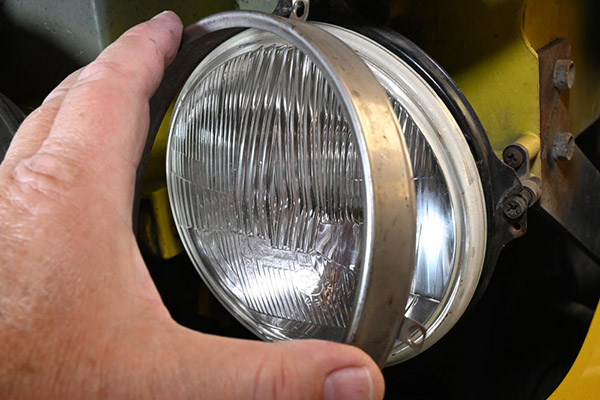
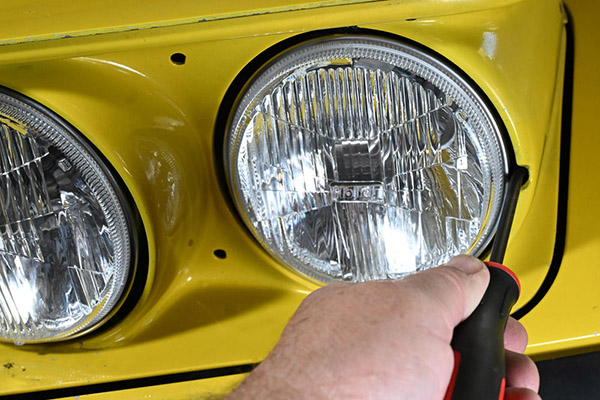
Remove the screws holding each headlight’s retaining ring then remove the ring. Pull the light forward, unplug the electrical connector then remove the light.
Headlight rings are held by three screws. Remove the screws and pull off the ring.
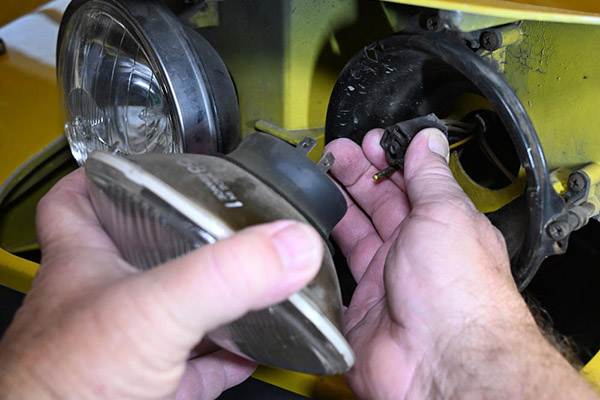
Pull the headlight forward, out of the headlight cup. Reach behind it and pull off the electrical connector.
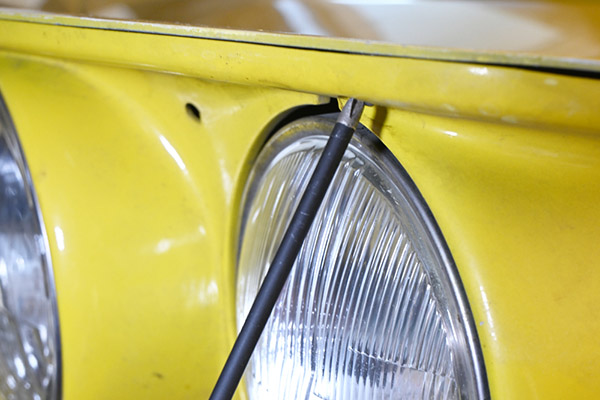
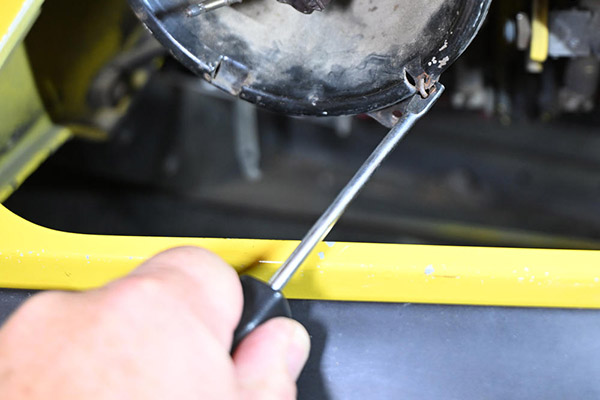
Release the spring retaining each headlight cup. The correct way to do this is with a special tool called a headlight spring tool, but any tool with a handle you can grip and a small hook on the end will do. Some even try needle nose pliers but you need a very strong grip for that.
Stock headlight cups are held by headlight retaining springs. Hook the end of the spring and stretch it so you can pull it off the cup.
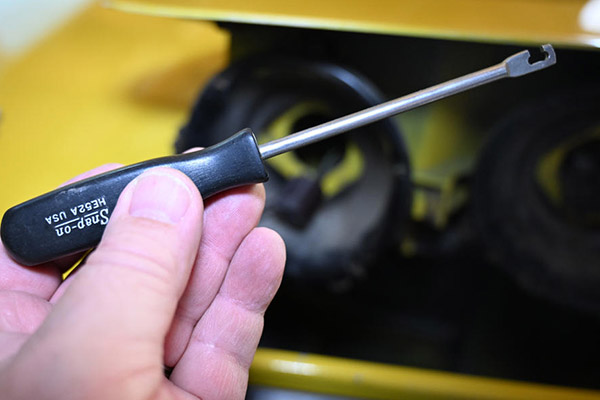
An example of the headlight spring tool we used in preparing this article. There are a ton of these Snap-On HE52As for sale on eBay. Snap-On's revised HE25B is available online. Also, "T" shaped tools are available.
The headlights and headlight cups are been stripped and discarded.
All that’s left are the headlight housings, the old headlight adjusters, retaining springs and the wiring.
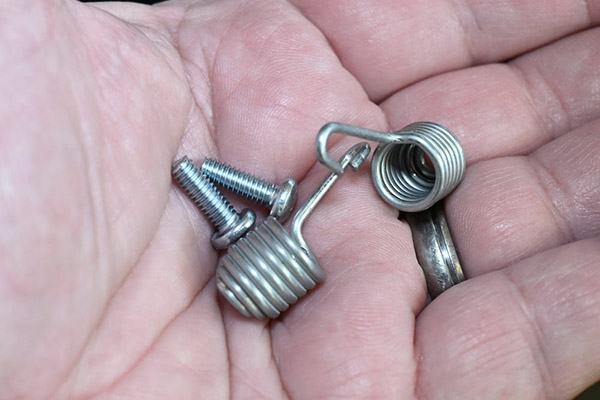
Begin the LED conversion by replacing the existing headlight mounting springs with the new springs and retaining screws from Zip’s Headlamp Replacement Kit.
New headlight retaining springs and spring screws come in the Zip Products Headlight Replacement Parts Kit.
Replace all four springs.
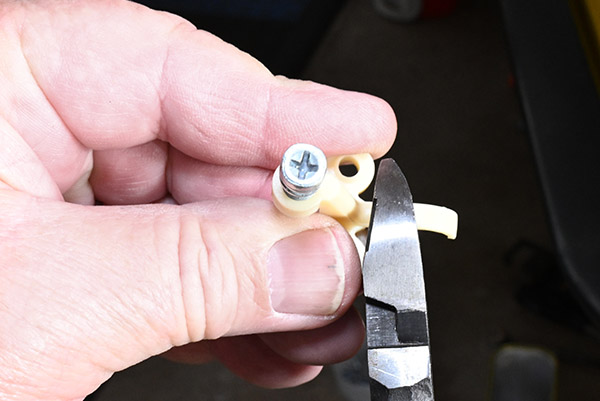
Headlight aiming is set by a pair of adjuster assemblies for each light. The reproduction plastic headlight adjuster bodies are not C3-specific and must be modified by removing the curved appendage at the base of the adjuster. Use wire cutters to remove the curved section from all eight of the adjusters included in the Headlight Replacement Kit.
Use wire cutters or small shears to cut the leg off each headlight adjuster.
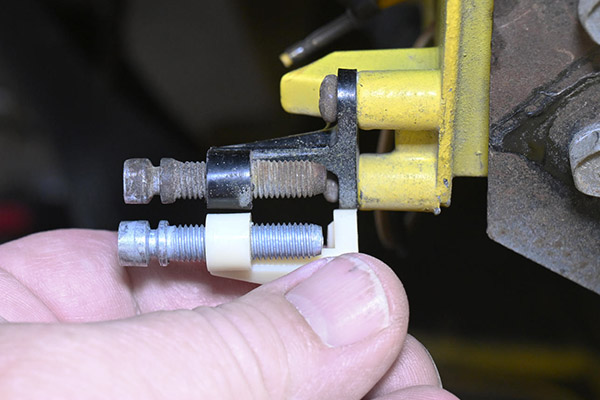
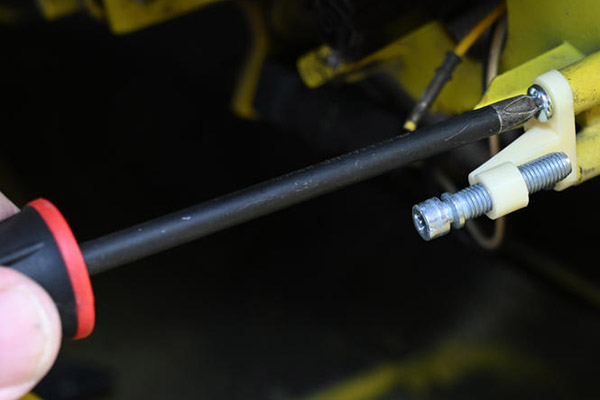
Match the position of each new headlight adjusting screw with the position of the headlight screw it is replacing. The slot just below the screw head is the part of the new screw that needs to match the old screw.
There are 16 headlight adjusters and each is specific to its mount. Replace them one at a time, matching the screw position for each.
Vertical aiming is accomplished by the adjuster at the top of each headlight cup. Horizontal aiming is accomplished by the adjuster at the side of each cup. Install the new screws into all eight of the modified adjuster bodies. Assuming that the stock headlights were aimed properly, a key step in replacing adjusters is to match each new adjuster screw position in the adjuster body to that of the adjuster screw being replaced. Matching adjuster screw positions will make your initial aiming of the new LED headlights far easier.
The driver-side headlight housing was fitted with new retaining springs and adjusters.
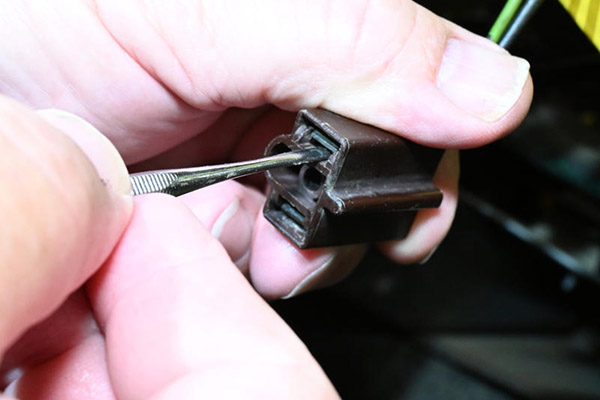
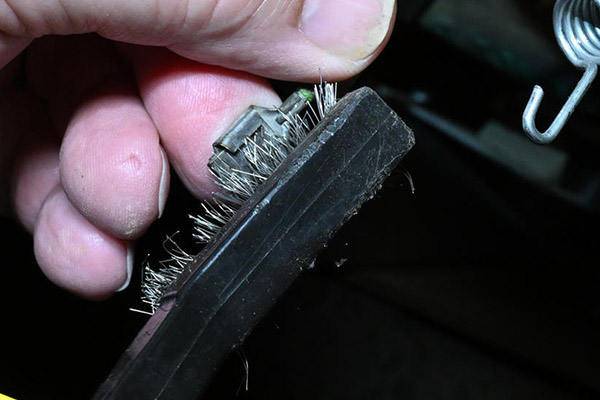
Clean all the connectors in the three-prong and two-prong headlight connector bodies. This is accomplished by using any tool with a narrow flat end to release the connector lock. Pull the connector out of the connector body then use a small wire brush to remove any dirt or corrosion on the connector.
We used this pointed tool to release the lock on the headlight connector in the three-prong connector body. But tools specific to that task are available. Unlocking a connector bends the locking tank so you have to bend the tank back out before you push the connector back into the connector body.
Clean the part of each female connector that engages the male spade connector in the 3- and 2-prong connector bodies.
An A-code headlight cup out of the Zip Products Headlight Replacement Kit.
We chose to replace all four of the car’s 45-year-old headlight cups with new, reproduction cups from Zip Products. They come as a set in Zip’s 68-82 Headlamp Bulb Replacement Kit (PN: HDL-333). This kit includes mounting springs, adjuster assemblies, retaining rings, and retaining ring screws.
Like the stock cups, the Zip reproductions are stamped “A”, “B”, “C” or “D” because they are specific to the position of each light on the car. “A” is driver-side outer, “B” is passenger-side outer, “C” is passenger-side inner, and “D” is driver-side inner. Because each position uses a specific headlight cup, pay attention to the letters stamped on each cup. Unlike the stock cups, the repro cups not do not accept the headlight retaining springs. They use headlight retaining rings with a slot into which one hooks the headlight spring. Unfortunately, this design makes it a little more difficult to hook the spring to the headlight assemblies. Again, a headlight spring tool is the best way to hook the springs.
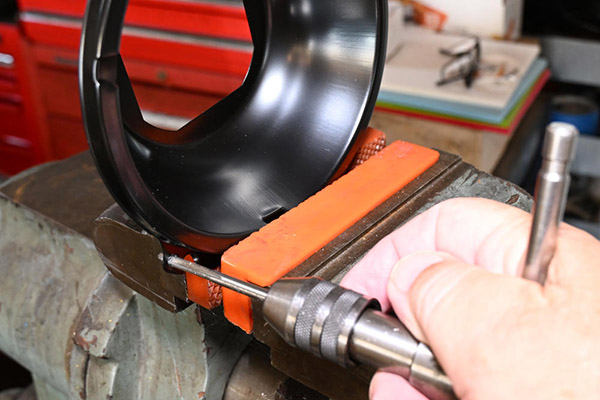
Reproduction headlight cups may not be threaded for the three headlight ring screws. The screws supplied with the Zip Headlight Replacement Kit are not self-tapping. Inspect the three screw holes in each cup. If they are not threaded, you’ll have make the threads. The headlight screws have an 8-32 thread. To cut threads in the cups, you need an 8-32 tap, a tap wrench and a vise with urethane vice jaw inserts. Chuck the cup in the vise then carefully cut the threads in the screw holes with the 8-32 tap.
Some of the reproduction headlight cups are not threaded. You must use urethane vice jaw inserts to prevent damage to the cup.
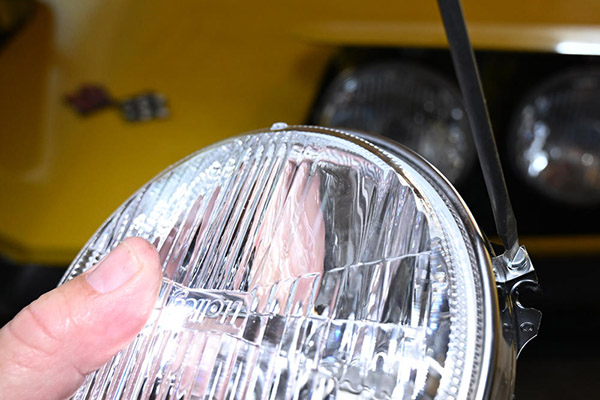
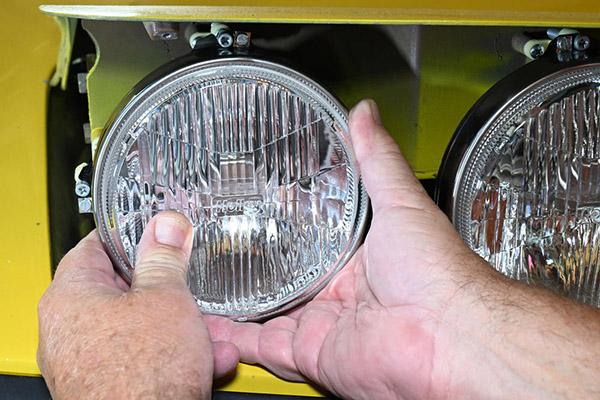
Test fit a RetroBright assembly in each headlight cup. Each must be “clocked” such that the word “Holley” embossed on the light lens is horizontal when the cup is in its correct position. Do the two outside lights first (A and B cups) and then the two inside lights (C and D cups).
Each headlight cup is different because of the locations of the headlight springs and adjusters. Test fit each RetroBright headlight in the correct headlight cup. The light must be oriented such that the word "Holley" is horizontal.
Attach the headlight rings with the screws included in the Headlight Replacement Parts Kit. To sharp-eyed readers: yes. This RetroBright is upside down.
Once the lights are in the correct cups and are clocked properly, install the headlight retaining rings with the screws supplied in the Headlight Replacement Kit. Install the headlight assembly into the adjusting screws then stretch. You may need to push the headlight assembly upwards so the rear of the LED cartridge drops into the hole in the headlight housing. Hook the headlight spring with your headlight tool.
Test fit the headlight assembly in the headlight housing. Inspect the edges of the hole in the housing behind the headlight cup looking for interference between the hole and the back of the LED cartridge. An inspection mirror will be necessary to see all potential interference areas.
Morimoto developed the Holley RetroBright LED headlights to be a “bolt in” conversion to fit OE headlight mountings typical of most cars with 5.75-inch, round, four-light systems, however, with C3 installations, there will likely be interference between the rear of the LED headlight cartridge and the wiring harness pass-through holes in the die-cast aluminum headlight housings. These holes are behind the headlight cups. There must be at least .030-inch clearance between the hole edges and the rear of the LED cartridges. Usually, interference problems will occur along the edges of the bottom half of the wiring harness hole.
Once a headlight and headlight cup are installed, inspect the clearance between the back of the LED cartridge and the edge of the hole. If interference exists, it will be impossible to properly aim the headlight. Remove the light and headlight cup.
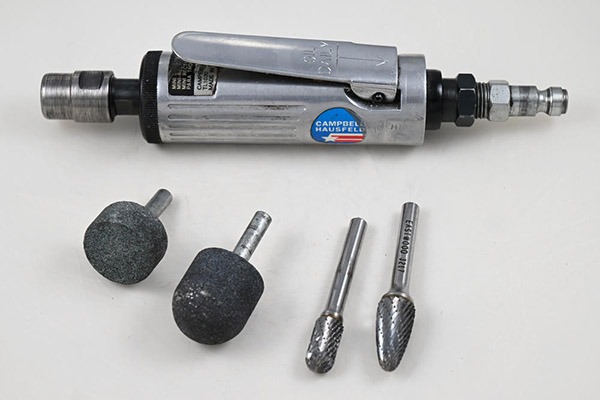
The best tool for removing material from the headlight housing holes is a mini die grinder, however, a full-size electric die grinder will work as long as its collet will accept stones or burrs with 1/4-inch shanks. Rotary burrs or grinding stones will work. The use of cutting oil will increase the life of the burr.
Obtain a mini die grinder with a 1/4-inch collet. It can be air- or electric-powered. Fit the grinder with either a double-cut, tungsten carbide burr or a medium-grit grinding stone. Enlarge the bottom of those holes so the rear of the LED cartridge clears their edges by at least .030-inch. If the lights need to be aimed higher, you may need even more clearance because raising the beams with the adjustment screws lowers the rear of the cartridges moving them closer to the holes’ edges.
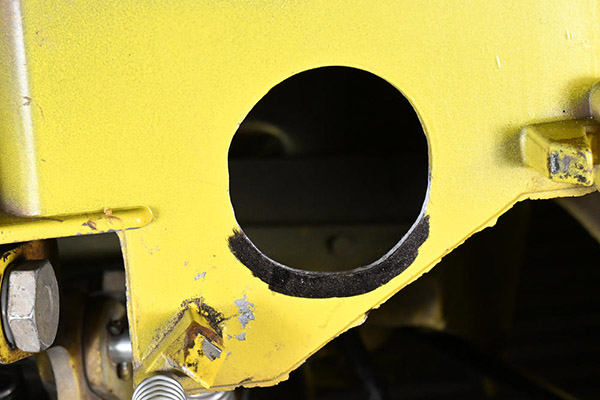
We used both carbide burrs and grinding stones. On this hole, we used a stone. We also deployed a shop vacuum to suck up as much of the chips as possible. After grinding we vacuumed the spaces underneath the housing to get the rest of the chips.
This was another of the housing holes we modified. Before we started we marked the areas where we had interference between the edge of the hole and the LED cartridge.
Once you have the proper clearances between cartridges and holes, reinstall each headlight assembly. Now begin the final headlight installation by connecting the RetroBright headlight plug to the car’s wiring harness. Install the headlight assembly into the adjustment screws. Then, using your headlight tool, stretch and hook the headlight spring onto the headlight assembly.
Once the headlight housing hole modifications were done, we connected the RetroBrights to the headlight wiring harness.
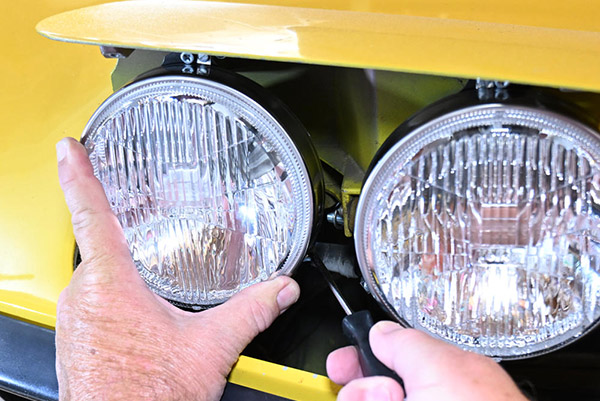
We put each headlight assembly in place. Do this by engaging the cup with its two headlight adjusters. Then push up slightly to allow the headlight cartridge to drop into the headlight housing hole.
Use your headlight spring tool to hook the spring onto the headlight ring. Stock headlight assemblies and RetroBrights with reproduction headlight cups have a headlight spring hook slot in the ring not in the cup. That requires the headlight retaining spring to be stretched farther.
Installation complete on the passenger side Holley RetroBright low/high beam light.
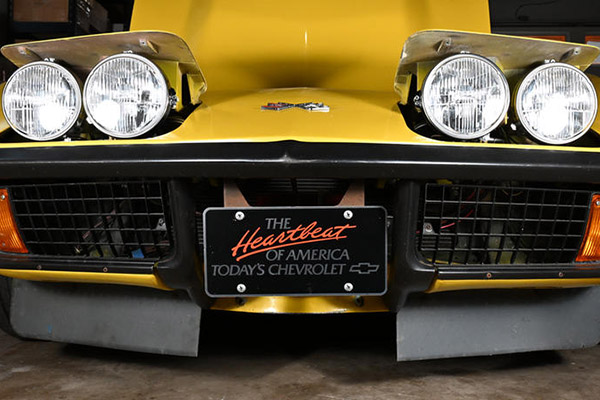
Worm's eye, front view of our '71 project car with all four RetroBright headlights installed and functional.
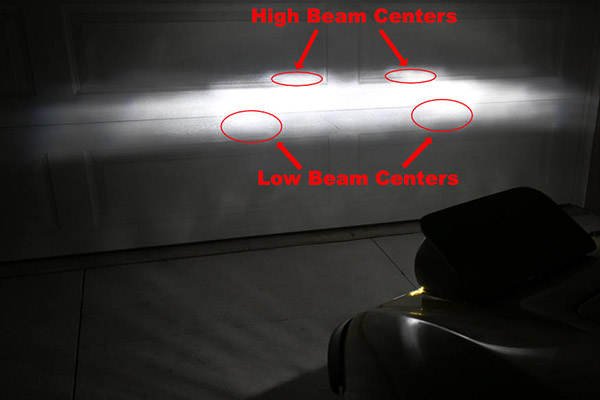
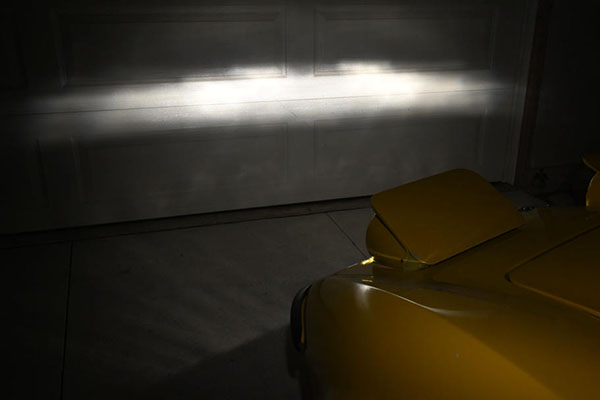
This is the light pattern we saw when we first turned the lights on and pulled up to the shop door. It was pretty close.
If you matched the positions of the new headlight aiming screws with the old ones as detailed above, the initial aiming of the RetroBright lights should be close to optimal. Verify the headlight aim by first parking the car on a level surface about five feet away from a garage door. Check the “quick and dirty” aim by looking at the light pattern on the door. Then road test the car to confirm that.
If you matched all the new headlight adjusters with the old ones, your headlight aiming should be close. When driving with low beams, if many oncoming drivers are flashing you with high beams, lower your low beam adjustment just slightly. You want your high beams to give as much downrange light as possible. You may find with LED lights, you can raise your high beam aiming just slightly.
We found that the horizontal aiming was ok, but the vertical aiming of all the lights was a bit low. We raised the light pattern of the low/high beam lights slightly and we raised the pattern of the high-beam light about twice what we did to the low/high beam lights.
Once we had acceptable headlight aiming, we replaced the two headlight bezels. Once the bezels are back in place, if you need to adjust the headlight aim, do that by accessing the adjuster screws through the screwdriver slots in the bezels.
We did our initial headlight adjusting with the bezels off. After the adjusting work, we replaced both headlight bezels.
You will need a Phillips head screwdriver if further adjustment is required. Poke it through the slot ahead of the adjuster screw and engage the screw. Then turn the screw in the appropriate direction. Image. Clockwise reduces the height of that part of the cup. Counter-clockwise increases the height.
This is how it looked after we made some small adjustments to headlight aiming. Image: Author. This is the pattern on our shop door after our final adjusting session.
Below are before and after images of the headlight pattern on a highway test location we use for headlight articles.
Real-world test. This was a highway pattern of the incandescent headlights we had on the car before the RetroBright upgrade.
In about the same location, this was the highway pattern after installing the RetroBrights.
Source:Zip Corvette Parts 8067 Fast Lane | Mechanicsville, VA 23111 | (800) 962-9632


Great normative article. I’ll be using it as a reference when I convert my 68. Thanks. 🙏
Steve Kellberg