
by Hib Halverson
Since 1963, Corvettes have contained plastic panels to channel cooling airflow to the right places and rubber seals that block it from the wrong places. The 1997-2004 C5s all have a plastic air dam to direct cooling air through the radiator. They also have seals that exist mainly to prevent cooling air from flowing where it should not. These seals also serve as “weatherstrip” to keep the rain, snow and dirt out. Like all plastic and rubber parts, these items deteriorate, wear away or get damaged so eventually they must be replaced.
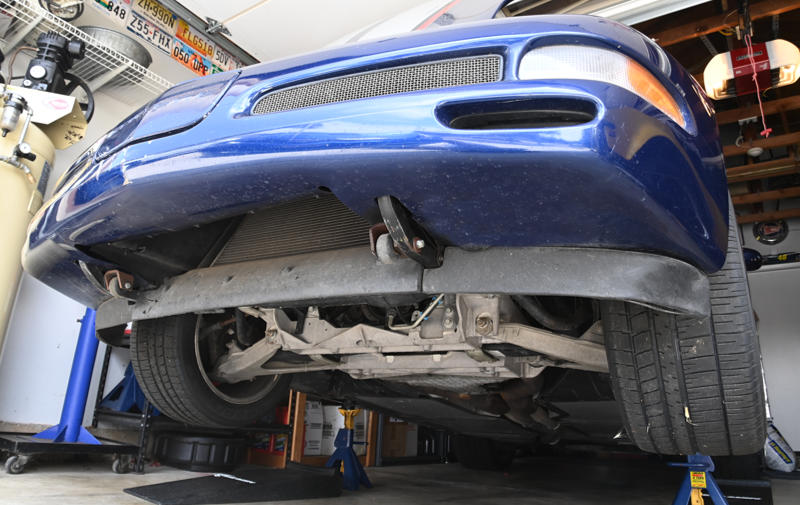
A C5’s air dam mounts beneath the front fascia. As the car moves forward a high-pressure area develops in front of the air dam and that forces airflow up into the engine cooling air intake and through the radiator. The car used for this project was a 2004 Z06 with 46,000-miles on it. After 18 years, this car’s air dam was pretty beat up.

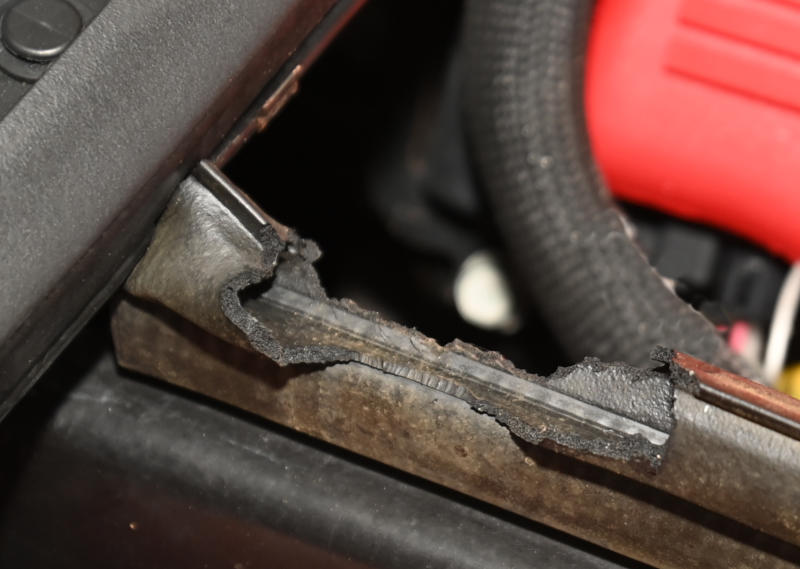
C5s also have seals that block cooling airflow in the following locations: 1) between the cowl and the rear of the hood, 2) between the battery compartment and the engine, and 3) between the top of each front fender and the edges of the hood. Some of our project car’s under-hood seals had hardened with age. Others had been partially eaten during a “rodent attack”.

Don’t worry, losses on our side were modest. In a counter-attack, we deployed three large, “Victor” brand rat traps. The rats won may have won a battle, but we won the war. Since it ended, there’ve been no more problems with rats doing a buffet under the hood of our C5.
The final part of our under-hood restoration project was to replace all four hood bumper caps, two of which had hardened with age.
To replace all of these under-hood items requires some parts from Zip Corvette, a few basic tools, a plastic scraper and several hours work. We ordered the following parts from Zip:
- 1997-2004 Front Lower Air Dam (Spoiler) Set
- 1997-2004 Front Lower Outer Air Dam (Spoiler) Reinforcements
- 1997-2004 Front Lower Air Dam (Spoiler) Mount Kit
- 1997-2004 Hood To Side Fender Seals
- 1997-2004 Cowl to Hood Rear Seal
- 1997-2004 Battery Compartment Seal
- 1997-2004 Hood Bumper Cap (4 caps are needed)
First, we replaced the air dam, the most important of the parts that manage cooling airflow. If it’s damaged or has pieces missing, engine coolant temperature might be higher than normal and may even overheat.

Since the air dam drags on the ground going in and out of steep driveways and over other similar obstacles, its material is designed to wear away rather than break. Because of that, the air dam on our Z06 project car was a bit torn up.
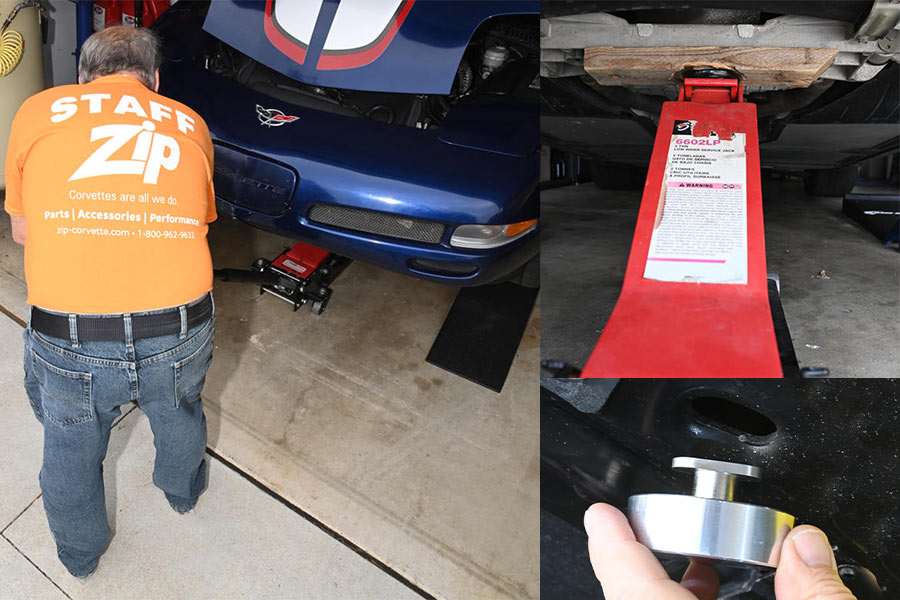
01: To lift the front of a C5 with a floor jack, usually you must drive the front wheels up onto low ramps. Position the jack to lift in the front cradle. Install Zip Corvette’s 1997-2013 Billet Aluminum Jack Pads in the front frame slots. Place jack stands under the pucks, then set the front end down on the stands.

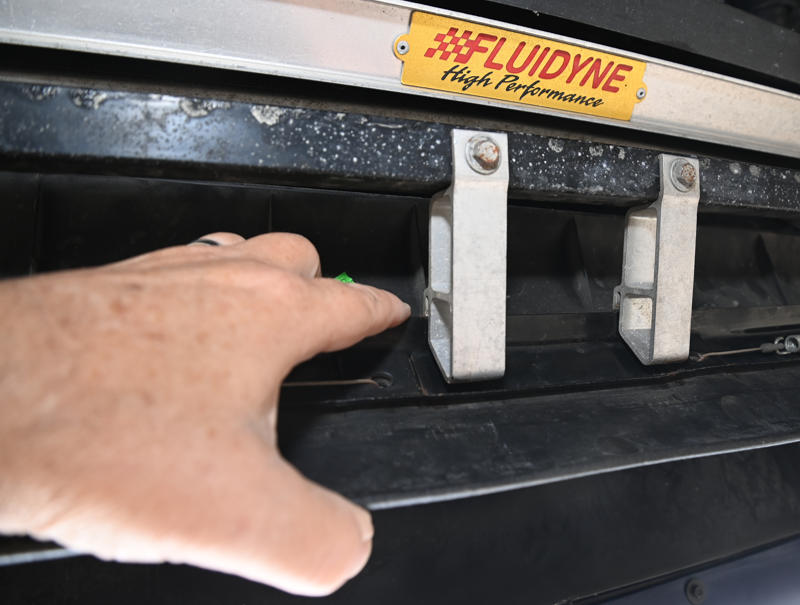

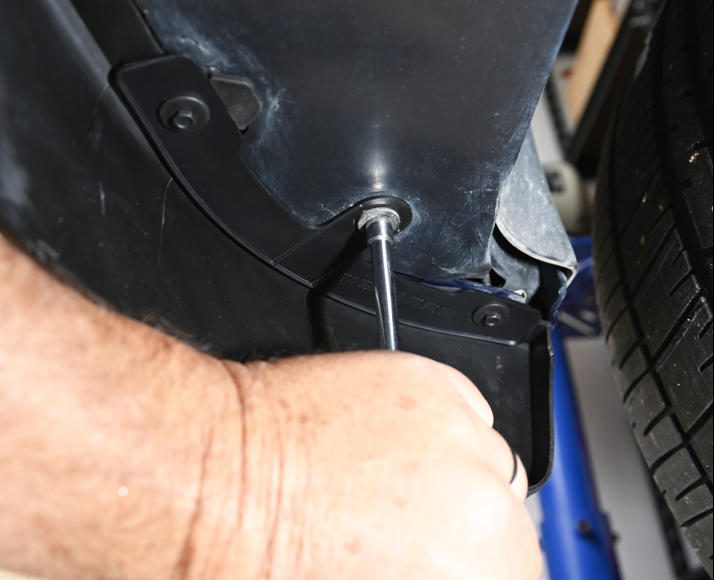
02: Remove the center section of the front air dam–or as GM calls it, the “center front air deflector”–by removing the two bolts holding it to the metal structure just ahead of the radiator that GM calls a “skid bar” and pulling it loose from two slots that hold it at the top. Next, take off both outer air dams, or “Front Valence Panels,” by removing their screws.

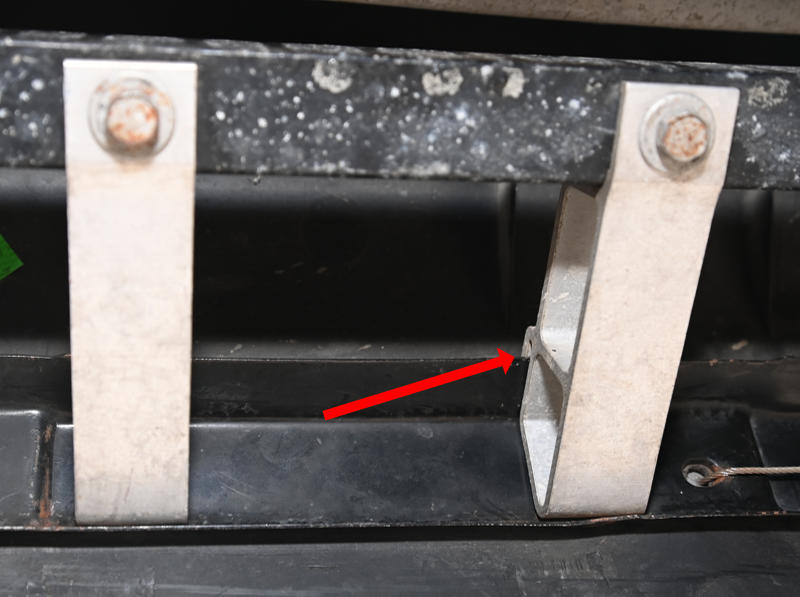


03: Clean the bottom of the front fascia where the air dam sections attach, then install the new center air dam with the bolts in the Zip mounting kit. You may find the center section’s two mounting tabs need to be bent a bit to line up with the threaded inserts in the skid bar.
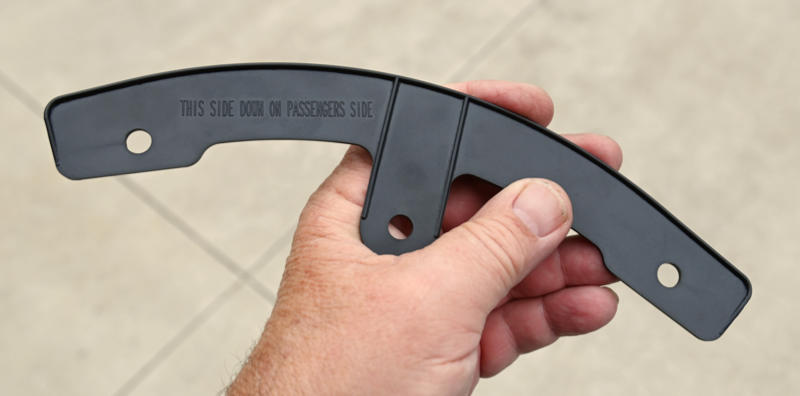

04: Finally, install the two outer air dam sections using the new screws out of the Zip Corvette Air Dam Mount kit. Then, set the front end back on the ground.
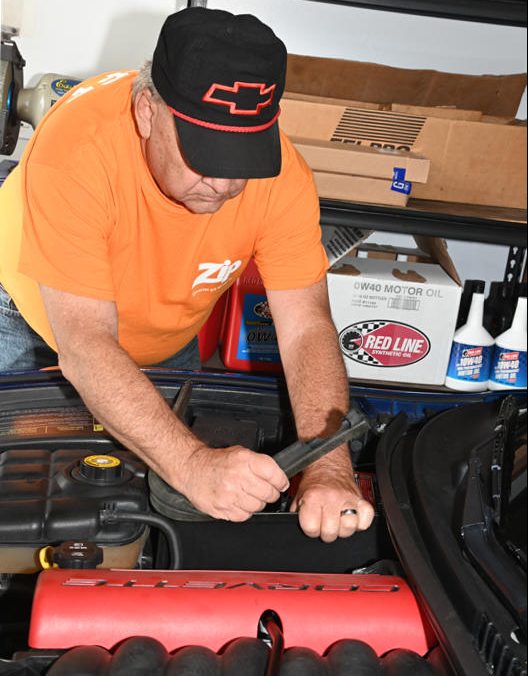
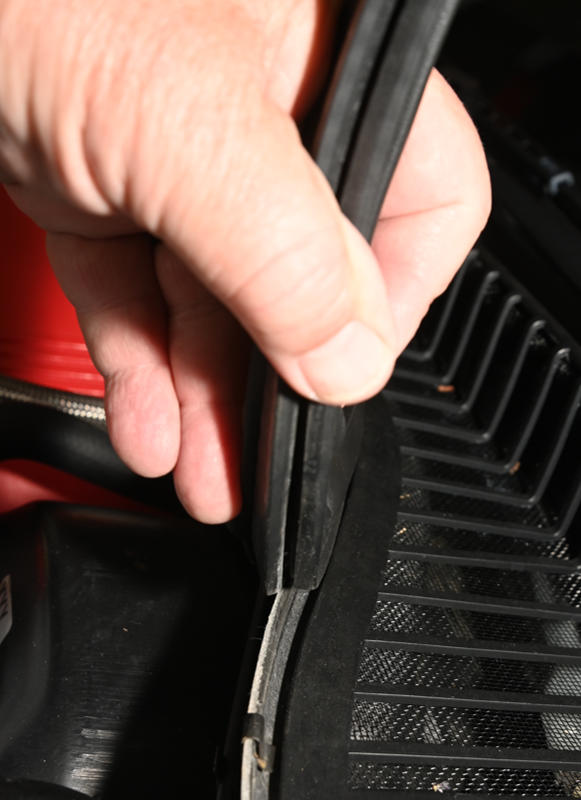
Next, we are going to replace the rat eaten and well aged under-hood seals. The cowl-to-hood seal exists to prevent hot, under-hood air from getting pulled into the heating, venting and air conditioning intake. The battery compartment seal prevents under-hood air from heating up the battery and the relay and fuse center.
01: Upon opening the hood, we found that both seals were lightly crimped to the edges of the cowl and battery bulkhead. To remove them, grasp each seal and pull up firmly.
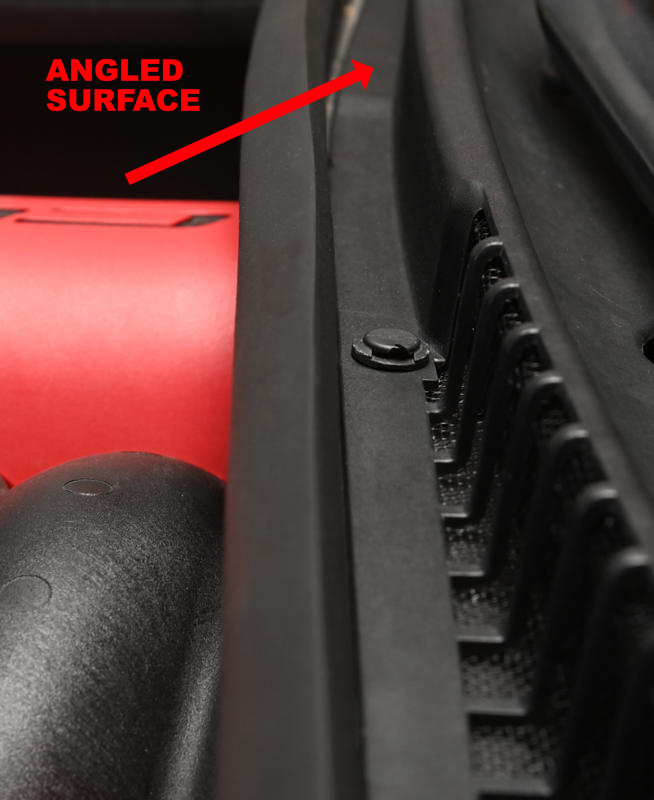

02: To replace the seals, push one end onto the cowl edge and work your way towards the other end of the seal, pushing it onto the cowl as you go. Do the same to the battery compartment seal.

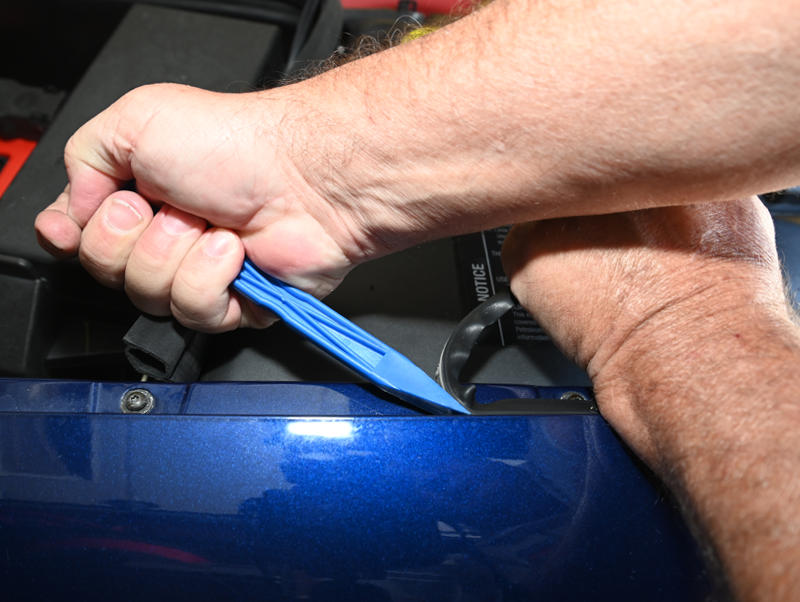
03: The fender-to-hood seals are adhesively bonded to each fender. There are two ways to remove them:
Option 1: the hard way is to grab one end of the seals and pull firmly to peel the seal off the fender. Then go back and remove the adhesive with a plastic scraper. Under no circumstances should you use a metal scraper.
Option 2: the easy way is to pull the seal off but follow the seal’s parting with the plastic scraper. The combination of pulling on the seal and applying the scraper to the adhesive right where the seal is lifting makes adhesive removal quicker and easier.

04: The seal’s lip must point downward towards the engine. Push the strip sideways and down such that the adhesive sticks on the vertical part of the hood opening with its bottom edge on the horizontal part of the hood opening.
One time consuming part of this project was repairing the hood bumpers. GM no longer sells C5 hood bumpers, so if the rubber caps are damaged or hardened with age, they must be replaced. GM, in its infinite wisdom, bonded the OE rubber bumper caps to the adjuster screws making rubber cap replacements a bit of a chore. It took us two tries to figure out how to do this using a utility knife very carefully so as not to amputate a finger.
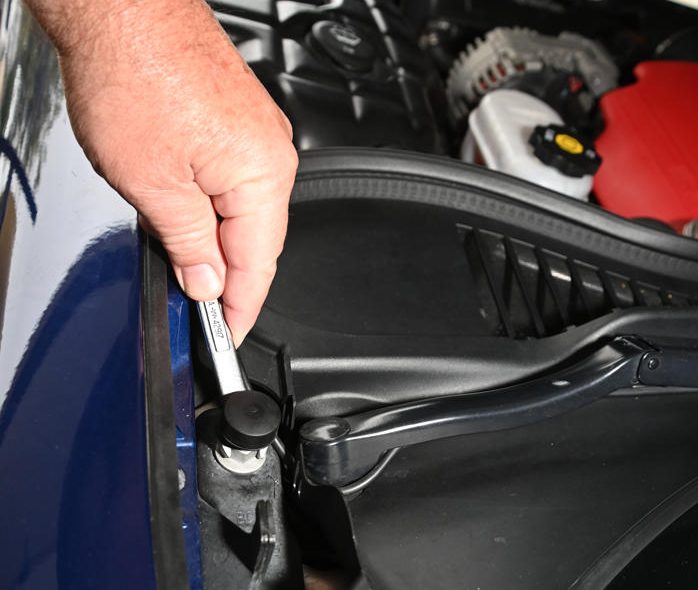
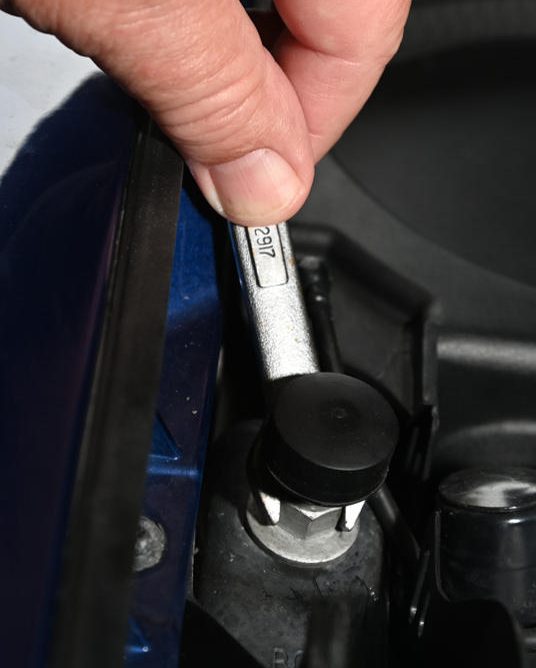
01: Replacement of hood bumper caps requires the adjustable hood bumpers to be removed. There are four of them: two at the front of the hood and two at the rear. We suggest marking the adjuster screw threads before you loosen the jam nut. It will make readjusting the bumper easier after the new cap is installed. Once you’ve marked them, loosen the nuts then unscrew and remove the adjuster.

02: Using a utility knife with a fresh blade, carefully slice one side of the bumper cap vertically. Then pivot the knife blade so you can peel away part of the bumper cap enough that you can tear off a chunk of it and expose the top of the metal adjuster.
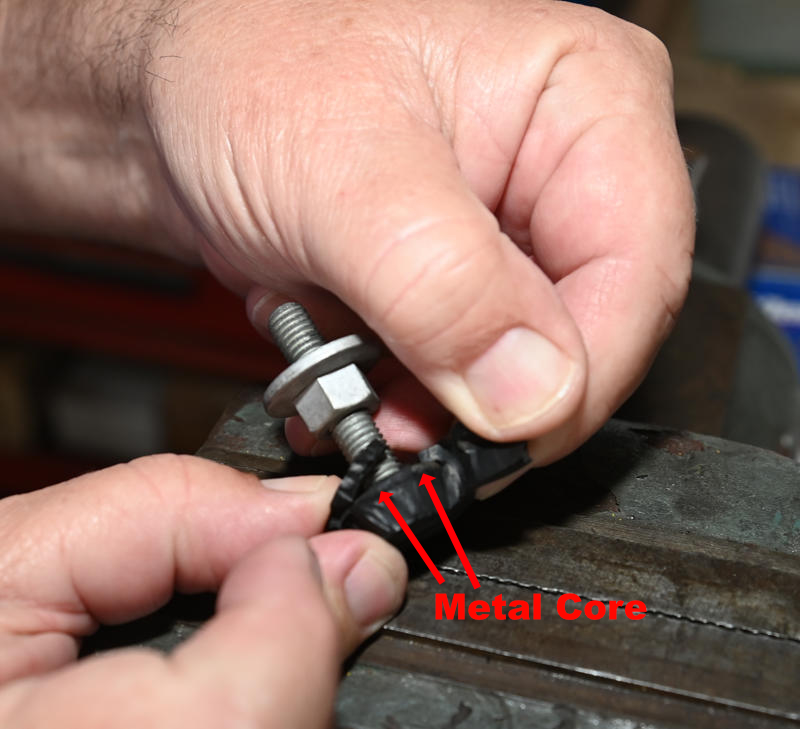
03: Now cut through the body of the bumper cap such that the rounded edge of the top adjuster screw’s metal core is exposed.
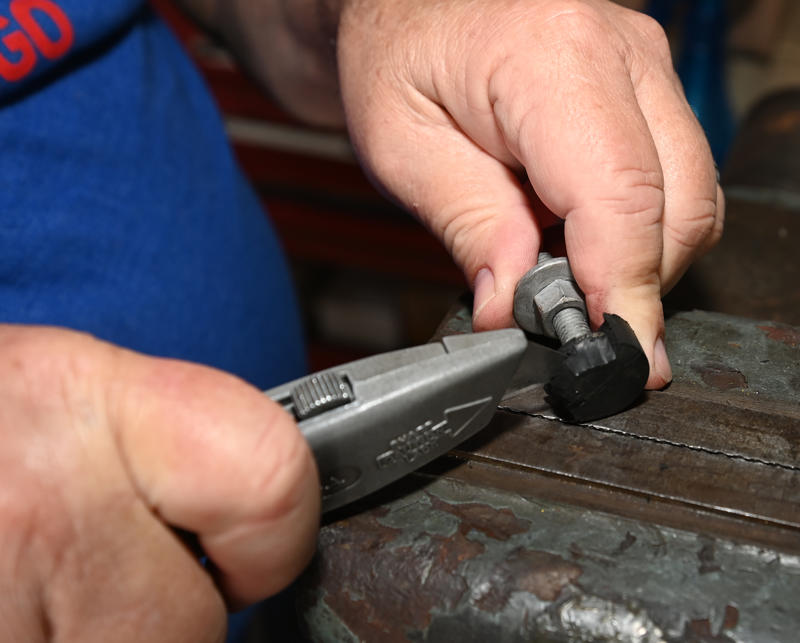

04: Continue to cut with the utility knife until a majority of the rubber cap has been cut away.

05: Finally, using a bench grinder fitted with either a wire wheel or abrasive deburring wheel, remove the remaining rubber and the adhesive.

06: Spray silicone rubber lubricant into the interior of the rubber cap then position it on a flat surface. Push the top of the adjuster screw into the cap with a rotating motion.

07: Screw the hood bumpers back into place. Then, tighten the lock nuts.
1997-2004 Corvette Front Air Dam, Hood Seals and Hood Bumper Replacement
Source: Zip Corvette Parts
8067 Fast Lane | Mechanicsville, VA 23111 | (800) 962-9632
Corvette Parts List Related to the Article:
- 1997-2004 Front Lower Air Dam (Spoiler) Set
- 1997-2004 Front Lower Outer Air Dam (Spoiler) Reinforcements
- 1997-2004 Front Lower Air Dam (Spoiler) Mount Kit
- 1997-2004 Hood To Side Fender Seals
- 1997-2004 Cowl to Hood Rear Seal
- 1997-2004 Battery Compartment Seal
- 1997-2004 Hood Bumper Cap
- 1997-2013 Billet Aluminum Jack Pads
- Shop/Service Manuals