
by John Pfanstiehl
Grills are among the parts most often damaged in collisions. Even minor bumps can break, bend or crack them. Barring any physical damage, decades of weathering ruin the appearance of the pot metal and aluminum grills of early Corvettes. Fortunately, grill replacement is pretty straightforward. In some cases, the only tool needed is a screwdriver.
The parking light assemblies will be removed along with the grills. It’s a good time to consider replacing the parking lights, changing the bulbs, upgrading to LED or repairing the light sockets. To see Zip Corvette’s offerings of related parts like these go to “Exterior Trim” and then “Grill Components.” Additional tips and information on those parts are found in the 1973-1982 Corvette Parking Light Replacement article.
This tech article covers the installation of replacement grills on a 1973 Corvette but the procedure is similar for many other Corvettes. As jobs go, this checks all the boxes. It’s easy, fast, relatively low-cost and creates an immediate visual improvement.

01: 1973 Corvette grills were made of pot metal and had chrome on their leading edges. Decades on the road have taken their toll on these original grills.

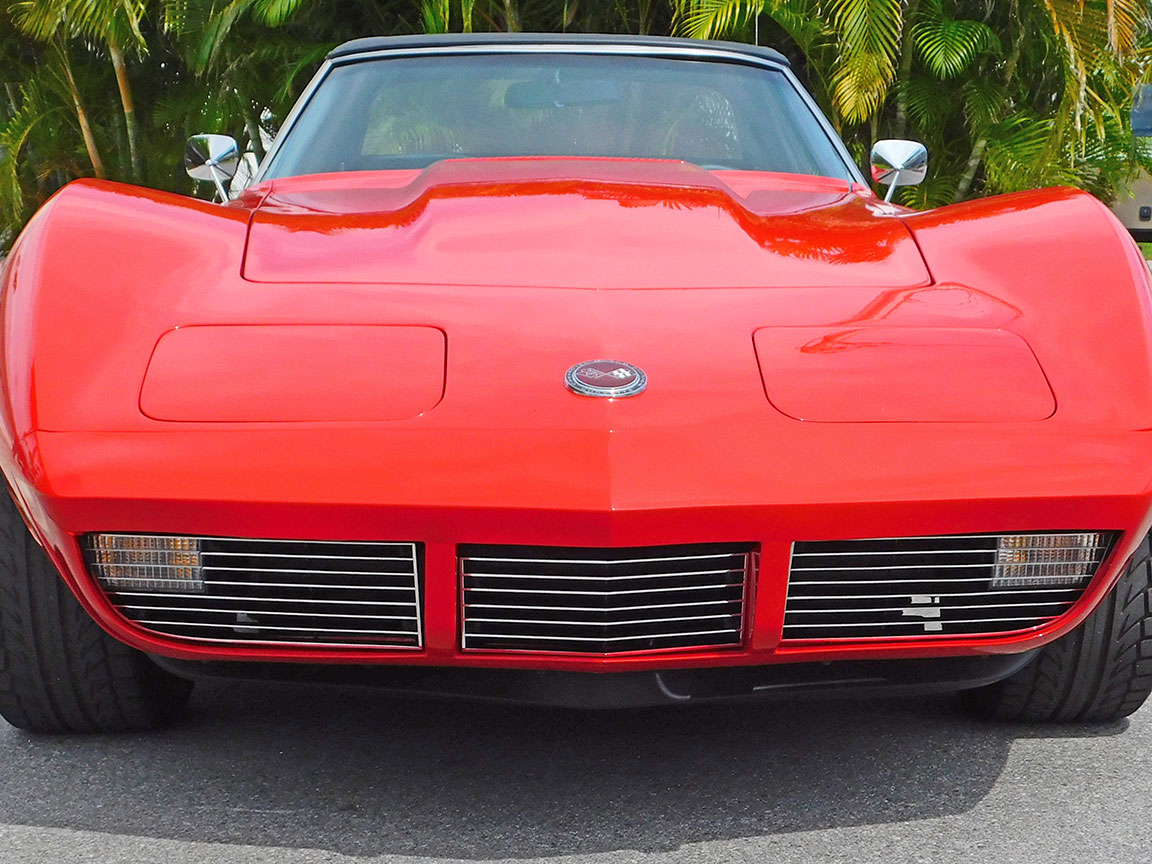
02: The replacement 1973 Grills from Zip are a big improvement in appearance. Consider replacing the parking light assemblies at the same time if they also have lost their luster.

03: Few jobs require fewer tools: a screwdriver and something to sit on. There’s no need to jack the car or put it on a lift. A helpful tip is to have a good light when removing and installing the grill screws. If there are no damaged or bent brackets, grill replacement only takes about an hour.

04: Four Phillips screws attach each side grill and the center grill. Use a Phillips screwdriver with an unworn tip because the screw heads can be rusty or rounded after decades on the road. The screws go into spring steel U-clips so rust-seized threads or broken screws are unlikely.

05: Pull the grill out sufficiently to remove the lamp socket. Turn the connector 1/8th turn or less counter clockwise to remove the socket from the lamp assembly.

06: Remove the old parking light assembly from the old grill if it is to be installed in the new grill. The assembly is attached with two screws. It’s not uncommon to find mismatch screws or repairs to the grills or to the parking lights.

07: Attach the parking light assembly to the new grill. Place the grill on clean cardboard or a clean towel to prevent scratches on its front surface. Use #8 screws that are ½ inch to ¾ inch long. Avoid larger screws, they may crack the plastic.

08: Use what little adjustment there is to align the horizontal bars on the parking light assembly with the leading edges on the grill. Then tighten the screws, but there is no need to over-tighten these screws.

09: Zip offers a replacement set of twelve correct #10 1970-1974 Grill Mount Screws to attach the grills to their brackets. These are black oxide cross-recess oval washer head screws like originally used here.

10: Install the outer grills after reconnecting the lamp socket. Tip: An awl or ice pick can help to align the U-clips with the grill’s screw holes. Make sure the clips are snug enough to stay in place but can also move easily to assist in aligning the grill in the bumper opening.

11: Tip: Needle nose pliers or a magnetized screwdriver helps to hold screws for insertion through the grill’s screw holes and into the U-clip.

12: On this car, there was no upper outer grill mounting bracket. A U-clip was used to retain a screw in what would otherwise be an empty screw hole.

13: The front grill supporting brackets may be bent from prior collisions or repair work. On one side of this car, a rubber washer is needed to space the grill from the bracket so that it is properly aligned with the bumper cover.

14: If there is a center grill assembly, remove it after the side grills are replaced. Four screws secure this grill, too. A license plate bracket is used in place of the center grill in states that require a front license plate.

15: The new replacement 1973 Center Grill Assembly from Zip is a major improvement over the old grill.

16: These mounting brackets are welded to the bumper assembly so there is little adjustment possible. Elongated slots in the brackets allow a little side movement. Tip: remove the clips, clean the surfaces and apply a thin film of grease. Make sure the clips can easily slide side to side over the slots.

17: Install and test fit the grill to see if its alignment with the side grills or bumper needs improvement.

18: A Dremel tool with a side cutter bit can slightly elongate the screw holes in the front grill. The screw head is wide, so this gains only about 1/16 inch on either side. The slots in the supporting brackets can similarly be enlarged.
19: In short work, the front of the car has gained a remarkable improvement in appearance. At a reasonable price, too.

20: Consider new replacement 1973-1974 Park Light Assemblies from Zip if the old ones are unsightly. The horizontal bars are painted silver on a 1973 parking light but changed to black in 1974. These are made in the USA and a new rubber seal for the socket is enclosed with the assembly.

21: A number of bulb choices are available from Zip. Amber 1157 Bulbs were used originally. LED Bulbs are also available. Be aware that LED bulbs draw less current and therefore require a LED flasher, which is also available from Zip.
1973-1979 Corvette Front Grill Replacement
Source: Zip Corvette Parts
8067 Fast Lane | Mechanicsville, VA 23111 | (800) 962-9632
Corvette Parts List Related to Article:
- 1973-1982 Grill Components
- 1973 Center Grill Assembly
- 1974 Center Grill Assembly
- 1973 Outer Grill
- 1974 Outer Grill
- 1970-1974 Grill Mount Screws
- 1975-1979 Outer Grill (Plastic)
- 1975-1979 Grill Mount Screws
- 1973-1974 Park Light Assembly
- 1975-1979 Park Light Assembly
- 1970-1979 Park Light Socket w/Pigtail
- 68-82 Park Light Bulb #1157 (Amber)
- Exterior/Interior Light Bulb #168/194 LED
- Shop/Repair Manuals
very good.
I have a ’77 Vette. The front bumper center section is built to support a license plate. Do you have how-to instructions and/or kit to make my center front bumper section able to accept a center grill as shown above? Thank you.
Hi Peter,
Unfortunately the only option for a front license plate bracket for a 1977 Corvette is finding one used.
Most people will just mount the plate directly to the bumper because the bracket is hard to find.
Here is the license plate hardware that Zip offers: