
One of the easiest ways to give your Corvette an interior facelift is to install a new carpet set. Carpets get most of the heaviest wear and a dirty, worn carpet will seriously detract from an otherwise nice Corvette interior. Install a new carpet set in your Corvette and you will notice the difference instantly.
The installation is fairly simple and should take one or two weekends depending on how thorough you want to be. The only tools you will need are simple hand tools, a utility knife, awls and ample working space. You may also want to enlist the help of a friend, wife or girlfriend. The extra pair of hands they supply will be quite handy. The ease of installation depends upon the quality of the carpet.
The Corvette carpet set we used came from Zip Corvette Parts, 8067 Fast Lane, Mechanicsville, VA 23111, 1-800-962-9632. It fit perfectly and was really quite easy to install. An important thing to remember when installing a complete Corvette carpet set is that you will have to remove and break apart the storage compartment lid frames and surround. Don’t worry. A complete rear compartment surround and frames are readily available from Zip Corvette as well. Now with all this in mind, let’s get ready and start our wall to wall overhaul.

01: Here is the complete molded Corvette carpet set. It is a good idea to lay it out and get to know how and where each piece goes. We also recommend purchasing new carpet underlayment and heat shields. This will allow the carpet to fit better and help to reduce heat in the cockpit. Since we wanted everything to look new, we also replaced the sill plates, console side panels, handbrake cover and all of the pedal pads.

02: The first thing you should do is to disconnect your Corvette’s battery. Start the disassembly by removing the sill plates, kick panels and seats. (Slide the seat forward to remove the rear bolts, then back to remove the front bolts.)

03: Now you can remove the seat belt floor cover and loosen the seat belt assembly. Keep track of all of the mounting bolts and washers.

04: Slide the shoulder belt bracket boot cover aside and remove the retaining bolt. Keep track where all of the seat belt retaining bolts go. They are different lengths and they need to go back in their respective places when you start reassembly.

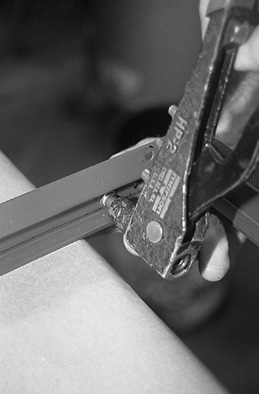
05: Remove all of the retaining screws and carefully remove the side trim panel and shoulder belt cover.

06: Unbolt the shoulder belt (remember to keep track of the mounting bolt) and remove the belt assembly.

07: The console side trim cover can now be removed. If you are going to re-use this item, be very careful with its removal. It is very easy to damage or bend.

08: We are replacing the handbrake cover so now was the time to remove it.

09: Remove all of the footman loops. If yours are good, a quick polish and they will be ready to re-use.

10: The storage compartment doors should be removed from the hinges.

11: Now the storage compartment surround can be removed from your Corvette.

12: Everything should now be removed so that you can start to take out the old carpet. Just don’t go in there and rip everything out. Look and see how each piece is installed. As you take it out, mark it and lay it out on the floor. This way you will have a complete pattern to go by. New carpet sets do not come with instructions so it is a good idea to have a pattern to look at. Remember what piece lays on top. A good rule of thumb is that any piece of carpet with a bound edge will go in after an unbound piece. Also, do not make the mistake of pre-cutting any holes in your new carpet by using the old carpet as a pattern. Can you say, “I just ruined my new carpet!” The old carpet has been in for years. It has compressed and moved. If you pre-cut the holes, you will more than likely find that they are off.

13: Remove the old underlayment and thoroughly vacuum the floor. If you find any holes, repair them. You do not want water and dirt ruining the new carpet, do you! It is also a good idea to route any wires while the carpet is out. Use duct tape to cover them and hold them in place.

14: Since our emergency brake handle was broken, we replaced it while everything was out of the car. Zip Corvette was able to supply us with a brand new one.

15: You will want to run a tap into every mounting hole. This will clean up the threads and just make re-assembly that much easier.

16: While everything was out, we refinished all of the trim pieces, such as, the seat belt covers, side trim panels, kick panels and handbrake cover, etc. If you are installing new carpet, you will want all of the accompanying pieces to look fresh. If you are installing new storage compartment frames, you want to refinish them now so that they will be ready when it comes time to install them.

17: Start the carpet installation by installing the new underlayment and heat shields. Use 3M’s 8074 or 8090 Spray Adhesive. Spray both the underlayment and the floor. When the adhesive is dry to the touch, lay the underlayment down on the floor. Then press it into place. It is a good idea to pre-fit each piece so that you know how it will lay. Remember on cars with a catalytic converter there will be an additional piece used as a heat shield over this area. Put it down before you put the underlayment in place. Note: It is sometimes easier to do half of an area at a time. Glue one half into place. Then fold back the other half, spray it and then glue it into place. Use the method that is easiest for you.

18: With the underlayment in place you can then start to install the carpet. I like to start in the rear first. Pre-fit one of the wheel well areas first. Apply the spray adhesive to the carpet and wheel well and glue the top of the carpet into place. Now fold the bottom of the carpet up. Use two awls pushed through the carpet to line up the holes for the side footman loops. (This will help to align the carpet.) Apply glue to the carpet and lower wheel well. Start to roll the carpet down. Push the awls into their respective holes and press the carpet into place. When you are done, you should have a perfect fit on the wheel well. Note: On mid to late 70 Corvettes the two rear footman loops that hold the T-top straps in place were put under the carpet. Then the carpet was slit so that the straps could be attached to the loops. I never liked this arrangement. It caused the carpet to bubble, loosen and move. I install the loops as they were done in the late Sixties and early Seventies. I mount them on top of the carpet. They are easier to get to and help hold the carpet in place. The choice is up to you.

19: After you have installed both wheel well covers you can install the center carpet. It does not glue to the back bulkhead. It is held in place by 3 push pins. This is so it can be removed to gain access to the rear light and wiring. The easiest way to install the pins is to hold the carpet up into place and locate each hole with an awl. Then use a soldering iron to make the hole in the carpet. Push it through, then pull it out. Voila! A perfect hole. Now install the push pins and the rear of the carpet is now in place.

20: Fold back the floor area carpet. Spray the adhesive on it and the rear shelf and then glue it into place. Do not worry if the carpet hangs down into the storage compartment area. You will correct this later on.

21: Now go to the front and install each side. Spray glue on one area and on the corresponding carpet area. Then glue it into place. Fold back the carpet and work on that section. Continue this procedure until the carpet is down into place. Work one section at a time. Do not try to install the entire piece all at once.

22: When the front sections are in place, use an awl to locate the seat bolt holes. An easy way to locate them is to push the awl up into the holes from underneath the car. Now cut a 1” square hole around each bolt hole. This will make it a snap to re-bolt the seat into place.

23: Next install the carpet on the bulkhead behind the seats. Start in the middle over the rear of the console and work to the outside of the car. Use masking paper to cover the installed carpet and spray the glue up and on the back of the rear bulkhead wings. Glue the carpet on the front. Then roll it over and glue it to the back of the bulkhead wings. This will give a finished edge look. Also glue the carpet up and over the center edge and let it fall down into the storage compartment area. This will be trimmed later.

24: Remove all of the latches and loops from the storage compartment doors. Here you can see the retainer, screw and latch mechanism.

25: You will have to break the old frame off the storage compartment doors. Place a screwdriver under the frame and twist. (A pair of channel lock pliers will also work.) It will easily break off.

26: The old carpet can now be removed from each door. It is important to remove all of it.

27: Use wire or side cutters to clip off any of the old frame plastic mounting studs. Make sure they are removed flush with the door. The new frames must slide down over this area and if any of the stud remains, the frame will not go into place. Here you can see we used a file to smooth the area out after we cut each stud off.

28: Slide the new frame down onto each door for a test fit. You may have to sand or shape the door so that the new frame will fit. It should fit loosely. Do not force it into place.

29: Lay the door onto the carpet. Trace and outline on the back of the carpet. Now cut the outline out. Remember, you want the carpet to just come to the edge of the door, not over it. When you have the correct fit, glue the carpet to the door.

30: Fit the trim frame over each door and pilot drill each mounting hole. Now install the screws. When this is done, the doors are ready to be installed.
31: Start the storage compartment door installation by pop riveting the hinges to the frame surround.

32: Now install the latch catch and door bumpers.
33: Carefully pre-fit the frame surround into the opening. Cut off any excess carpet. You want the frame surround to sit flush. Do not force the surround into place. This can cause it to bulge or break. When it is in place, use the screw provided and mount it into place.

34: Attach the lids to the hinges and check their alignment. Adjust each door so that it opens and closes as it should.

35: Re-install the seat and shoulder belts. Remember to put the nylon washer under the seat belt assembly so that it will be able to swivel.

36: Replace the seat belt retainer bar and plastic cover. You can also re-install the rear side trim and shoulder belt assembly cover.

37: New pedal pads always look good with new carpet. You can also re-install the kick panels.

38: Install the handbrake cover on the mounting skeleton and mount it in the car.

39: Now the side console trim can be put back into place.

40: We also installed new sill plate to complete the package.

41: Here is the finishing touch. A new set of Corvette floor mats. What a perfect ending!

42: Here it is. A complete wall to wall Corvette carpet overhaul.
1968-1979 Corvette Carpet & Rear Storage Compartment Replacement: Corvette Carpet & Rear Storage Compartment Replacement
Source: Zip Corvette Parts
8067 Fast Lane | Mechanicsville, VA 23111 | (800) 962-9632
Corvette Parts List Related to Article:
- 1968-1982 Corvette Carpet Sets
- Corvette Carpet Adhesive
- Corvette Carpet Fastener, Hardware, Plugs, and Tool
- 1968-1982 Corvette Carpet Underlayment & Insulation
- 1968-1982 Corvette Sill Plates & Screws
- 1968-1982 Corvette Storage Compartment and Parts
- 1972L-1982 Corvette Accelerator Pedal
- 1968-1979 Corvette Brake and Clutch Pedal Pad
- 1968-1982 Corvette Parking Brake Console Covers
- 1968-1982 Corvette Console Side Trim Panels
- 1967-1982 Corvette Parking Brake Handle
- Corvette Floor Mats
- Corvette Interior Dye
- Corvette Shop/Repair Manuals