

by Hib Halverson
In a C5 Corvette, the center console assembly bolts to the torque tube tunnel behind the “Accessory Panel Trim Plate”. Elbows rub on the console door. If the car is regularly parked outside uncovered, it may get sun bleached. The console door may be dirty, stained from spilled liquids, torn and scratched. If the car has a lot of miles on it, the console door latch parts and door hinge may be worn.
If your console assembly has any of those problems, Zip Corvette’s array of interior trim restoration parts might be just the solution you need.
Removing the Console Assembly
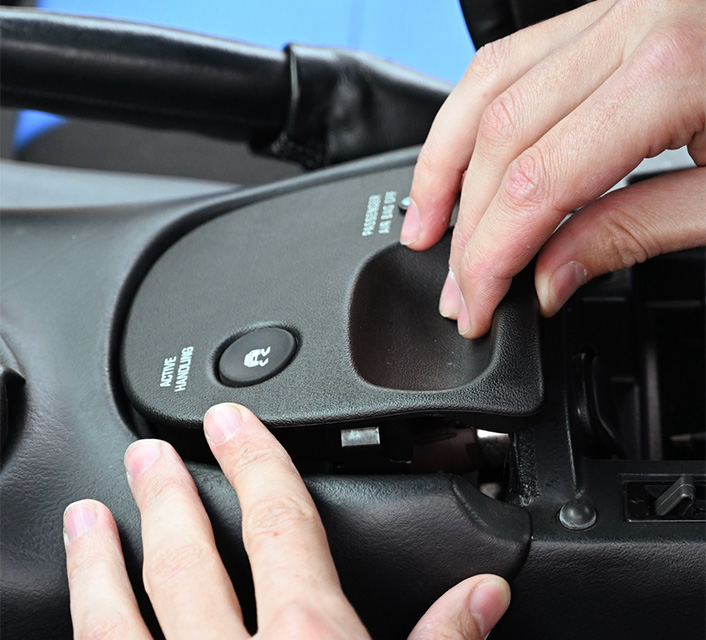
01: Open the console door, remove everything, put it all in a box then store that in the cargo area or trunk. Vacuum the interior of the box. Next, remove the traction control/ride control (TC/RC) panel by pulling up the rear of it to release its retainers.
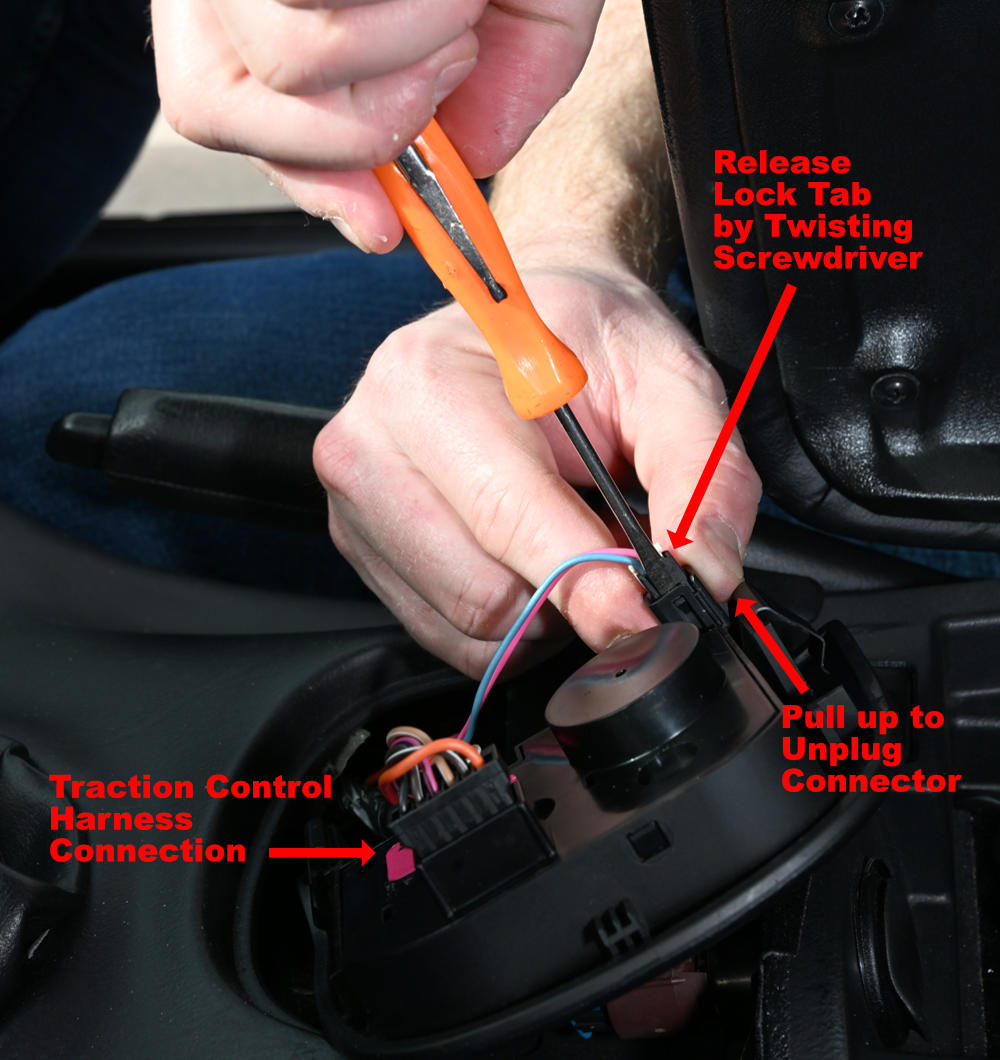
02a: Lift the TC/RC panel off the accessory panel trim plate, turn it over and lay it over the panel opening in the accessory panel trim plate with the ride control connection closest to the driver. That panel’s LED Light connector is difficult to remove. Use a small screwdriver to release the connector locking tab. While the lock tab is retracted, use your second hand to pull the connector out of the panel. It fits tightly, so have a good grip on the connector. Set the panel aside. Then disconnect the traction control switch connector by squeezing the lock and pulling it loose.
02b:In addition to the traction control connector and the light connector, 1997-2002s with RPO F45 real-time damping and 2003-2004s with RPO F55 magnetic selective ride control will have a third connector (not shown because the car used for imagery was a ZO6, none of which had a ride control option) for the ride control selector. Unplug that connection as well.
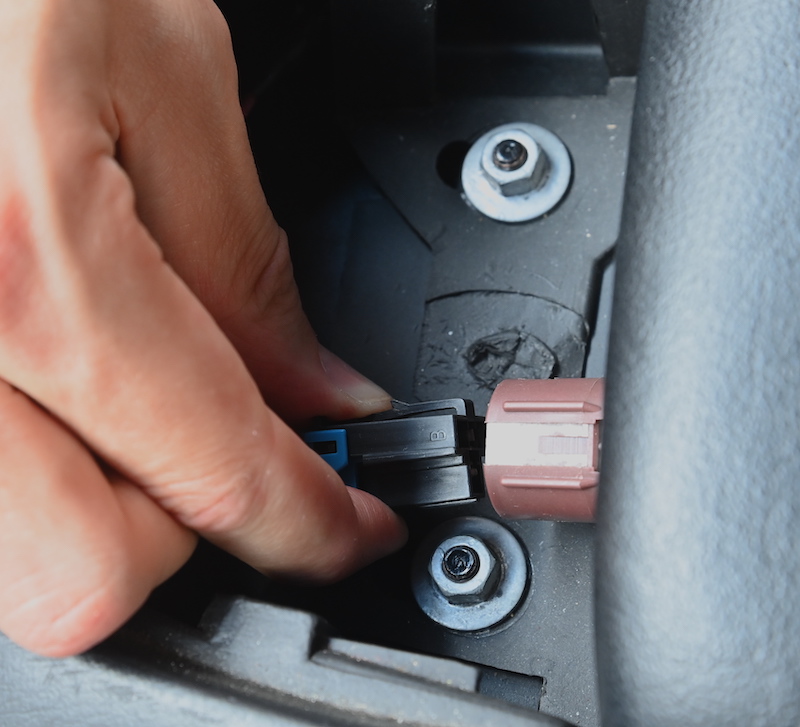
03: In the space under the TC/RC panel, unplug the wiring to the accessory socket that’s inside the console by squeezing the lock tab and pulling on the plug.
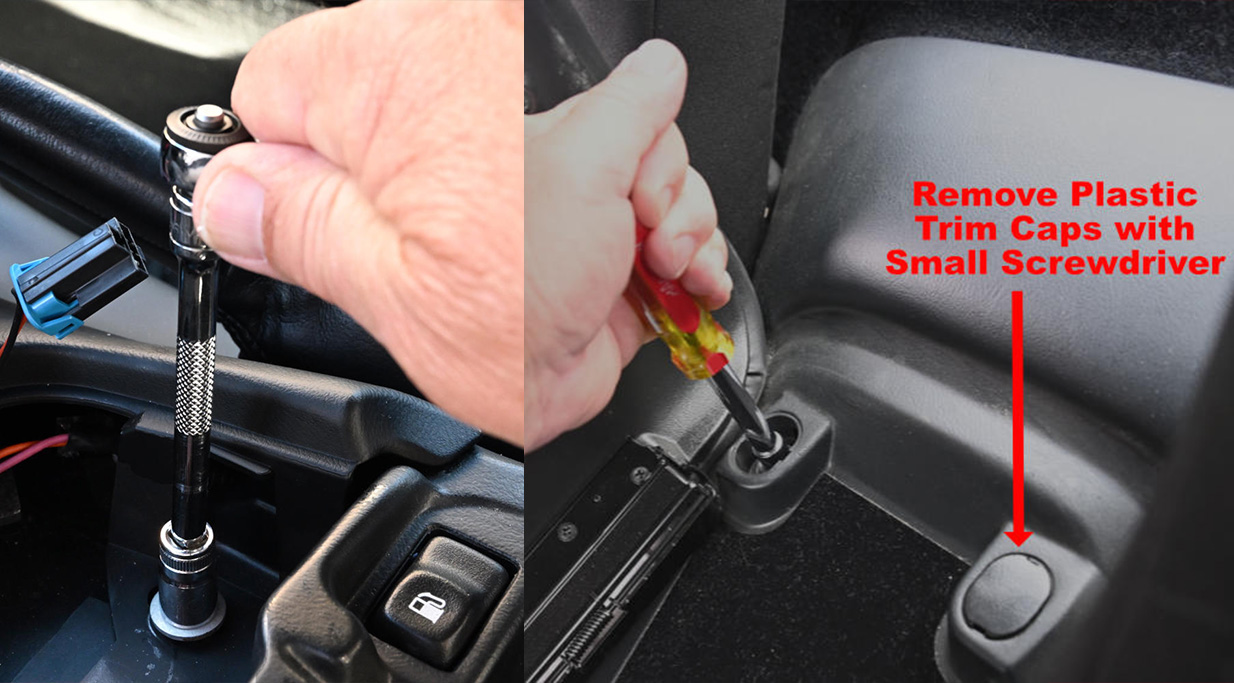
04: There are four 10-mm nuts holding the center console assembly; two at the rear and two at the front. The two front nuts are in the space under the TC/RC panel. The two rear nuts are beneath two small plastic trim pieces at the rear of the console box. Carefully remove the two trim pieces with a small, flat-blade screwdriver. Then, remove all four nuts.
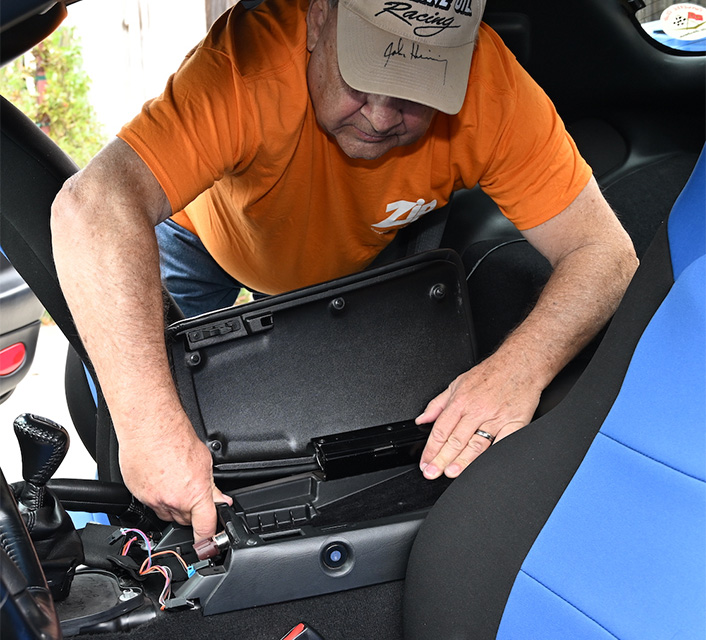
05: Slide the console assembly rearward until its front edge is free of the accessory panel trim plate. Grasp the trim plate at the front of the TC/RC panel opening and lift up slightly. Gently pull the wiring harness that goes to the panel and the fuel door to make sure it’s extended as far rearward as possible.
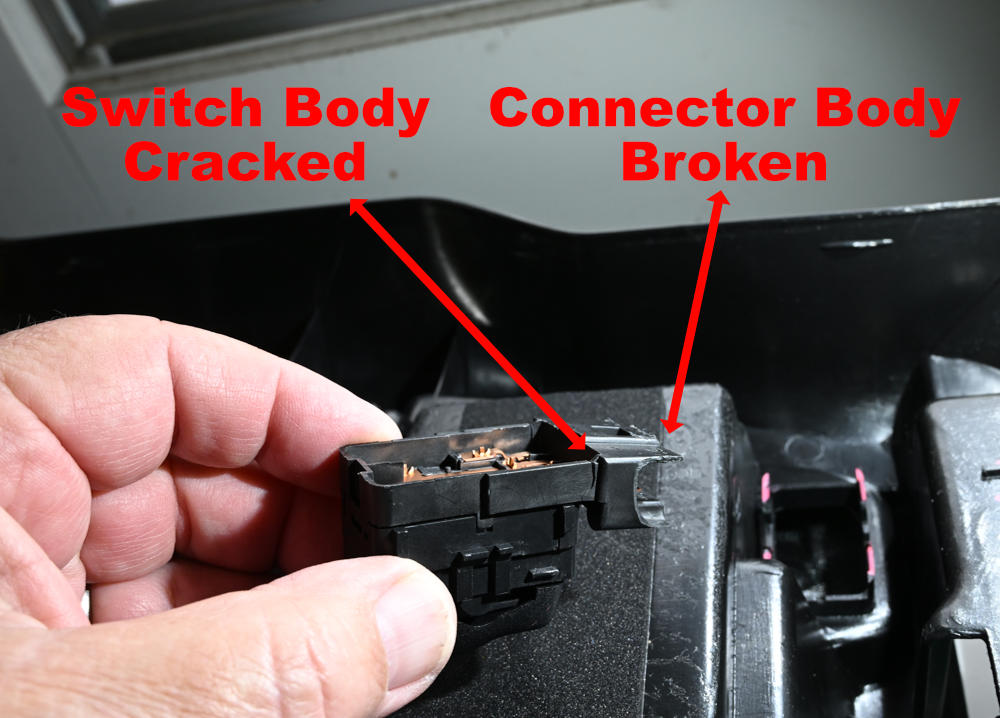
06: Pulling on that harness too far will damage the fuel door switch that is mounted in the console assembly. In previous service work, the switch in our project car was broken. Remember, when moving the console rearward, do not pull it back so far that this switch gets damaged.
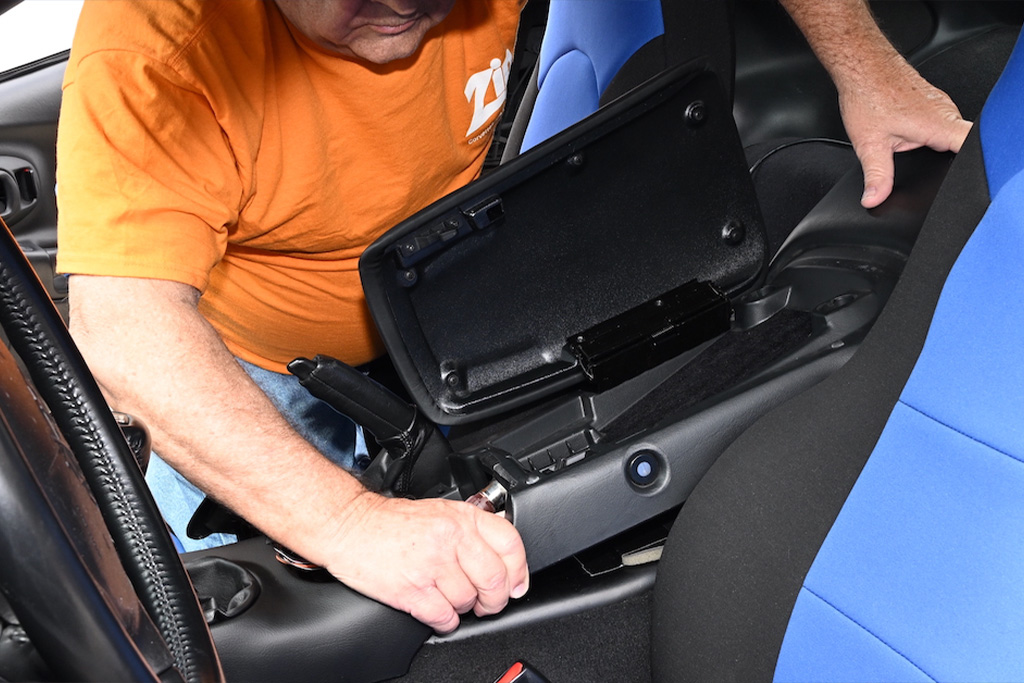
07: Once the front edge of the console is free of the accessory panel trim plate, lift up on the rear of the console. You may need to pivot one of the seat backs forward to gain clearance.
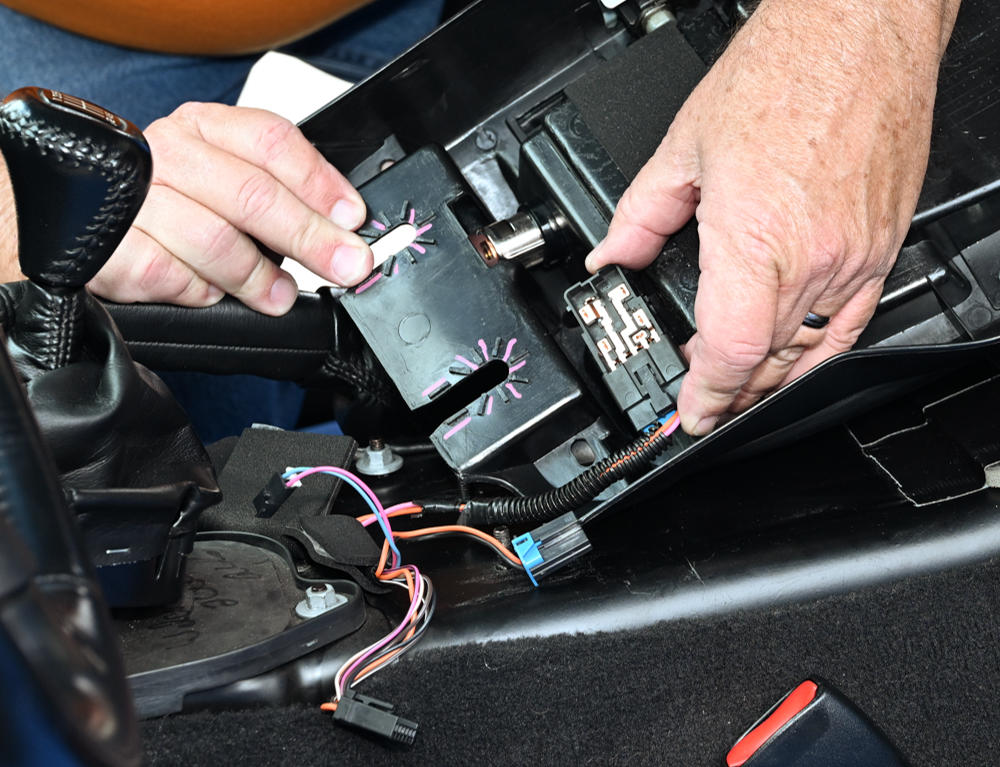
08: Turn the console assembly vertically to remove the fuel door switch. This switch is difficult to remove.
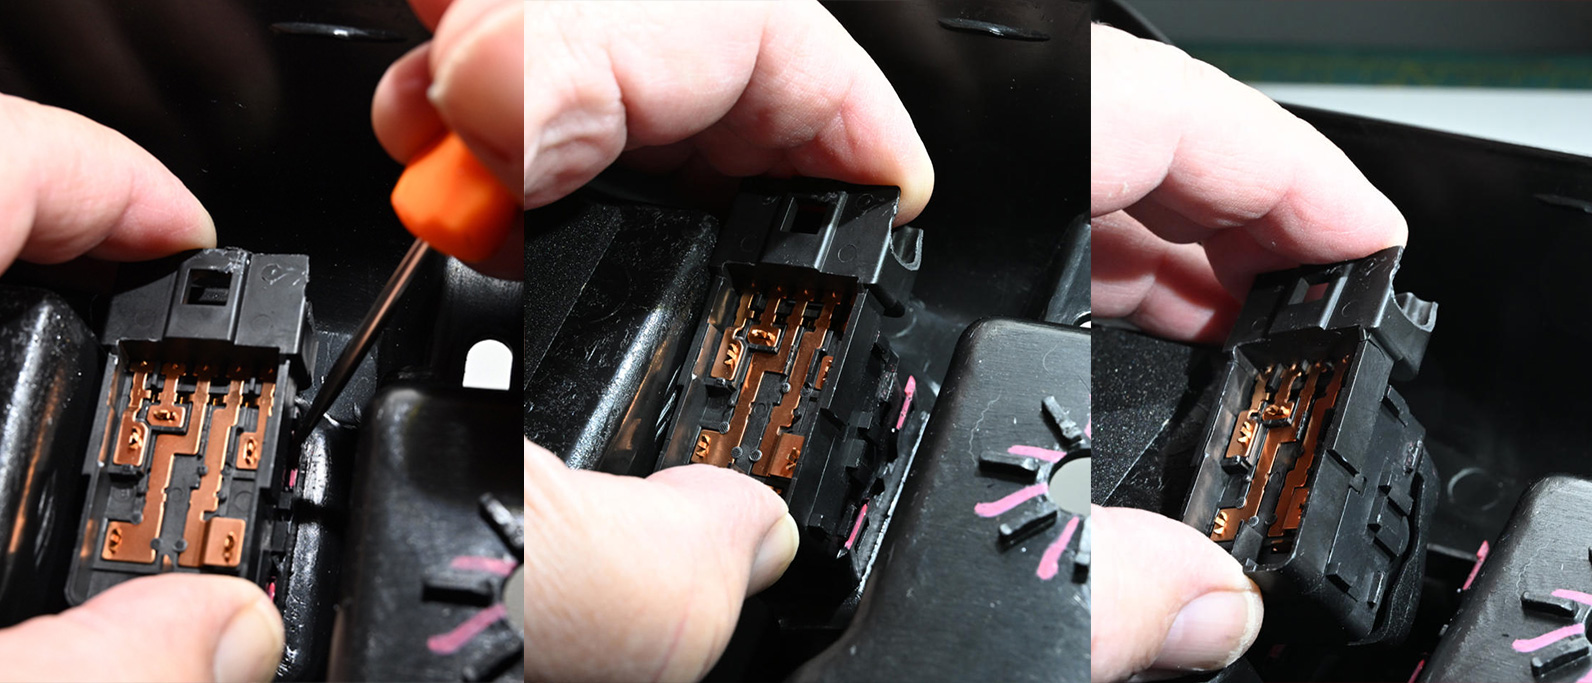
09: For clarity, we’re showing the fuel door switch removal with the console on the workbench, however, the switch can only be removed with the console still in the car. The door switch is held in place with four retaining tabs. Use a small screwdriver to carefully pry the two tabs on the front of the switch mount forward. Do them one at a time. As you pry back each tab pull on that part of the switch to free one end. Then pry on the other tab to free the other end. With the switch free of the mount on one side, pull the switch outward until the other two tabs unsnap, then lift the switch out of the console.
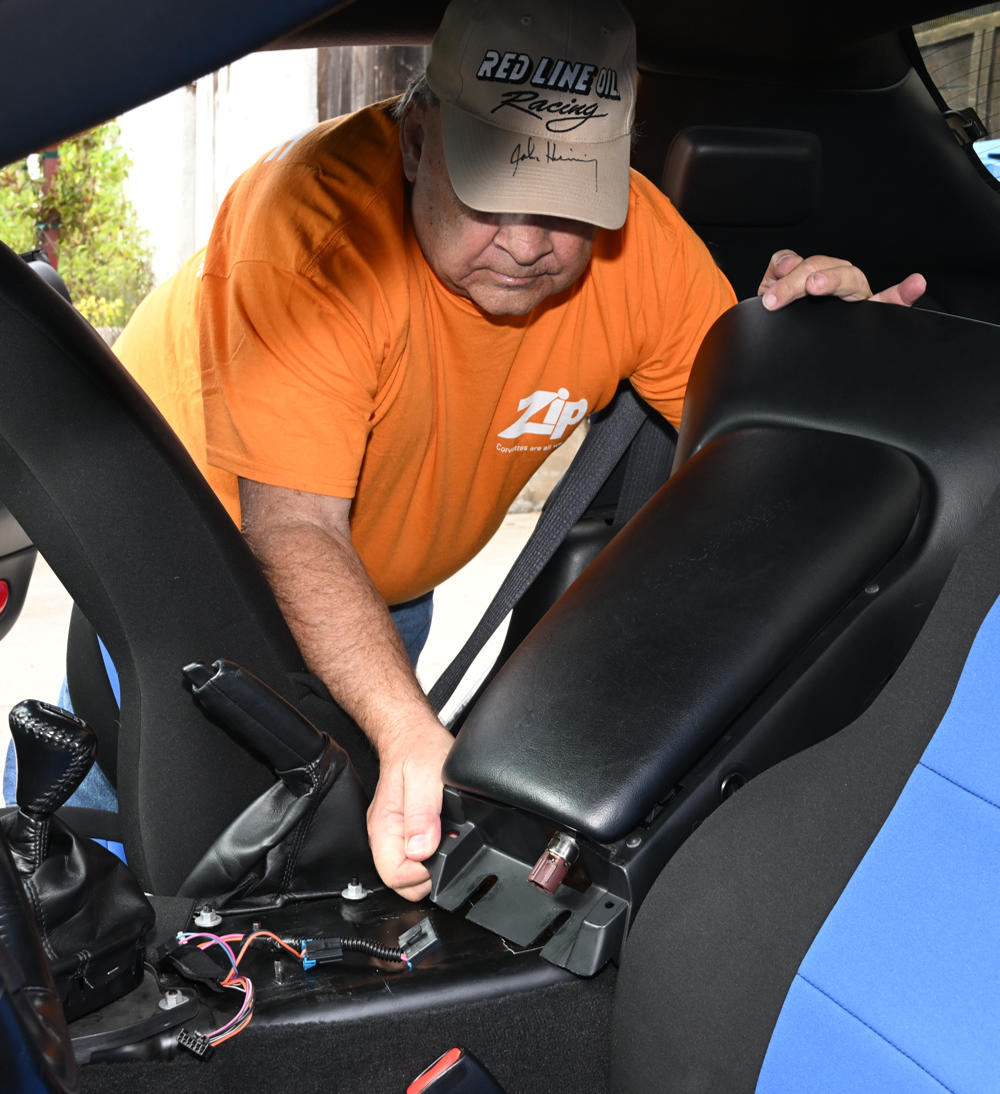
10: Lift the rear of the center console assembly up, rotate it slightly then remove it.
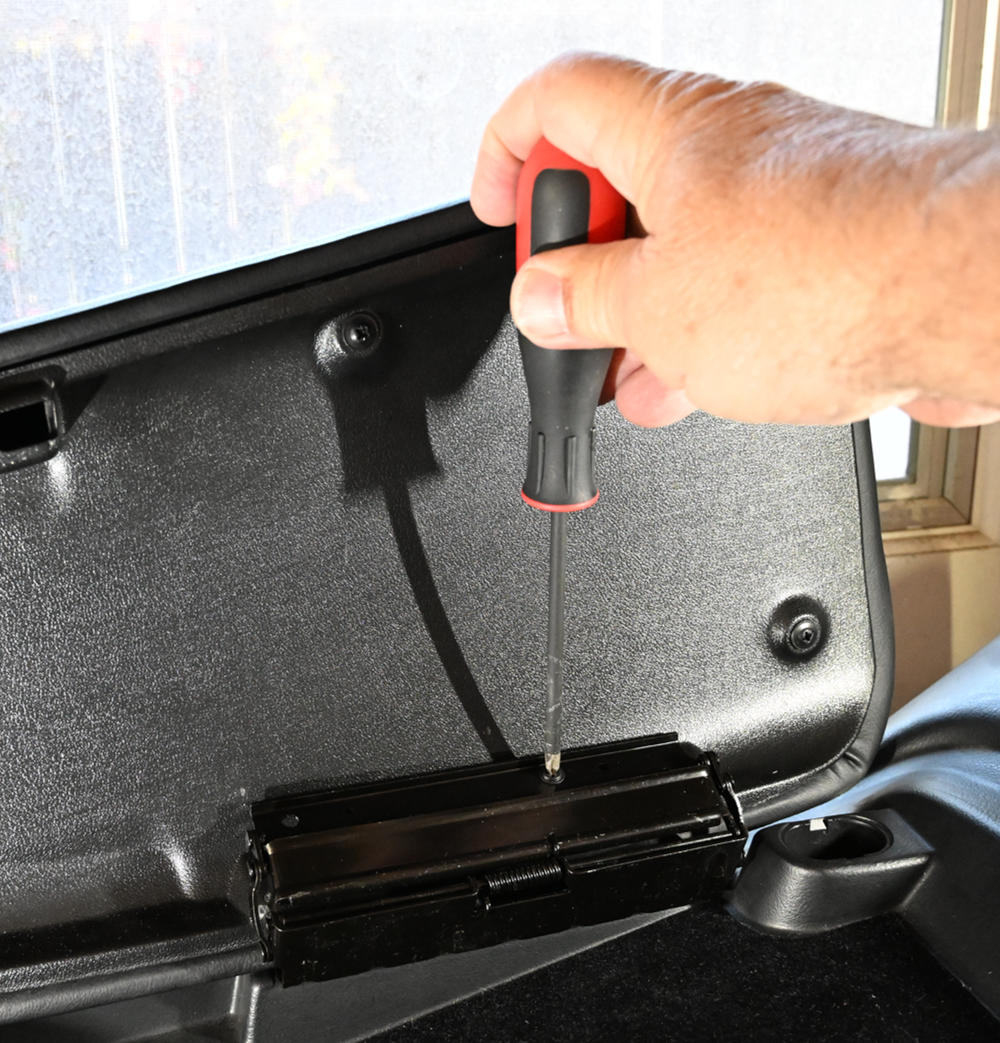
11: Remove the four screws holding the console door and remove it.

12: Hold the console assembly vertically then remove the four nuts holding the console door hinge assembly and remove it.
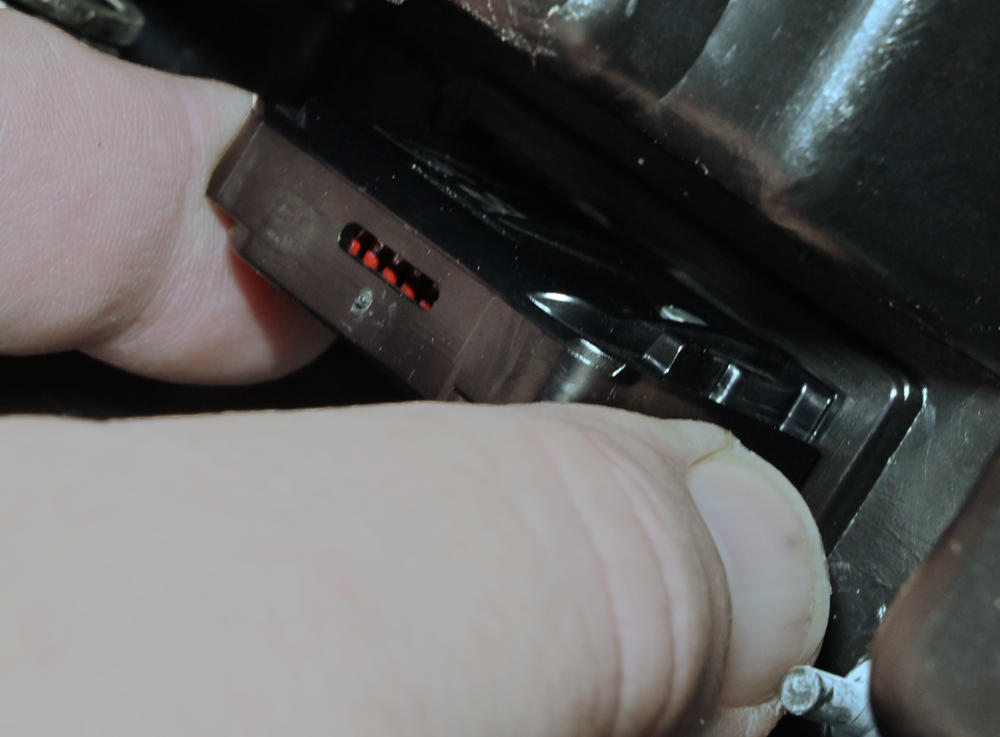
13: With the console on the bench upside down, release the console door latch by squeezing the retainers on its ends. Flip the console over and lift the latch out of it.
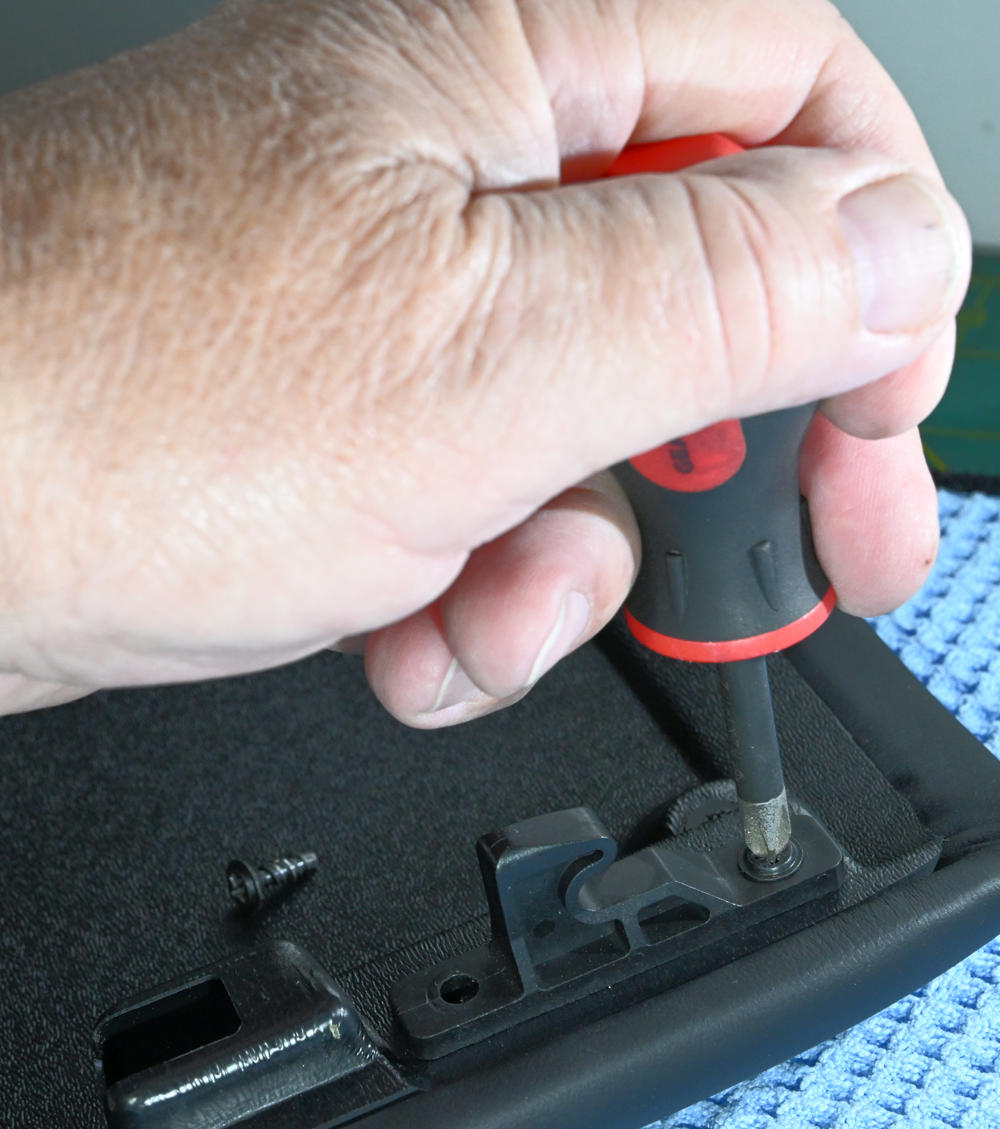
14: Remove the console door latch hook, but save it. Some replacement console doors do not come with a new hook. If necessary, you can order a new 97-04 Console Door Latch Hook from Zip.
Restoring the Console
To prevent noise when the console bottom contacts the torque tube tunnel, the GM supplier that assembled the console applied a thin layer of adhesive-backed sponge to the bottom of the console assembly to serve as an acoustic damper. This sponge eventually rots, and with the newest C5 twenty years old, anyone removing the console assembly will find that sponge deteriorated. Our project car was no different.
Suitable replacements are available from a variety of internet vendors. Amazon.com sells a “High Density, Waterproof Foam Tape.” It is 2-in .wide, 1/8-in. thick, comes in a pack of two 10-foot rolls and can tolerate up to 320°F, way hotter than the tunnel gets. While a problem can be its availability in far larger quantities than you need, it is perhaps the least expensive, most durable alternative available.
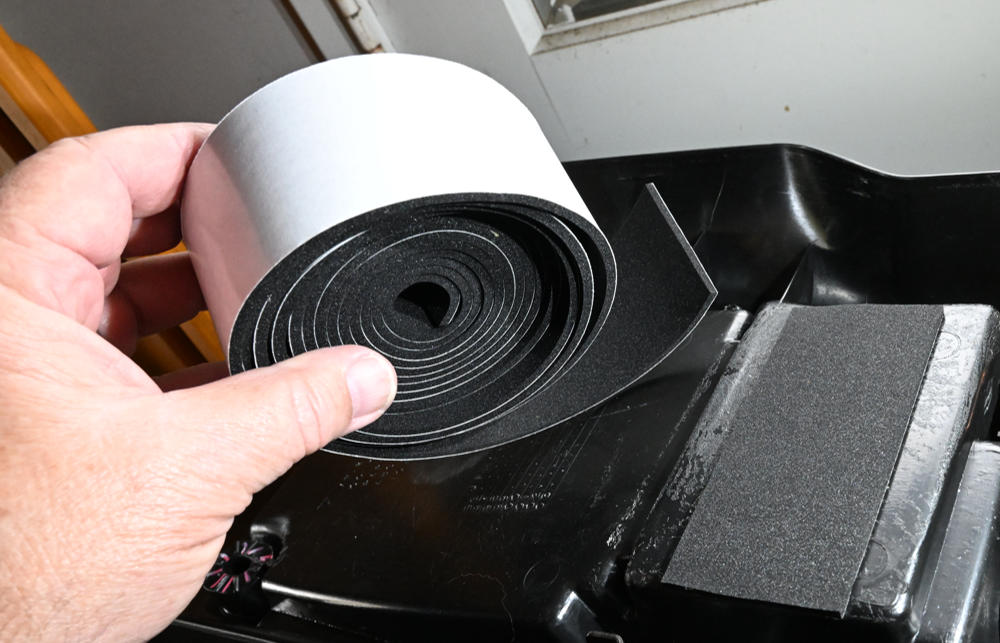
15: We removed the rotting, stock sponge tape which can be difficult to get off. You may need to use a plastic scraper available at paint stores. Then we applied a 2-in by 4-in section of that Amazon foam tape to the bottom of the console assembly.
A related problem can be the foam mat GM installed under the rear of the console as acoustic insulation to attenuate noise from the car’s rear-mounted transmission. During the assembly process, that mat was held in place with duct tape to keep it from moving prior to installation of the console because its position had stay aligned with the studs which hold the back of the console.
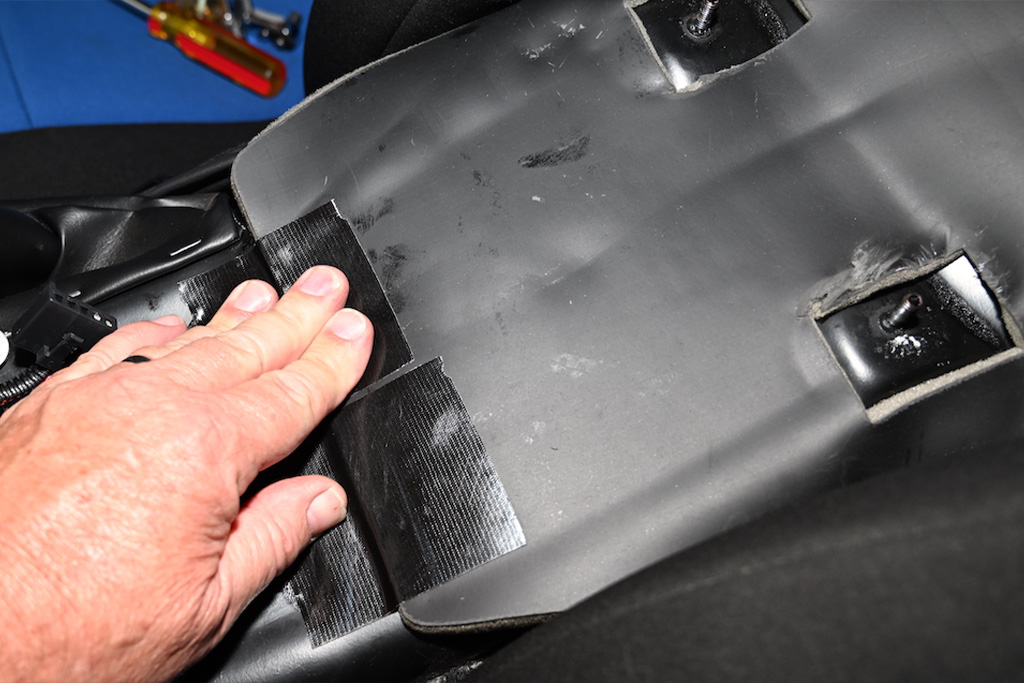
16: The tape holding the mat in our car had deteriorated such that during several previous console removals, the mat had dislodged. We moved the mat back to the proper position then applied new duct tape.
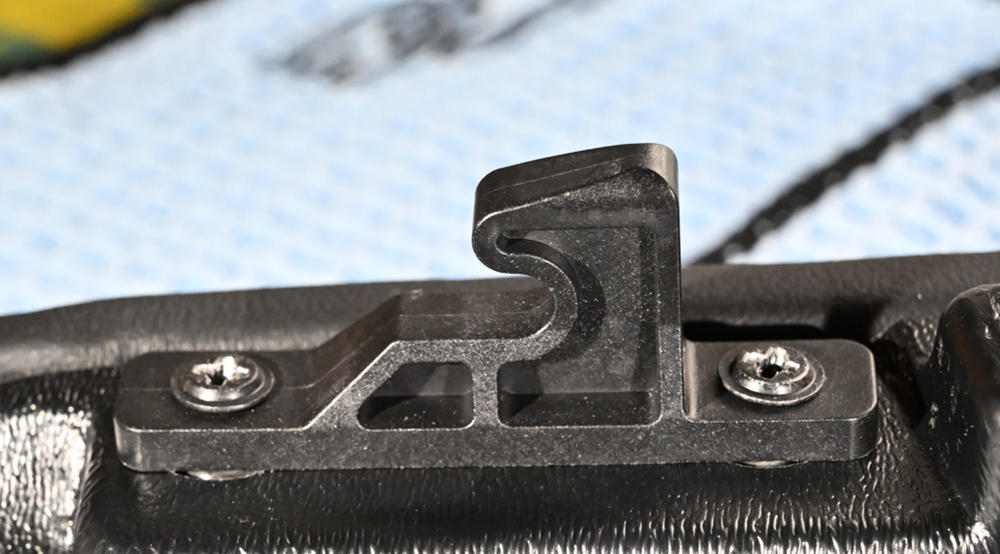
17: Remove the new 97-04 Center Console Door Assembly from packaging, place it upside down on a soft surface, and install the new Zip Corvette 97-04 Console Door Latch Hook. If you’re using the existing door, attach the new hook to it.
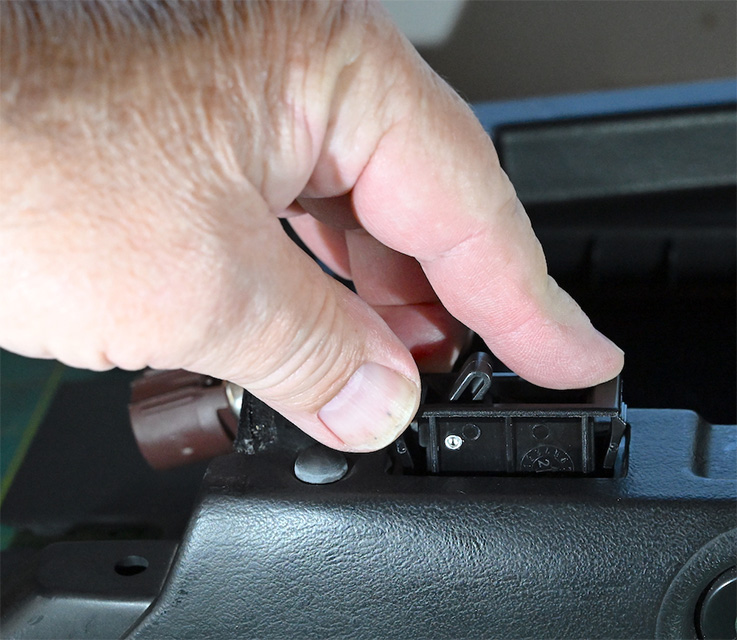
18: Push the Zip Corvette 97-04 Console Door Latch into the side of the console assembly.
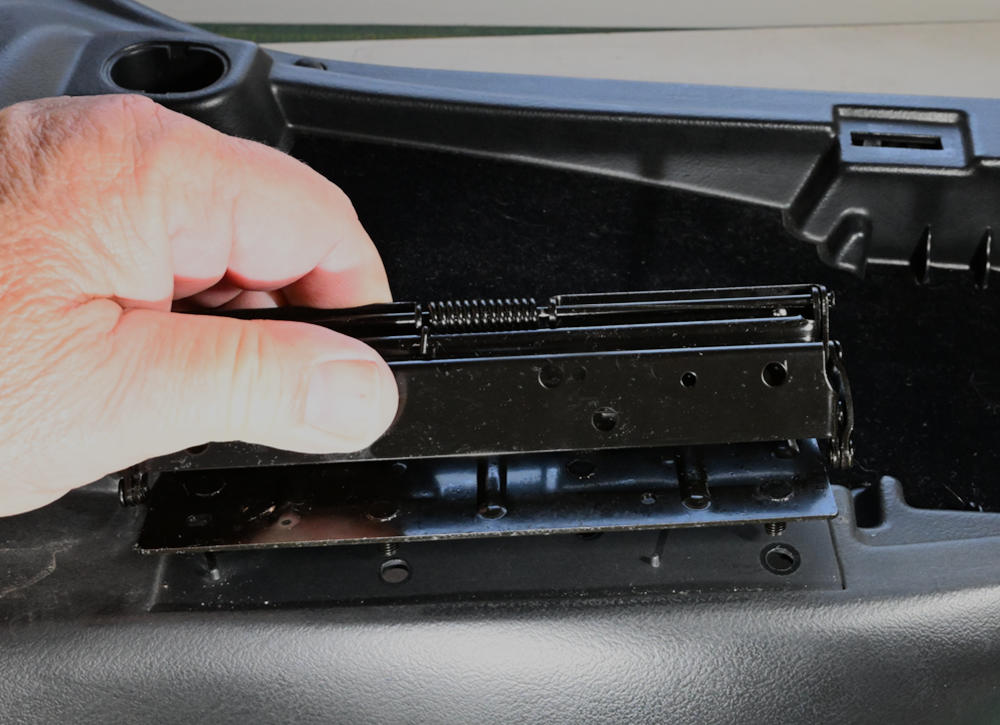
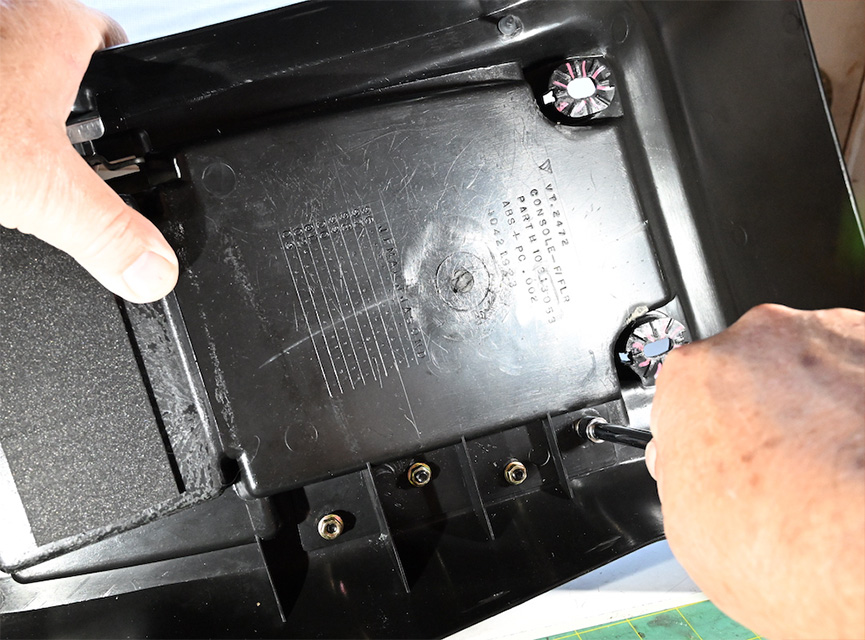
19: Install the Zip Corvette 97-04 Console Door Hinge Assembly to the side of the console box using the four nuts included with the hinge. Finally, install the console door to the hinge.
Reinstalling the Console Assembly
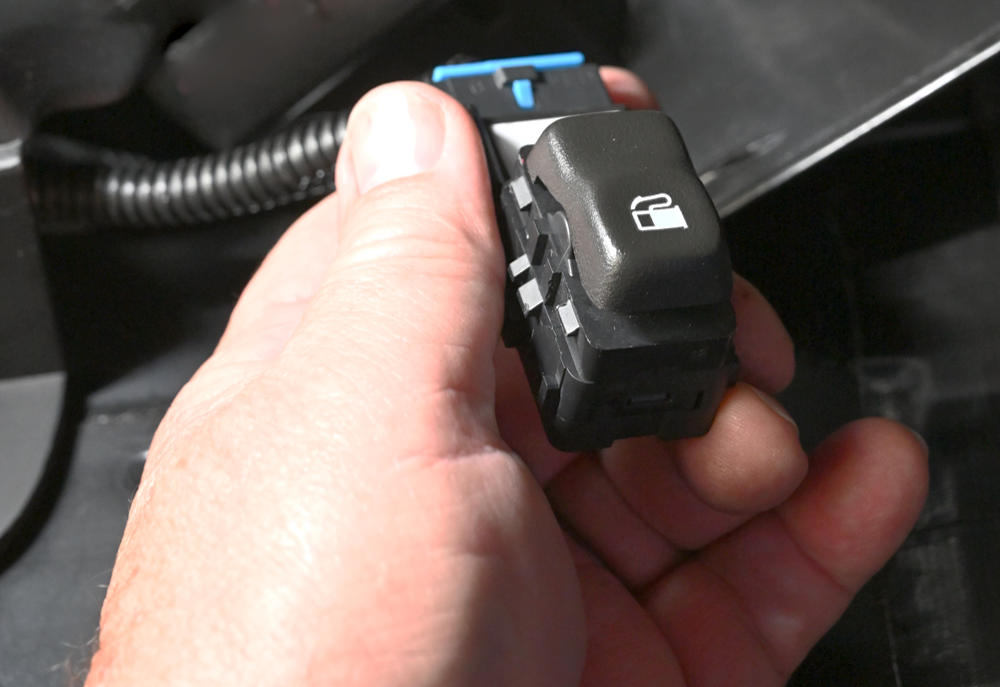
20: Reconnect the console wiring to the fuel door switch, or like in our case, connect it to a new 97-04 Fuel Door Opening Switch from Zip Corvette.
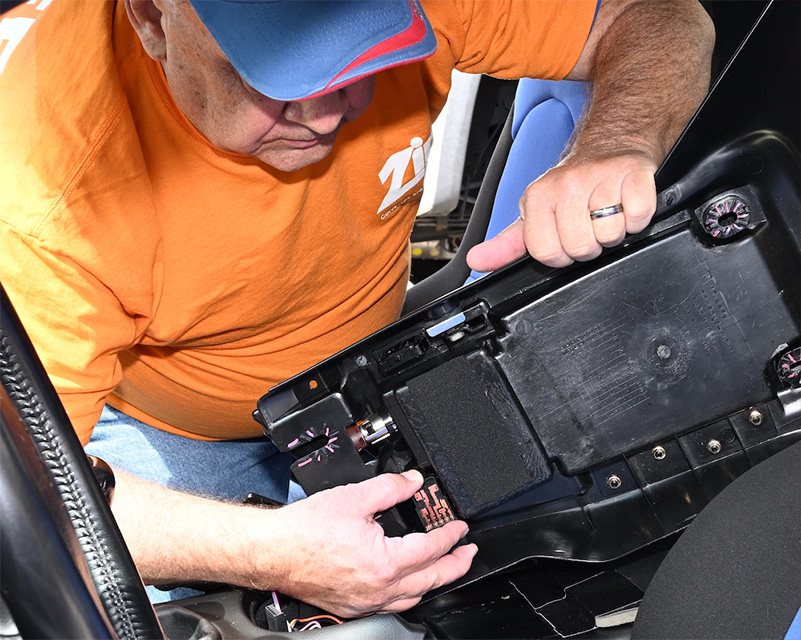
21: Position the console assembly vertically on the tunnel then push on the fuel door switch until it snaps in place.
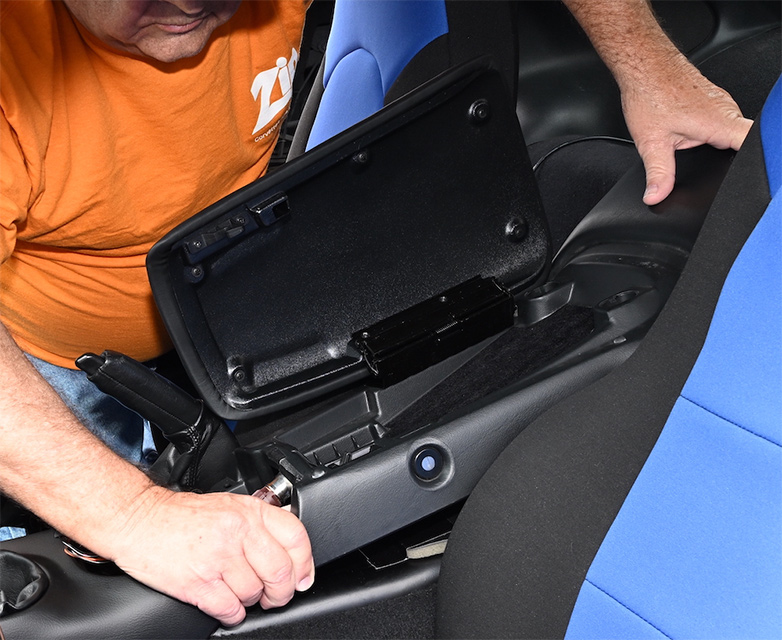
22: Pivot the console assembly into position. Lift up slightly on center stack trim plate. Slide the front part of the console assembly under the rear edges of the trim plate.
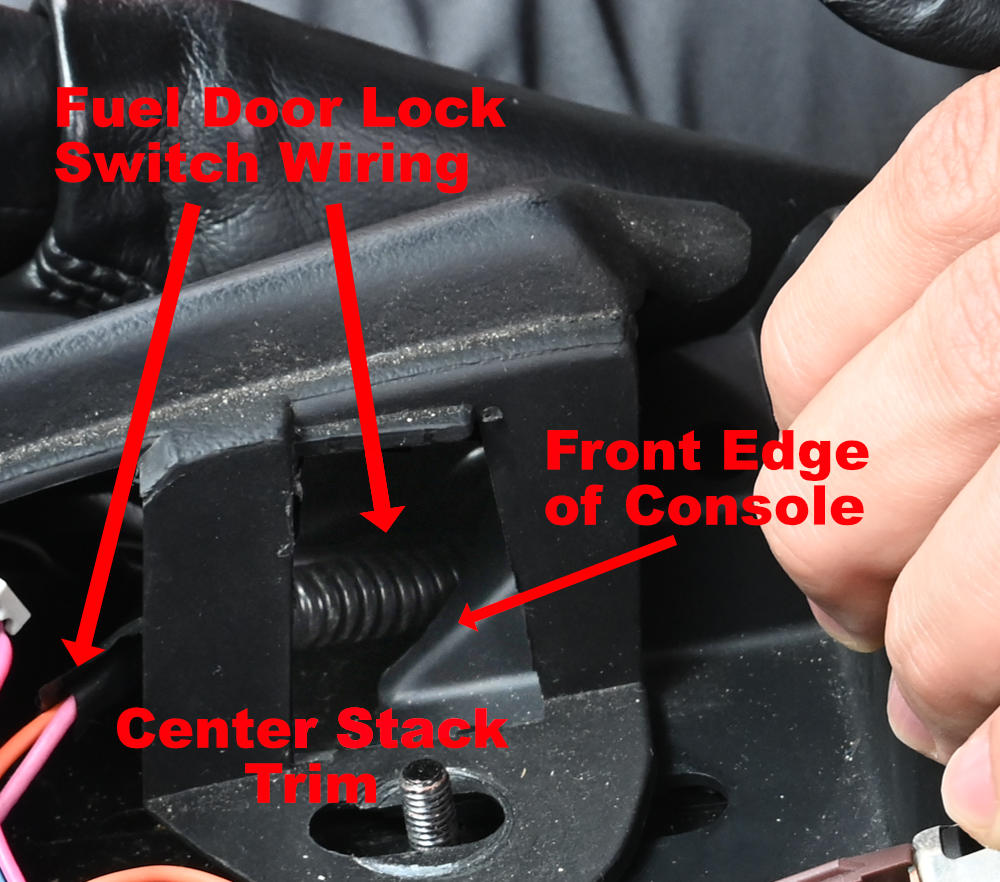
23: Once the console is in place, make sure the fuel door wiring is positioned properly.
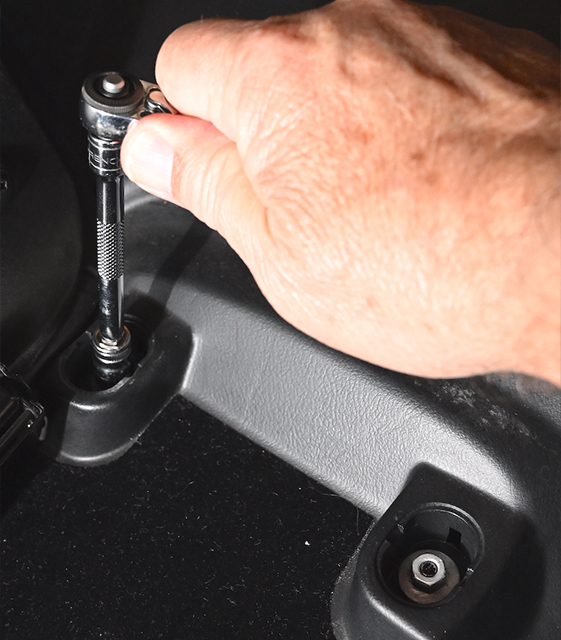
24: Reinstall for four nuts that retain the console assembly.
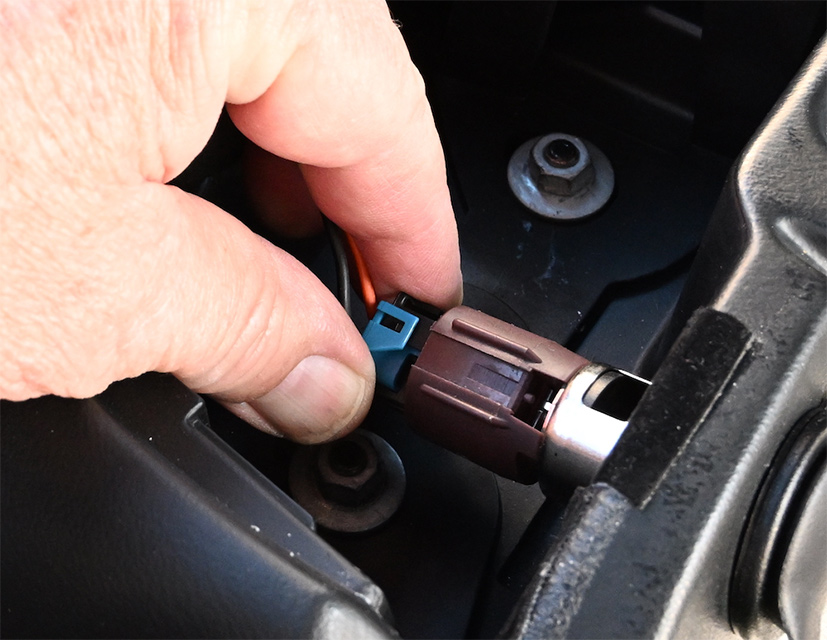
25: Reconnect the console accessory socket wiring.
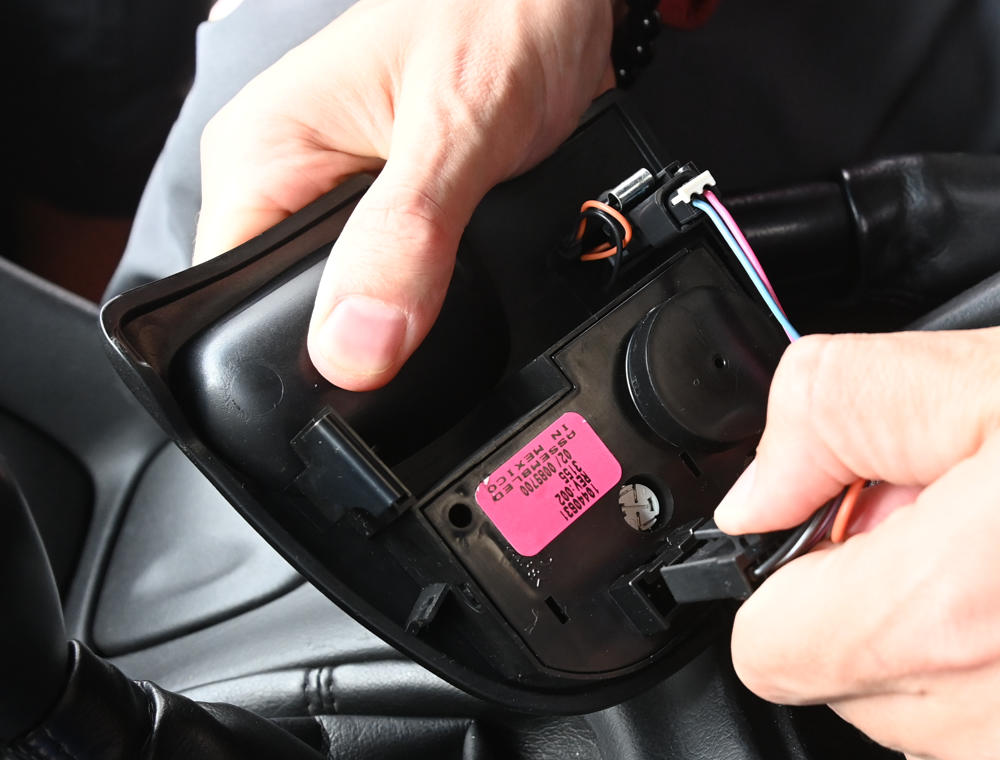
26: Retrieve the TC/RC switch panel. Reconnect its wiring harnesses and reconnect the console assembly light harness.
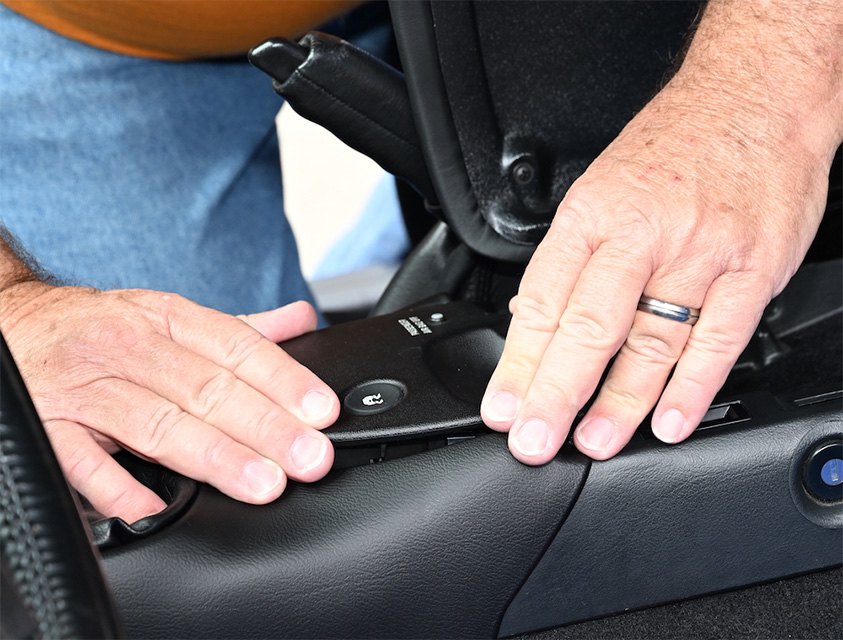
27: Push the ride control panel back into place. Replace items removed from the center console compartment.
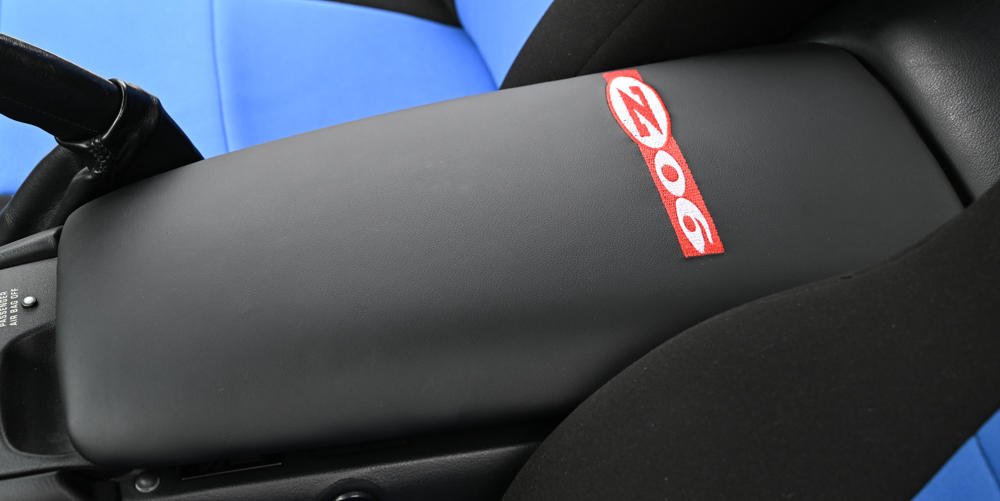
28: Close the console door and you’re done. We chose Zip Product’s Center Console Door with ZO6 Emblem Embroidery, in Black just because in our 2004 ZO6 LeMans Collector Edition, we thought it looks so darn cool.
29: Take the car on a test drive to verify proper operation of the traction control switch and, if applicable, the ride control selector then admire your work.
Restoring the C5’s Center Console Assembly
Source: Zip Corvette Parts
8067 Fast Lane | Mechanicsville, VA 23111 | (800) 962-9632
Corvette Parts List Related to Article:
- 97-04 Console Door Hinge Assembly
- 97-04 Console Door Latch
- 97-04 Console Door Latch Hook
- 97-04 Fuel Door Opening Switch
- 97-04 Embroidered Center Console w/C5 Emblem
- 97-04 Embroidered Center Console w/50th Emblem
- 97-04 Embroidered Center Console w/Z06 Emblem
- 97-04 Center Console Door Assembly (Leather)
- Shop/Service Manual