
For this week’s article, we went to Zip Corvette Parts so we could see what goes into one of their trailing arm rebuilds. We will be doing this in a two-part article because of the amount of time that is spent on each trailing arm, from the disassembly and inspection to actually rebuilding the components. This is a great way to see the complex procedures in building a trailing arm the correct way. If you’re wondering if you can do this at home, this article will answer all your questions for you. For those who just wanted to know what goes into a rebuild, you’ll also be able to find out. So lets join the crew at Zip Products and find out how they rebuild Corvette Rear Trailing Arm & Wheel Bearings.

01:This is how the trailing arms look when they come in from the customers. Most of the time they look worse than this one.

02: First, Zip inspects the threads on the spindle to make sure the knock-off tool will be able to thread on. If the tool will not go on and the threads can’t be fixed with a chaser, then the spindle will not be reusable. This particular trailing arm spindle had nice threads and the tool threaded on with no problems.

03: Sometimes you just can’t beat old fashioned tools. It takes a sledge hammer to knock out a spindle. You can also press it out if you have a press, but it is quicker to just use the sledge. You will not damage the spindle as long as you are using the knock-out tool.

04: Once you have the spindle out, you have to remove the outer bearing. As you can see, there is a special tool for this. It takes a _-inch impact gun to remove it. Once the spindle bearing is removed, you can discard it.

05: Next comes the removal of the emergency brake hardware. Don’t be too upset if you break something because all of these parts will be replaced. There are two springs with cups on them that must be removed in order to remove the shoes. After these are removed, everything else will fall off.

06:If you look at the top of the backing plate, you will see a large bolt with a lock tab on it. Bend the tab down and then remove the bolt. Save thi bolt and the metal anchor that it is holding down.

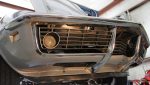
07: Now you can unbolt the four nuts that hold the spindle support and brake caliper bracket to the trailing arm.

08: These are the throw-away parts. The only thing not pictured is the rotor because Zip Products will replace it with a new rotor.

09: These are the items that are left from the original trailing arm to rebuild.

10:You can now remove the races that are in the bearing housing. You will need a fairly heavy hammer and punch to remove.

11: As you can see, this is why this trailing arm needed to be rebuilt. You can see the pits and wear on this race. It would not be long before this trailing arm caused serious damage to someone’s Corvette.

12: This is the fun part – just kidding. Actually, it’s the hardest item to remove during the rebuild. Zip had to use a Sawzall to start the removal process of the front trailing arm bushing.

13: When that would not finish the job, they tried the air hammer to force it out.

14: This is the last resort, as most bushings are not this stubborn and they can be drilled out. Zip had to get the torch out in order to get this particular bushing removed.

15:Once all the pieces are apart, the next step is to clean them. Zip Products has a special washing machine that uses heated water with a caustic soap that attacks oil in order the get the parts super clean. Once they are washed, everything is checked to make sure they are in spec before being used in the rebuild. This is a good place to end this article and we will pick up next week with the inspection and painting, and then rebuilding them into new trailing arm assemblies.
How to Rebuild 1965-1982 Corvette Rear Trailing Arm & Wheel Bearings
Source: Zip Corvette Parts
8067 Fast Lane | Mechanicsville, VA 23111 | (800) 962-9632
Corvette Parts List Related to Article:

Trying to re-assemble trailing arms. bearing carrier-strut attachment casting very tight. Just need more force, or am I doing something wrong? Thank you for any assistance. Sincerely, Chuck McManus.
Chuck.
When installing the bearing carrier/strut assy., because the thru bolts are a drive fit in the trailing arm, one idea would be to put the carrier assy into the arm first. Then install the thru bolts one at a time. This way, the carrier aligns the bolts with the trailing arm.
If you installed the thru bolts first, it is possible for them to not be seated in the trailing arm parallel with the holes in the carrier assy.
Try taking the thru bolts out and installing them one at a time. That should help.
Bob
Thank you, downloaded the pdf. I have a 72 doing frame off replacing bird cage.
Do you have a tech. article about how to replace the rear leaf spring on a 1972 coupe?
Hi Tom,
We cover that in “1963-1982 Corvette Trailing Arm, Strut Rod & Spring Mount Replacement” but don’t get too specific. We will try and get an article up on this in the future.
Thanks